Tag: knitting in the round

  • Re-introducing the Just Plain Mittens!

    Re-introducing the Just Plain Mittens!

    This post comes to you from a crisp, cold -40 day in northern Alberta. Brr! So even if you’re looking at crocuses and spring showers or summer sunshine with hints of autumn in your part of the world, let me remind you that anytime of year is a good time of year to be preparing for colder weather.

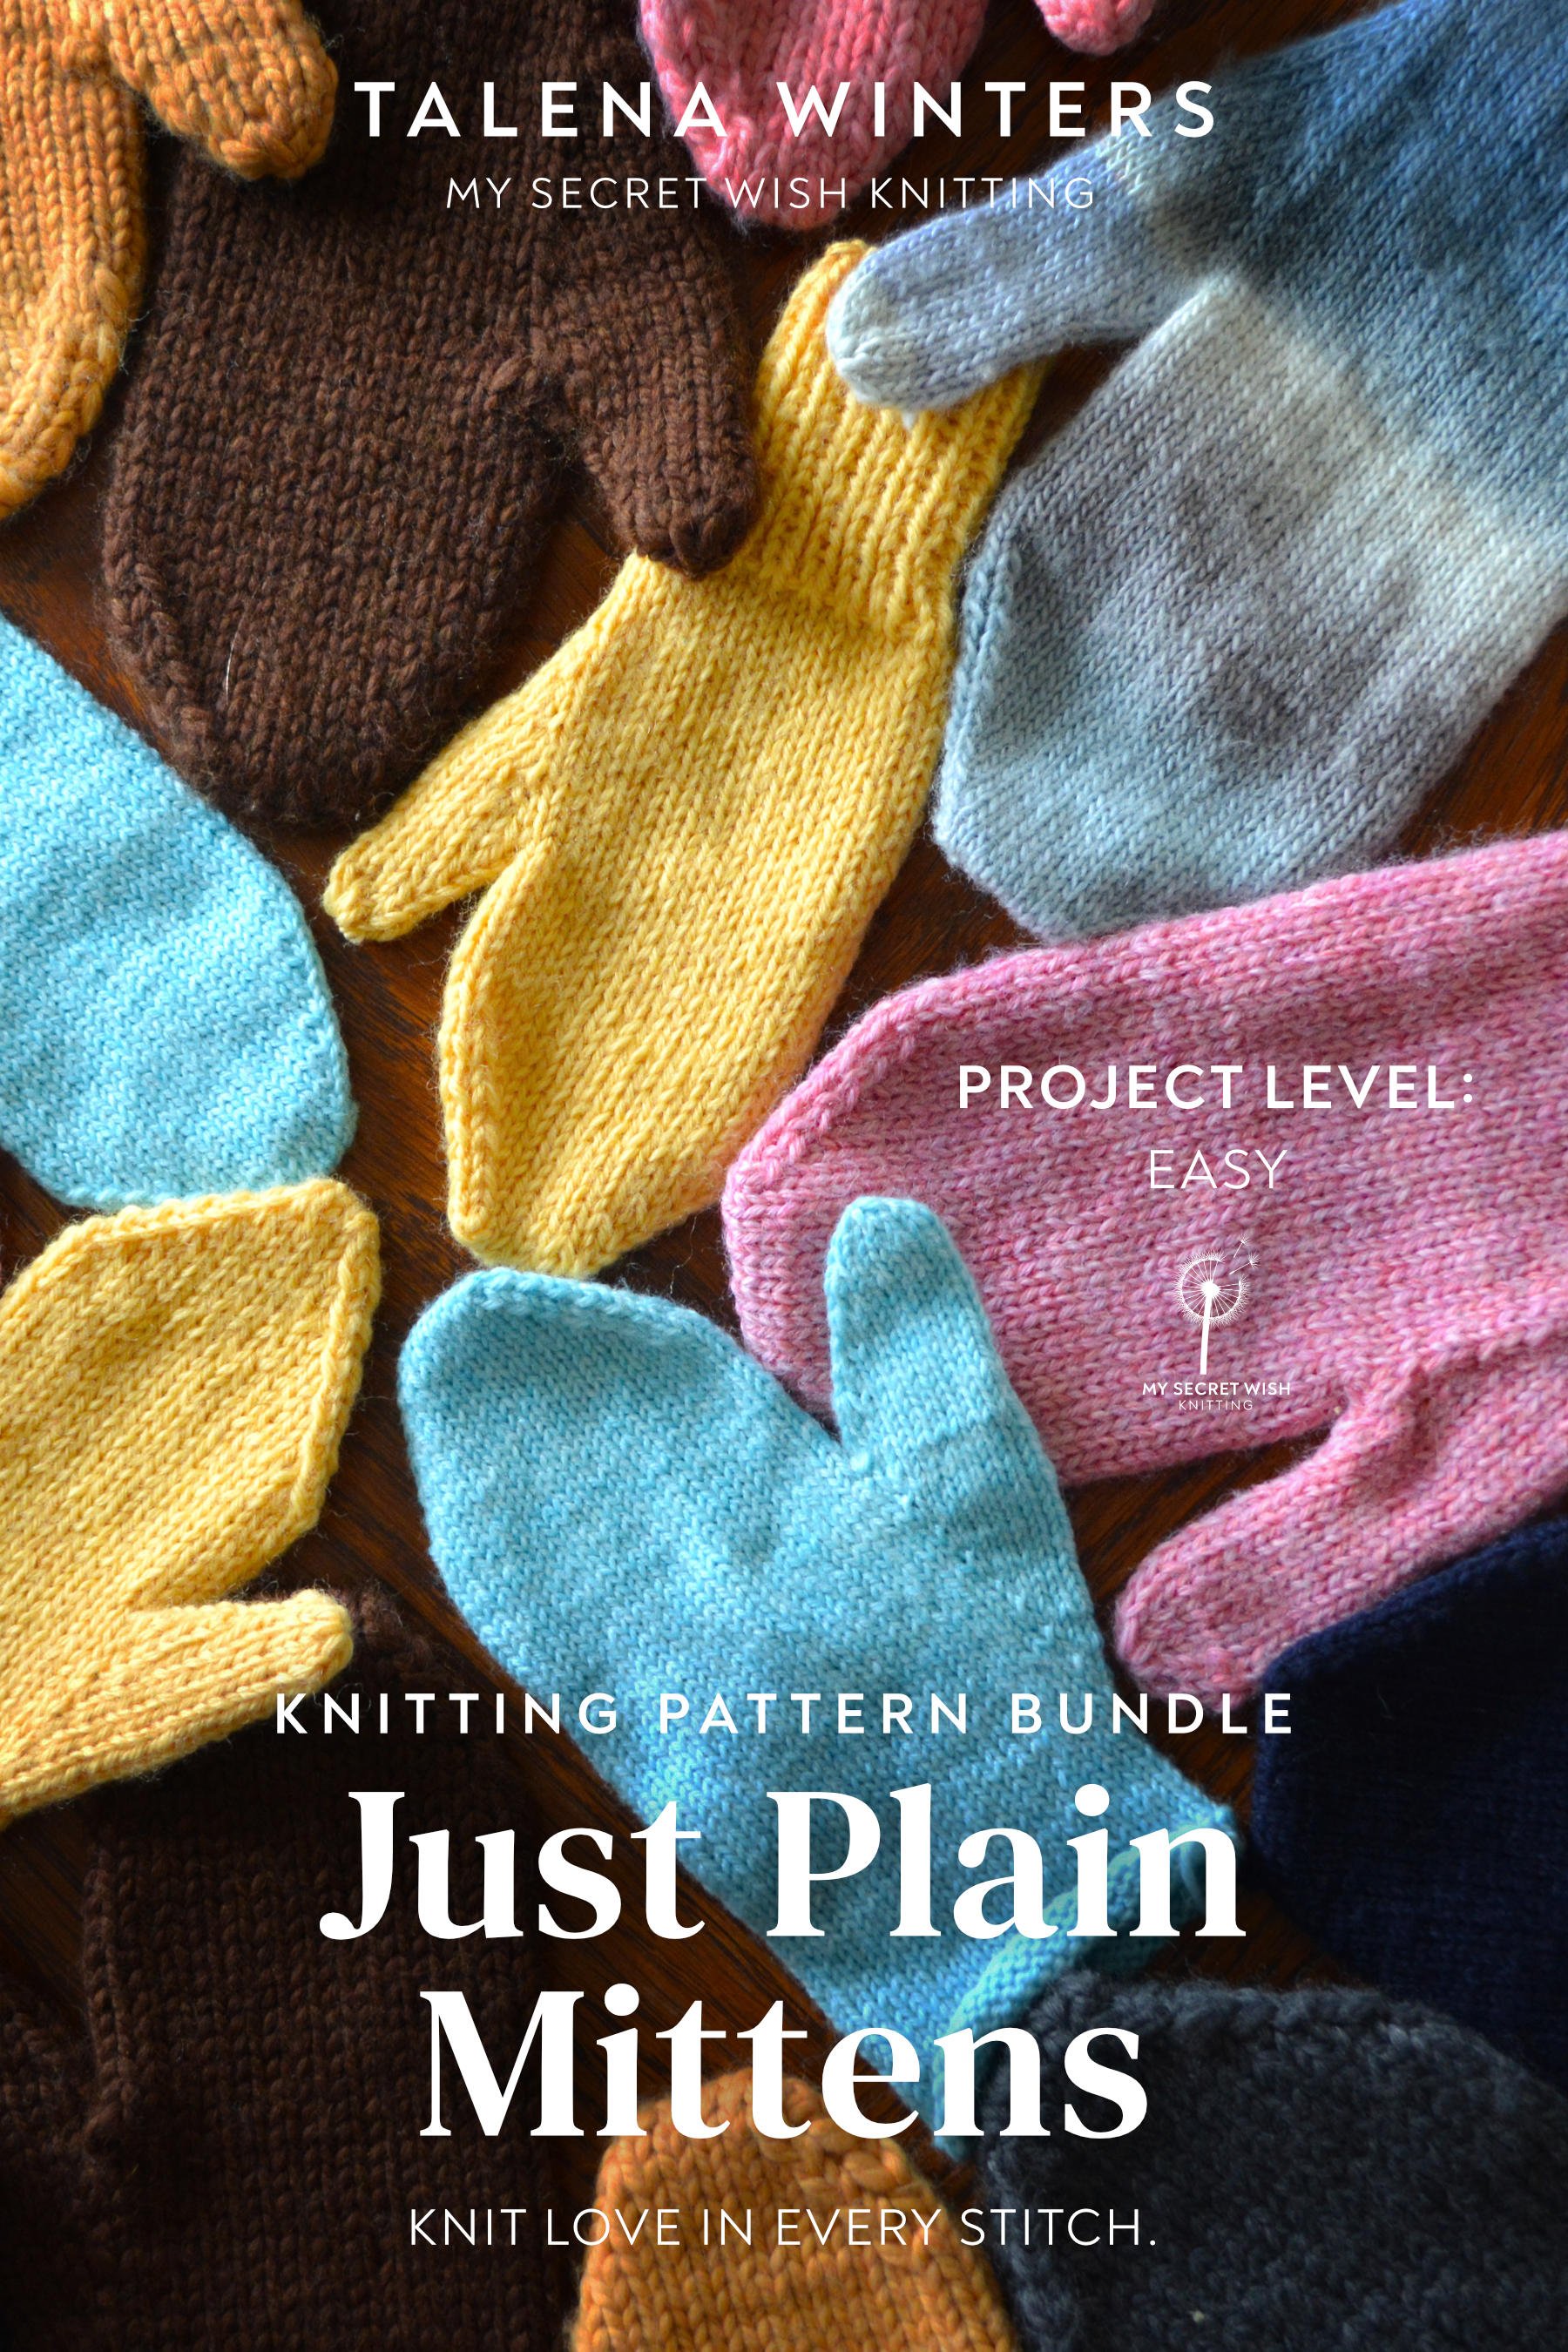
    Which brings me to my latest pattern (re-)release: the Just Plain Mittens Pattern Bundle!

    Just Plain Mittens poster. Link goes to pattern listing.
    Just Plain Mittens knitting pattern bundle: Knit love in every stitch. Project level: Easy.

    But first, a brief history:

    One of my very first pattern designs, way back in 2010 when I was first venturing into publishing patterns, was a kind of wonky mitten pattern I called (very imaginatively) Lined Seamless Mittens. I typed it up and posted it for free on my personal blog, where I and many other people used it over the years.

    However, it had its limitations—for one thing, it was only available in two sizes, both of which were on the small side. (I was making mittens for my kids, after all.) And I designed it for a chunky yarn that was discontinued two years later and replaced with a yarn that had the same name but a different gauge. (Bernat Chunky—thanks, Bernat.) I’m sure that was fun for people trying to make up the pattern.

    Besides, as my kids grew, I needed bigger sizes. So, a few years later, I started on the rather ambitious project of creating the Just Plain Mittens bundle.

    The newer version had five sizes, better fit, a better design for the sewn liners, and was available in three yarn weights. However, despite making about a million mittens while designing and testing this pattern, a few issues remained—not so much with the design (though the thumb could use a little tweaking) as with the pattern layout.

    Also? The yarn manufacturer discontinued that bulky yarn too, and it had a gauge that was difficult to find substitutes for. (This time, Knit Picks Biggo. I’m so sad. Do you know how much of that yarn I have that I can no longer design with? Sigh. But I digress…)

    So, when I decided to move my knitwear design business to my new site and undertake the project of updating all my patterns to have better layout, formatting, and low vision accessible formats in 2023, I knew that this particular pattern would need more than minor tweaking. It was going to need an overhaul. Which is why it is one of the last previously published patterns I tackled.

    But now…

    The New and Improved Just Plain Mittens are here!

    Okay, so what’s so great about these mittens, you ask?

    Well, let me tell you. :-)

    What’s the same:

    • The pattern is still available in three yarn weights: Bulky, Worsted, and Fingering.
    • It still includes both a short- and a long-cuff variation.
    • The fingering-weight size includes instructions to make a Shell (regular mitten) or a Liner (to go inside a Shell).
    • The pattern still includes instructions to make a sewn liner out of fleece, if you prefer. (You also don’t need a liner at all, if you don’t want!)
    • These mittens are a fantastic blank canvas to showcase exciting yarn colourways or your own colourwork designs.

    What’s new:

    • It now comes in six sizes, from Toddler (5.5-inch or 14-cm hand circumference) up to Adult Extra-Large (10.5-inch or 26.5-cm hand circumference). (The largest size is new.)
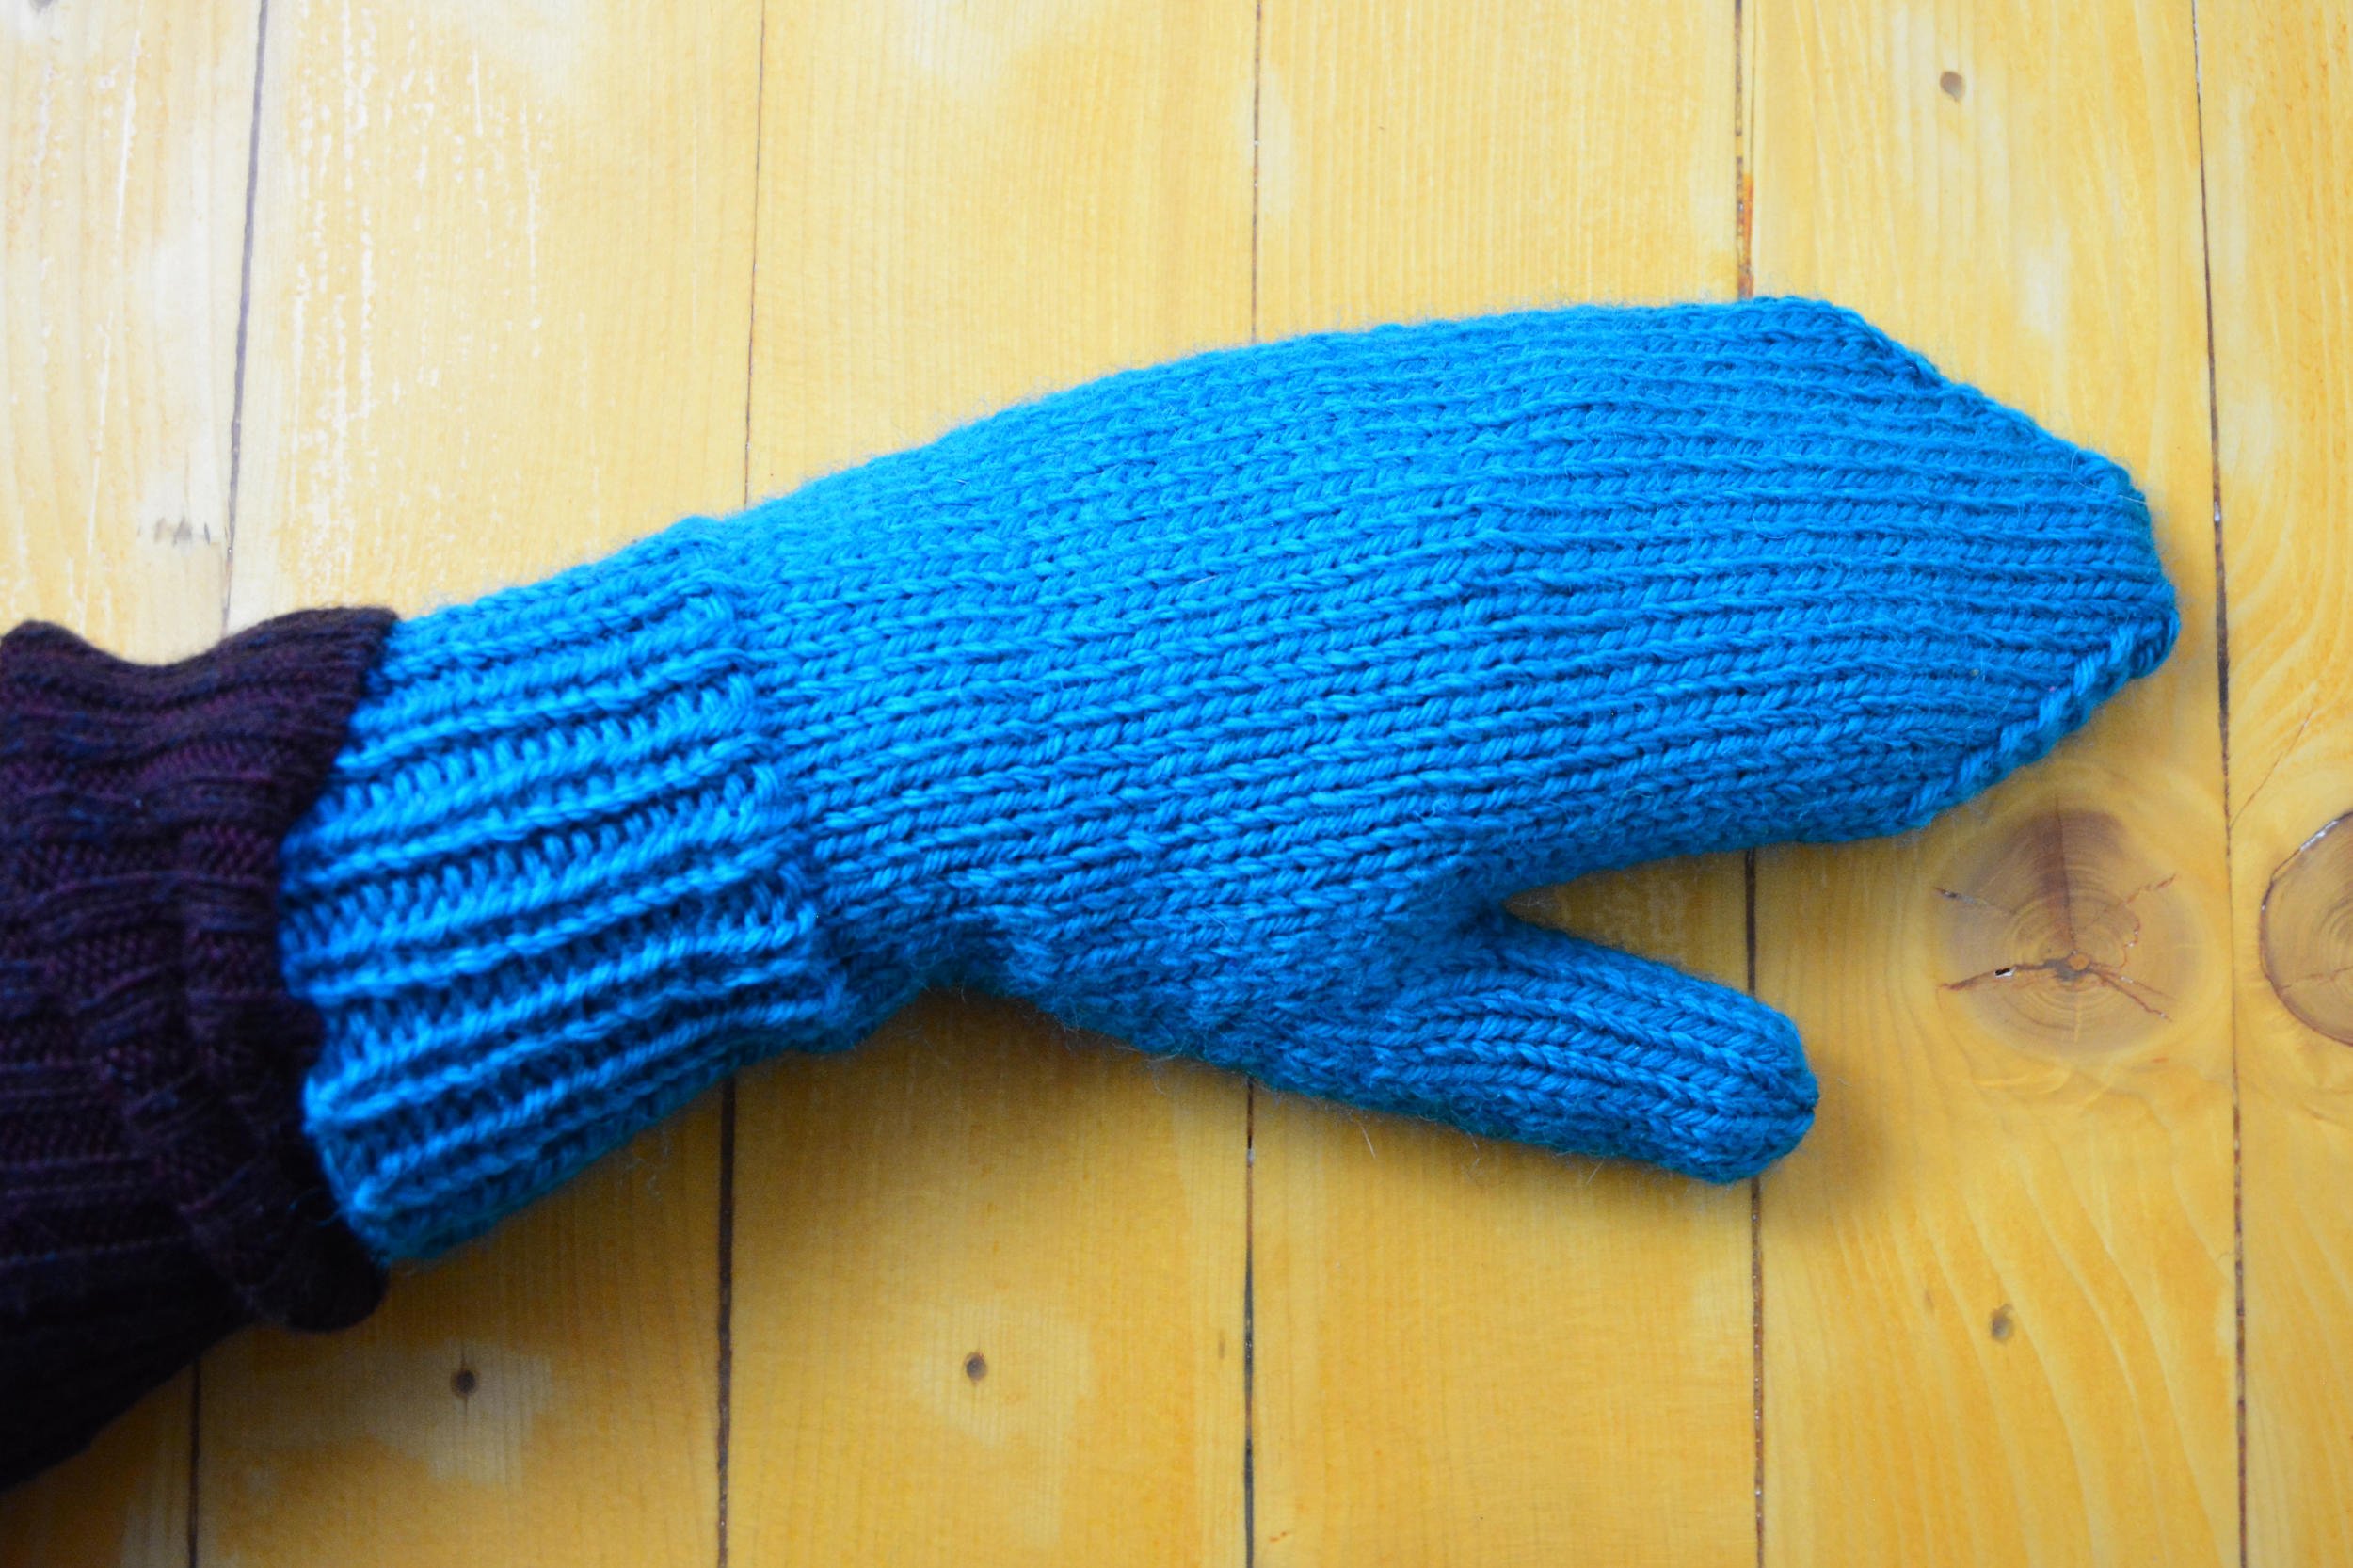
    • The bulky weight has been completely redesigned to use “Knit Picks Wool of the Andes Superwash Bulky“, a hardy 100% wool yarn that comes in gorgeous colours, has a gauge that’s easy to find substitutes for, and is a staple in Knit Picks’ line that isn’t likely to disappear anytime soon.
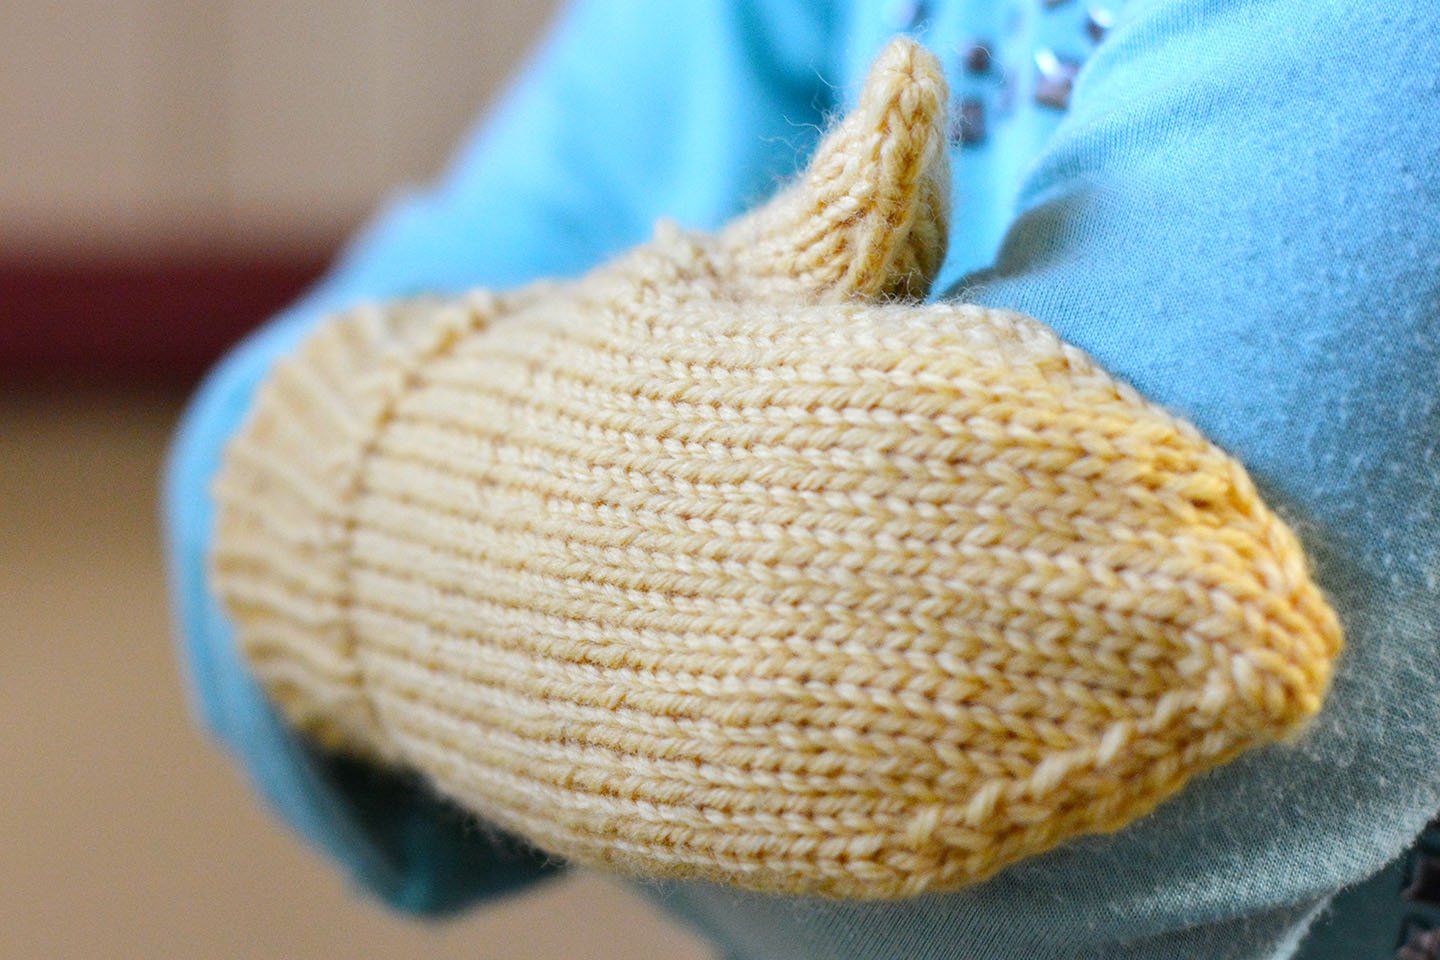
    • The thumb has been redesigned for better fit. Instead of tapering to the end as the original design did, it’s now straight, with plenty of wiggle room for holding warmth.
    • The entire pattern has been redesigned for a more consistent fit in all sizes. This required spreadsheets and some really technical math. So much math. But now they all fit better—even the fleece liners.
    • It is now available in three formats: standard PDF format for printing, plus the two low-vision-accessible formats—ePUB and large print screen-reader-accessible PDF.
    Two pairs of mittens lay on a worn wooden surface next to a spiky succulent. The mittens have gussets, angled tips to a blunt end, and long ribbed cuffs. The thumbs are straight.
    The new bulky weight mittens in Knit Picks Wool of the Andes Superwash Bulky will be a much better fit with these new thumbs. The top pair in teal are Size 3 (Junior & Ladies Small), and the bottom ones in green are Size 2 (Child).
    A woman’s hand wearing the Size 3 mittens.
    Here’s one of the teal ones one my hand. (They are slightly too small for me, but they would still work.)

    That’s not all! While I was at it, I learned a whole new software program so I could create a decent schematic and all-new digital sewn liner patterns! (I don’t know if you’ve ever wanted a mitten pattern with a schematic, but after you get one, you’ll wonder how you lived without it! Probably. Heehee.)

    I actually learned two software programs while formatting this pattern—the design software for the graphics, and a publishing format software to lay out the Standard PDF pattern in a more professional (and easier to read) layout than I’ve ever been able to achieve before. (No one may notice the difference but me, but I’m celebrating anyway.)

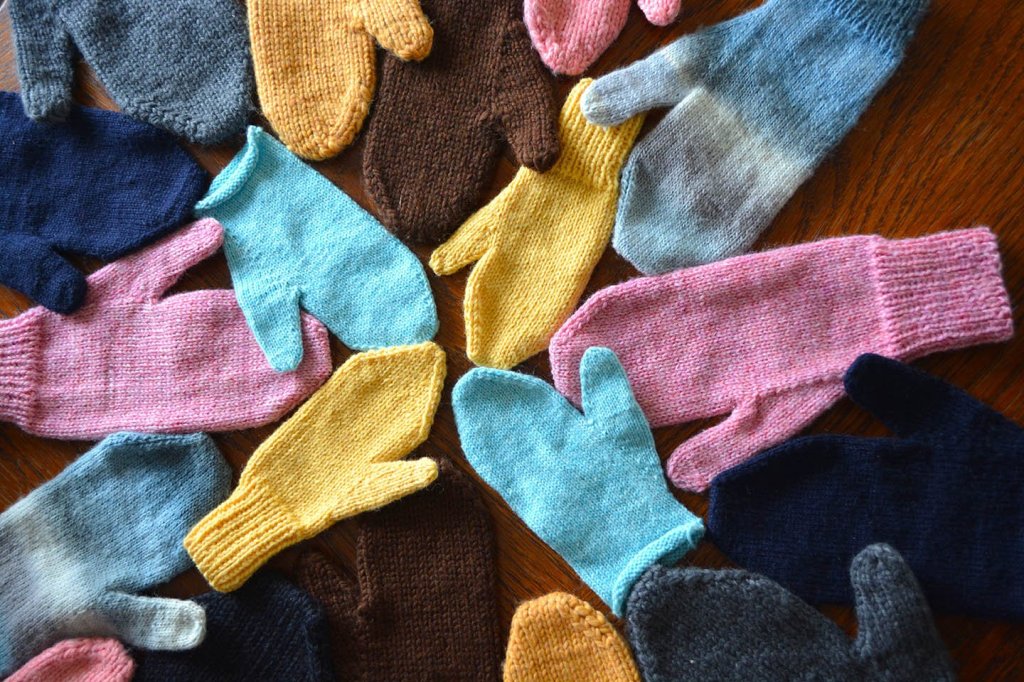
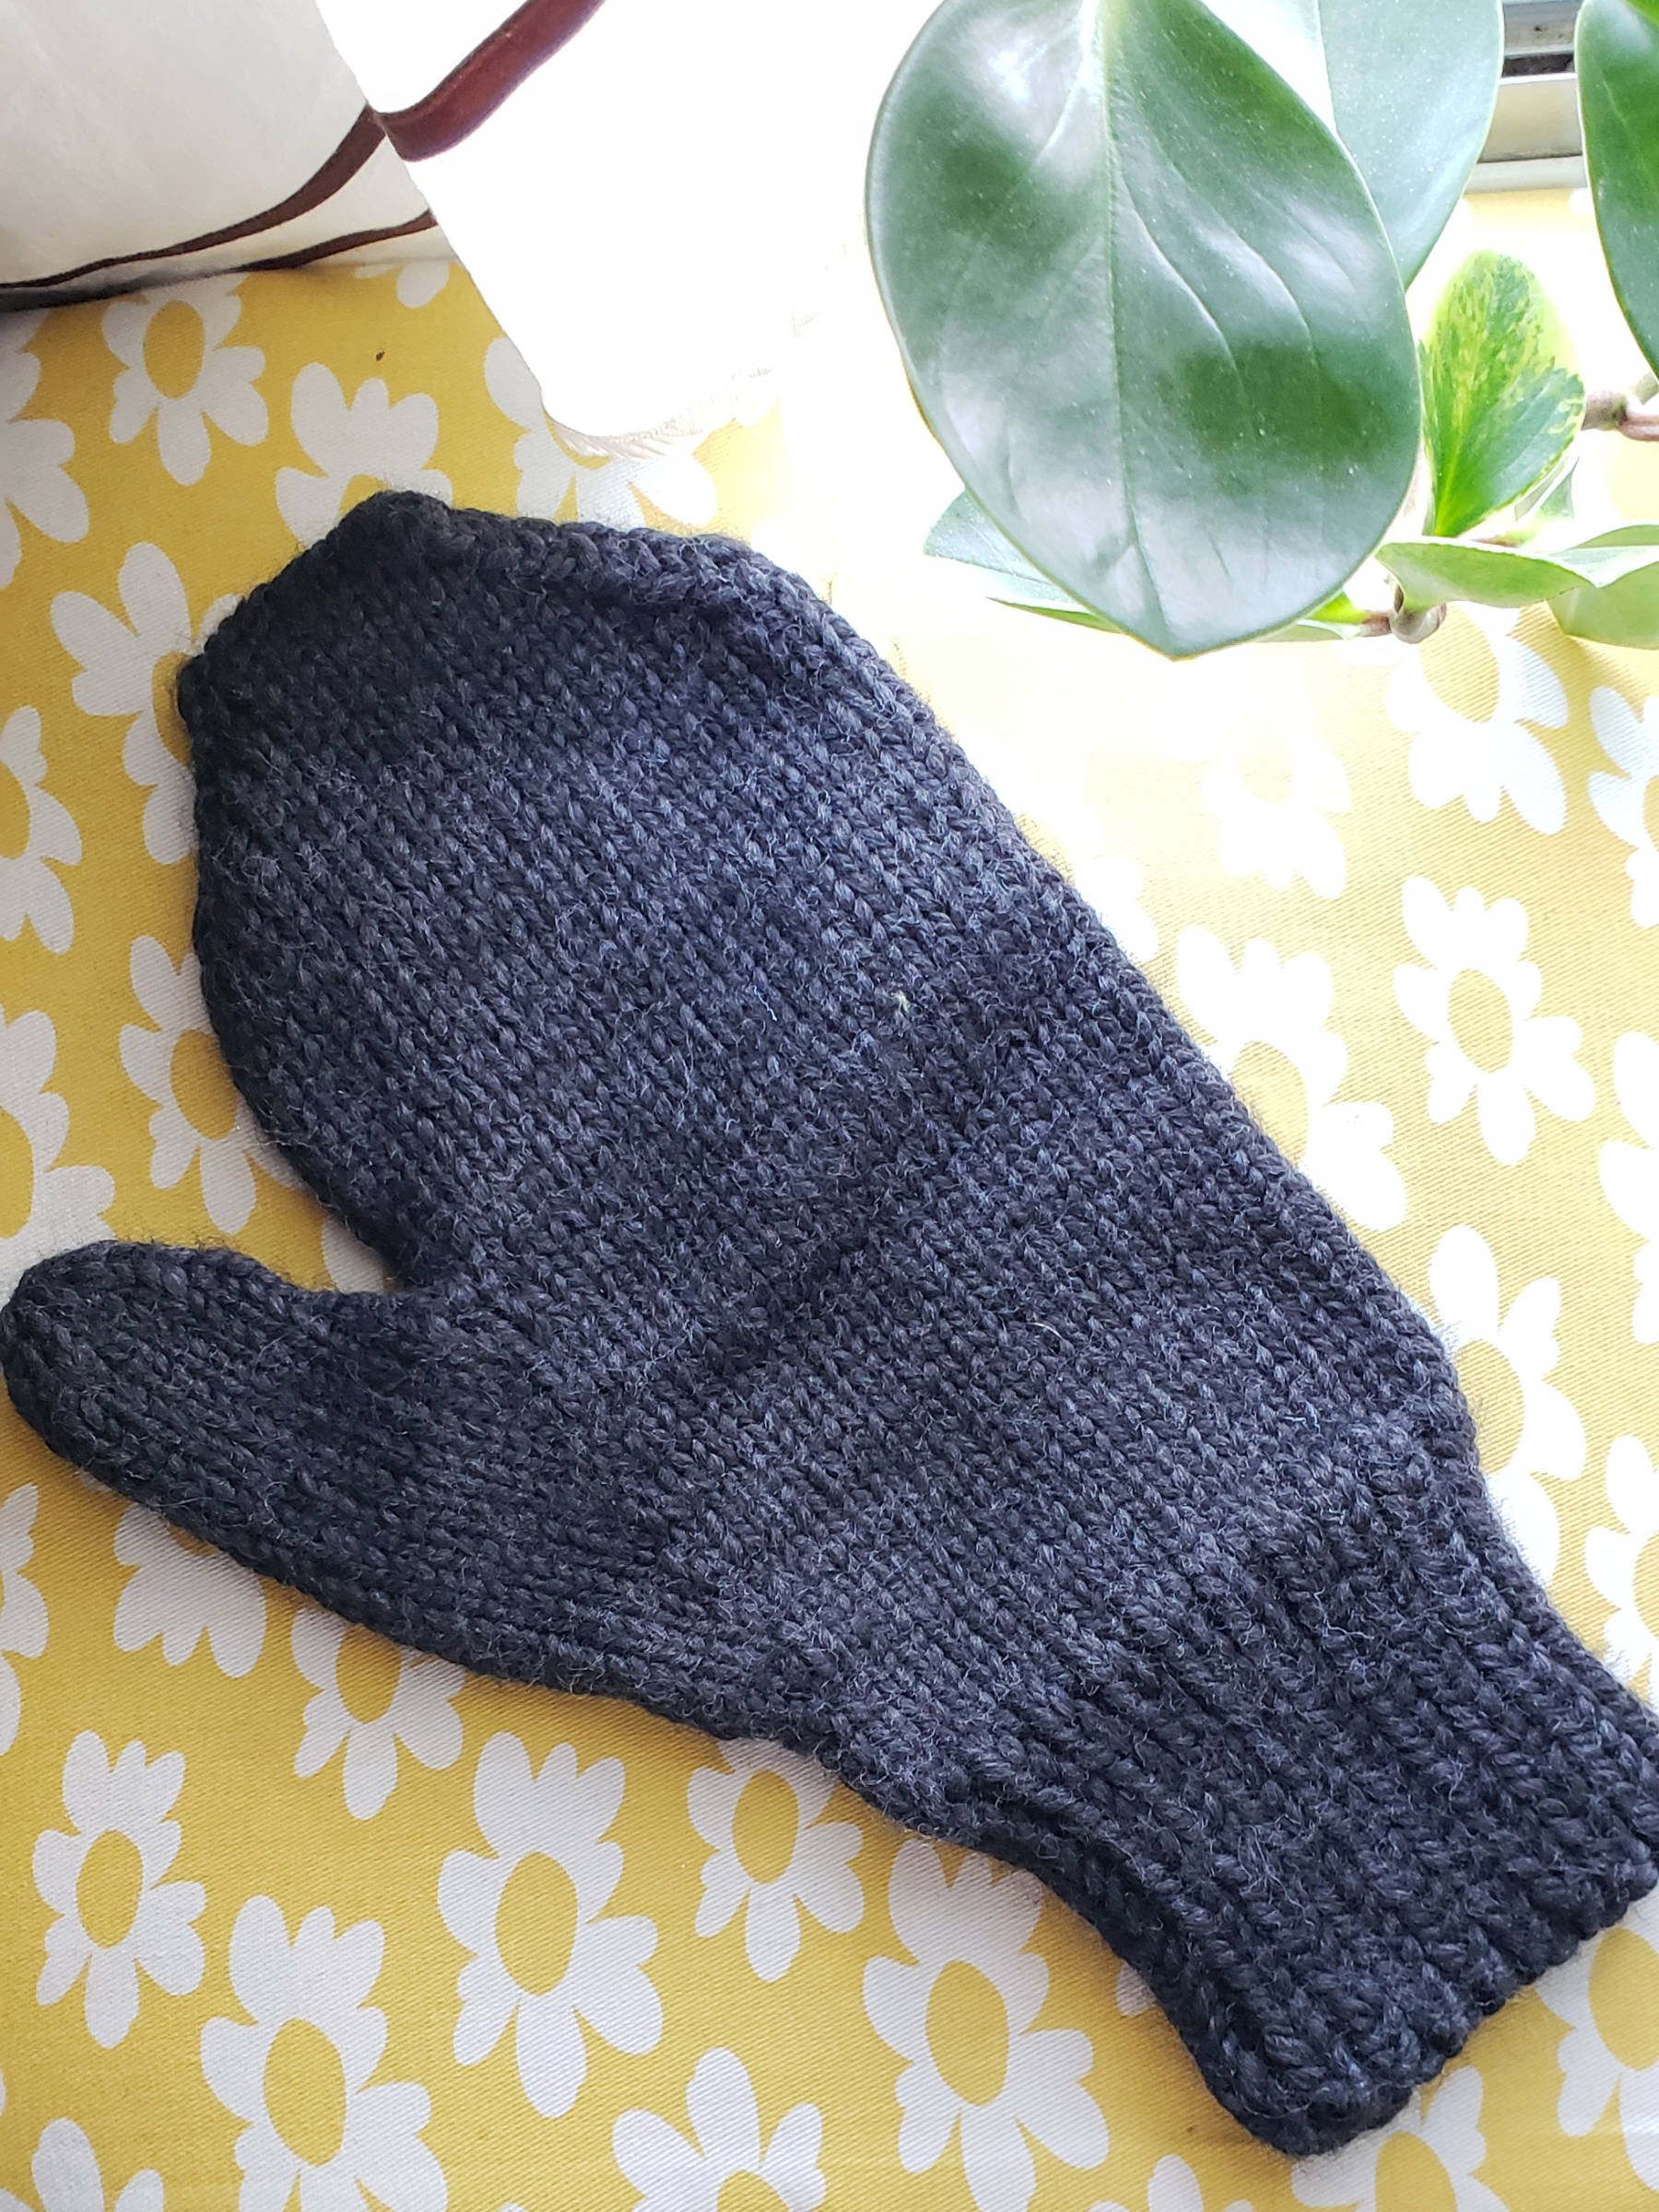
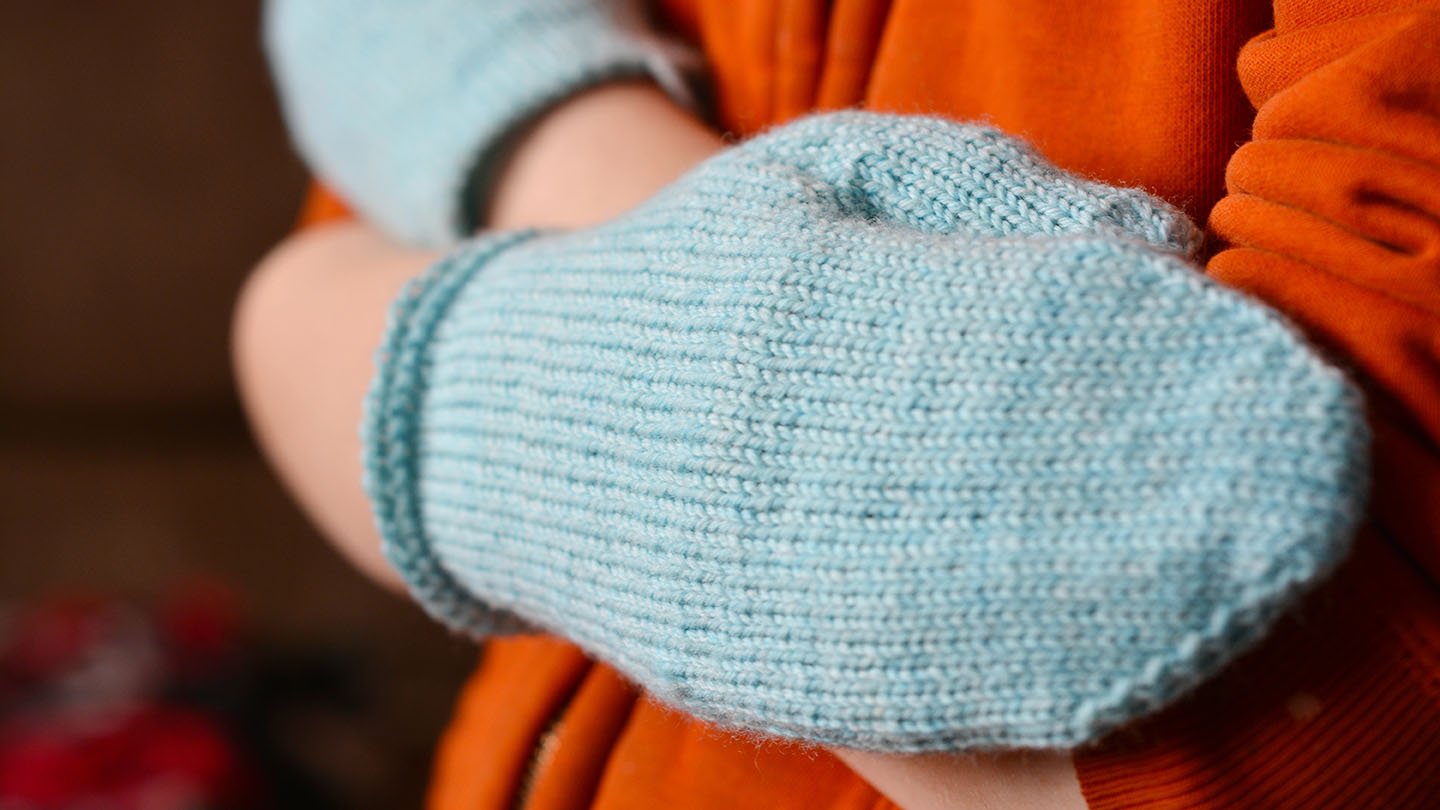
    However, here’s one more thing that didn’t change: most of the photos. Many of the sample photos for this pattern feature the old thumb design. I’ve tried to label these as such in the pattern where it’s obvious, but I didn’t want you to be confused, as I didn’t want to take two years to republish this pattern while I sample knit every size.

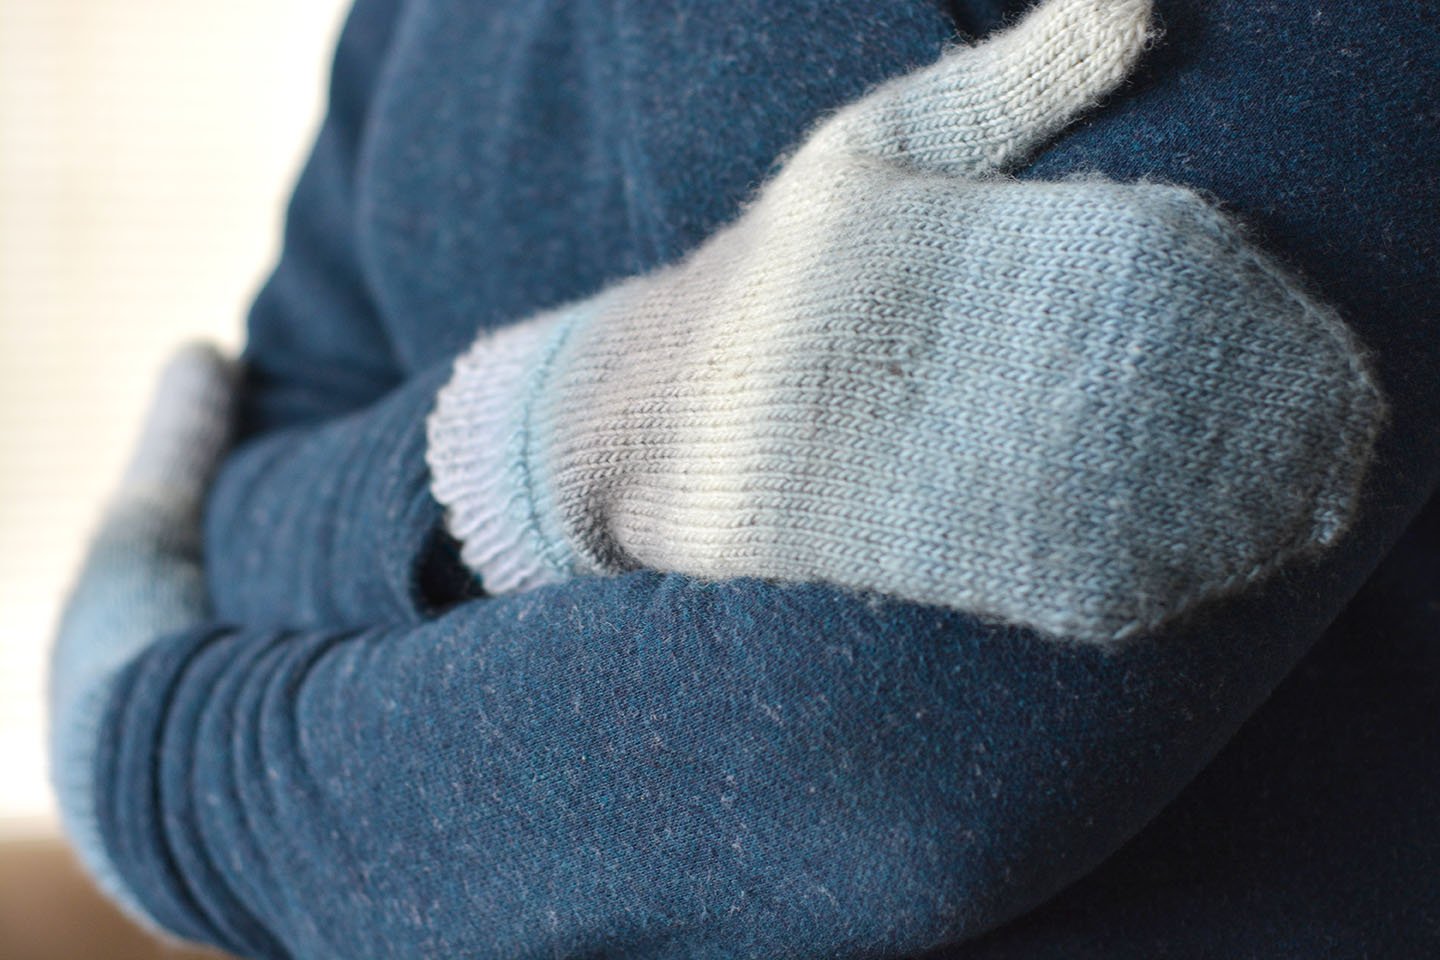
    The new thumbs on the bulky mittens above? All the thumbs are like that now.

    But the rest of these images? They have the old thumbs and feature the old Biggo yarn. Just so you know. But still, they’re so bright and cheerful to look at, they always make me smile.

    Bulky mitten in Size 5 (Adult Large).
    Bulky mitten in Size 5 (Adult Large) with long cuff (and old thumb design).
    Worsted mitten in Size 1 (Toddler).
    Worsted mitten in Size 1 (Toddler) with long cuff (and old thumb). Yarn: Knit Picks Wool of the Andes Worsted.
    Fingering-weight mitten in Size 3 (Junior and Adult Small).
    Fingering-weight mitten in Size 3 (Junior and Adult Small) with a long cuff and old thumb. Also, I’m modeling these again, and again, they’re slightly too small, because they were a gift for a friend. I have really big hands for a woman! Yarn: Knit Picks Chroma in “Avalon”.
    Fingering-weight liner pattern in Size 2 (Child)
    Fingering-weight liner pattern in Size 2 (Child). Yarn: Knit Picks Stroll in “Wonderland Heather”. Pro tip: if you don’t sew in the liners, you’ll have more flexibility to dress for the weather—but kids are definitely going to have more to lose, so just sew theirs in, okay?

    I’m introducing the bundle at 33% off. So make sure you snap it up before this deal goes away!

    A basket of mittens of various sizes, colours, and yarn weights.
    Just a basket o’ mittens, hangin’ out and bein’ chill.

    I would love to hear your thoughts on this new pattern bundle! What will you do to make it your own? Are you looking forward to making some extra-warm mittens with liners?

    Let me know in the comments!

    Show off your Finished Objects!

    Has one of my patterns helped you create some knitting magic? I would love a chance to showcase your amazing work to the rest of the community in an upcoming blog post and newsletter. To be featured, share your project in the new thread I just created in my Ravelry community or send me an email. Make sure to include “Permission to repost” so I know you’re okay with me sharing it here. (I’ll confirm with you before I use it and give credit.)

    While you’re in my Ravelry community, please pop over to the Introductions thread and let me know who you are. It’s been pretty quiet in the community, and I’d love to hear from you. More than that, I can’t wait to see what you’ve been making!

    Happy knitting, Magic Maker!

  • Introducing the Adventure Socks!

    Introducing the Adventure Socks!

    Hello, magic maker!

    It’s been a minute. But I’m thrilled to pop in here to say there’s a new pattern in the store for something warm, toasty, perfect for winter…

    Okay, they’re socks. Toe-up socks. With waffle texture and gusset heels and just enough pattern interest to keep you paying attention but not so much you can’t knit while watching Castle. (Or your own favourite show. You do you.)

    Presenting the Adventure Socks pattern!

    Cover for the Adventure Socks knitting pattern by Talena Winters, a waffle-texture toe-up sock. Intermediate.
    Cover for the Adventure Socks knitting pattern by Talena Winters, a waffle-texture toe-up sock. Project Level: Intermediate.

    This pattern is perfect for tucking into hiking boots and hitting the trail, or keeping your feet toasty while you dive into your latest read.

    AND!

    It’s got low vision accessible formats! Get it in large print screen reader accessible PDF, ePUB, or standard PDF formats, all from a single purchase!

    Feast your eyes on these details:

    Extreme closeup of toes and legs of Adventure Socks knitting pattern on model's feet, showing the raglan toe shaping the waffle weave texture.
    Using a provisional cast on like Magic Cast On or Turkish Cast On at the toe means no grafting later! Easily shape the toes using raglan-style increases on the edges while knitting in the round.
    Closeup of short-row gusset heel of the waffle weave Adventure Socks knitting pattern on model's feet.
    Use short row shaping to produce a gusset heel at just the right foot length for a perfect fit.
    Closeup of top and side of the waffle weave unisex Adventure Socks knitting pattern, showing the raglan toe shaping, waffle weave texture, and short-row gusset heel.
    The waffle texture is an easy four-stitch, four-row repeat that captures a little extra warmth while providing textural interest—as well as a little more interest for the knitter.
    Extreme closeup of the legs and cuffs of the fingering-weight knit Adventure Socks on the model, showing the waffle weave texture and one-by-one ribbing on the one-inch cuff.
    Finish with an inch (or more) of one-by-one ribbing for a stretchy cuff that won’t fall down, then bind off with either Sewn Rib Bind Off or Super-Stretchy Bind Off for a smooth, professional edge.
    Top-down view of the Adventure Socks knitting pattern on the model's feet, showing the waffle weave texture, one-inch one-by-one ribbed cuff, and raglan toe shaping.
    Put it all together for a pair of snug-as-bug feet on yourself or some lucky person you love!

    While I made my sample in a variegated yarn, this would also be a great pattern for solids to really show off that waffle texture.

    The pattern is available in three sizes, from Youth / Adult Small (8.5-inch or 21.5-cm instep circumference) up to Adult Large (11-inch or 28-cm instep circumference.)

    What are you waiting for? Go get yours and cast on your next knitting adventure today!

    Or you can add it to your Ravelry queue here: Add on Ravelry.

  • 3 Tips for Better Circular Knitting

    3 Tips for Better Circular Knitting

    Knitting in the round, or circular knitting, is one of my all-time favourite styles of knitting. What’s better than casting on and then going round and round until you’re done?

    However, there are a few challenges with circular knitting, such as difficulties with tension, the dreaded “laddering” effect where your needles meet when using double-pointed needles, or simply knowing how to accomplish the feat in the first place. (And the purl haters are saying “don’t forget the purl stitch!” I happen to enjoy purling, but we’ll tackle ways to increase your purl love in another post.)

    In this post, I’m going to give you my top five tips for creating beautiful circular projects, so you can fall in love with circular knitting too!

    Onward.

    Title pin for 3 Tips for Better Circular Knitting

    Tip #1: Use the right needles for the job

    Circular projects come in all shapes and sizes, from sweaters in the round to sleeves to hats to socks and mittens. And let’s not forget fingers on gloves or even I-cord. Each of these projects has a different circumference, and circumferences can even change throughout the project.

    To create a pleasant knitting experience, it’s helpful to know which needles to use when.

    When it comes to knitting in the round, you have two options:

    Double-pointed Needles

    Set of five double-pointed needles.

    As the name suggest, double-pointed needles (or DPNs) have points on both ends. They often come in sets of four or five, allowing you to hold stitches in the round (though they’ll look like a triangle or square shape on the needles) while having one free needle to use as your working needle at all times.

    (Some DPNs come in sets of six, but the sixth is usually a spare in case one of the other ones breaks.)

    Circular Needles

    A set of circular needles with interchangeable tips

    Circular needles have two rigid needle tips connected by a flexible cable. The tips can be fixed, meaning they can’t be removed from the cable, or interchangeable, such as these ones. Interchangeable needle tips can be swapped out to use many different sizes with one cable, or to use the same needle tips with cables of different lengths.

    If you’re new to the different types of needles and how best to use them, I go into much more depth in my tutorial about How to Choose Needles, which you can see here:

    While both types of needles come in a wide variety of lengths, you’ll be hard-pressed to find double-pointed needles longer than ten inches (or 25 cm), and the shortest circular needle cable is usually 16 inches (or 40 cm).

    I have some vintage DPNs that are 14 inches (or 35 cm) long, but I’ve never seen any modern options this length. That’s because working with rigid double-pointed needles at longer lengths for projects like sweater bodies is awkward and ungainly. Once circular needles were invented, I suspect these longer DPN options fell out of fashion.

    But manipulating the rigid ends of circular needles requires you to have enough cable to be able to turn the needle tips back toward themselves, so you can’t really have a cable shorter than 16 inches. However, you can use a cable as long as 42 inches (or 107 cm) for pretty much anything.

    That’s why, traditionally, double-pointed needles have been used for small-circumference projects, and circular needles have been used for larger ones. Frankly, I prefer double-pointed needles, and will use them whenever a project circumference allows for it. Not everyone does, but if you’re starting out with circular knitting, I recommend you give double-pointed needles a try. (Find a tutorial about using them here.)

    Inside of a large striped knitted tube on a metal-tipped circular needle
    A striped orange-and-white project on a circular needle sits piled next to the balls of yarn on a rustic whitewashed wooden surface. The inside of the project is most plainly visible, showing the reverse stockinette side of the stripes.

    However, there are also three ways to use circular needles: in a single loop (as one would suspect), using two shorter circular needles in place of four double-pointed needles, or using one long needle looped in the Magic Loop method. Since many people find circular needles easier to work with than double-pointed needles, you can usually use one of these three methods to suit your project needs. Not to mention the cash and space you’ll save with only having to buy needles of one type to cover the full range of circumferences.

    (Click the links to go to my tutorials about how to knit in the round using each of these methods, or find them all in my Stitches and Techniques index.)

    In the end, the type of needle you choose will often come down to personal preference. But keep this general guideline mind: double-pointed needles or Magic Loop method for small circumferences, and circular needles for large ones.

    General Guideline: double-pointed needles or Magic Loop method for small circumferences, and circular needles for large ones.

    Flat lay of a completed Beanstalk Sock and a started one with only the cuff on a white desk.
    A sock started on a set of four six-inch (15-cm) nickel-plated double-pointed needles. Sock design shown is Beanstalk Socks.

    Tip #2: Prevent ladders before they begin

    The problem: after several rounds of your project, you notice what looks like a “run” in your knitting where your needles meet, with a long column of stitches with too much yarn between them. This can happen no matter which types of needles you choose, and it’s called “laddering”.

    I’ve found three key ways to prevent this:

    First, always begin your needle with a knit stitch, if possible. This allows for the least amount of distance between the new non-working needle and the one you just completed. If you must start with a purl stitch, make sure your working needle is below the non-working needle to simulate this effect.

    Second, give your yarn a good tug after the first stitch of every needle. This reduces that gap even more, ensuring you don’t accidentally leave some extra yarn behind as you move past it.

    Third, rotate your work around the needles as you go. Meaning, make sure the gap between needles isn’t always in the same place in your project by changing the location each round. This helps keep your tension more even and ensures your “stitches between the needles” don’t line up vertically, preventing the unsightly ladders you might otherwise see.

    While I usually find the first two prevention measures to be enough, you might need to employ this last one, too, especially when using the Magic Loop Method with a single circular. Since Magic Loop requires pulling the extra cable length out between your stitches, rotating the location of this loop around the project can keep it from stretching out in a single spot.

    Tip #3: Swatch in the round for circular projects

    When knitting in the round, your tension will be different than if you knit back and forth—yes, even if you’re incorporating purl stitches in your design. (Or maybe especially then.)

    If you’re knitting in the round, it’s imperative that you also do your gauge swatch in the round to match tension. The gauge given in circular knitting project patterns should be given in the round, and you may have a difficult time matching it with a flat swatch (and if you do, you’re resulting garment likely won’t fit and you’ll wonder why).

    This doesn’t mean you need to make a knitted tube for your swatch, though you can. Doing so will take a lot more time and yarn than you need, however. Whereas swatching in the round means you create a swatch where you only ever knit from your leading edge, duplicating the tension you’ll have in your actual project. You do this by only knitting the area you’ll need for you swatch while carrying the yarn straight across behind the swatch in a float, like so:

    Back of swatch made in the round
    The back side of a gauge swatch made in the round, showing the yarn floats.

    To learn to make a swatch that duplicates the tension of knitting in the round but saves yarn and time, check out my tutorial about how to swatch in the round below:

    I also recently saw another ingenious idea for swatching in the round, which will save even more yarn and create even better tension, because it prevents the swatch curling toward the back of the piece. (I think it was from designer Patty Lyons on her Instagram account, but I can’t find it now. If someone knows differently, please let me know so I can attribute properly.)

    A swatch knitted in the round using the "knit your floats" method

    What I did for this swatch in the round is keep an extra three or four times the width of the swatch for each yarn float as I ran it back across, then used that float to work the next round instead of the working yarn. You keep alternating rows between the working yarn and using the yarn float to work the next row.

    Kind of blew my mind when I saw it, and it works great. (Though, as you can see, I wasn’t keeping enough slack on my leading edge at first (on the right), which is why that part is more puckered. The slack gets used up as you work the first bit of the row, so make sure to leave more of a loop at the leading edge than you think you’ll need.)

    I hope these tips give you a much more satisfying experience while knitting in the round. If you still have questions, feel free to reach out to me, or join my Ravelry community to ask questions and get help from a bevvy of experienced knitters.

    And be sure to sign up to receive blog notifications in the sidebar to never miss a helpful post.

    Happy knitting, magic-maker!