“Back? I never knew it was gone,” you might be saying.
Understandably so. This spring, I made the difficult decision to shut down my store and take everything offline. I couldn’t justify the expense of my tech stack, and I didn’t have the time or energy to find other options before my annual renewals started hitting me.
Also, I was pretty wiped out energetically, so I didn’t even announce the departure. My Secret Wish Knitting just… quietly disappeared.
But now, it’s back. Hopefully, for good. I’ve built the new store on a platform that will be affordable forever, so even if (God forbid) something should happen to me, my heirs could keep it going with little trouble.
If you missed my store over the past few months, now is the perfect chance to explore my pattern catalogue again as you dig into your stash for the fall knitting season. And to use a tutorial or two to help you complete your projects.
Also, be sure to check out my selection of Low Vision Accessible patterns, which are available in standard PDF, Large Print Screen-Reader-Accessible PDF, and ePUB.
I hope to get a couple new patterns published this fall and winter season, so I’ll be back to tell you when those are available.
Happy knitting, magic maker. Thanks for continuing on this journey with me.
Warmly,
Talena (The Yarn Mermaid)
P.S. I’d love to hear what’s on your needles now (or next). Let me know in the comments!
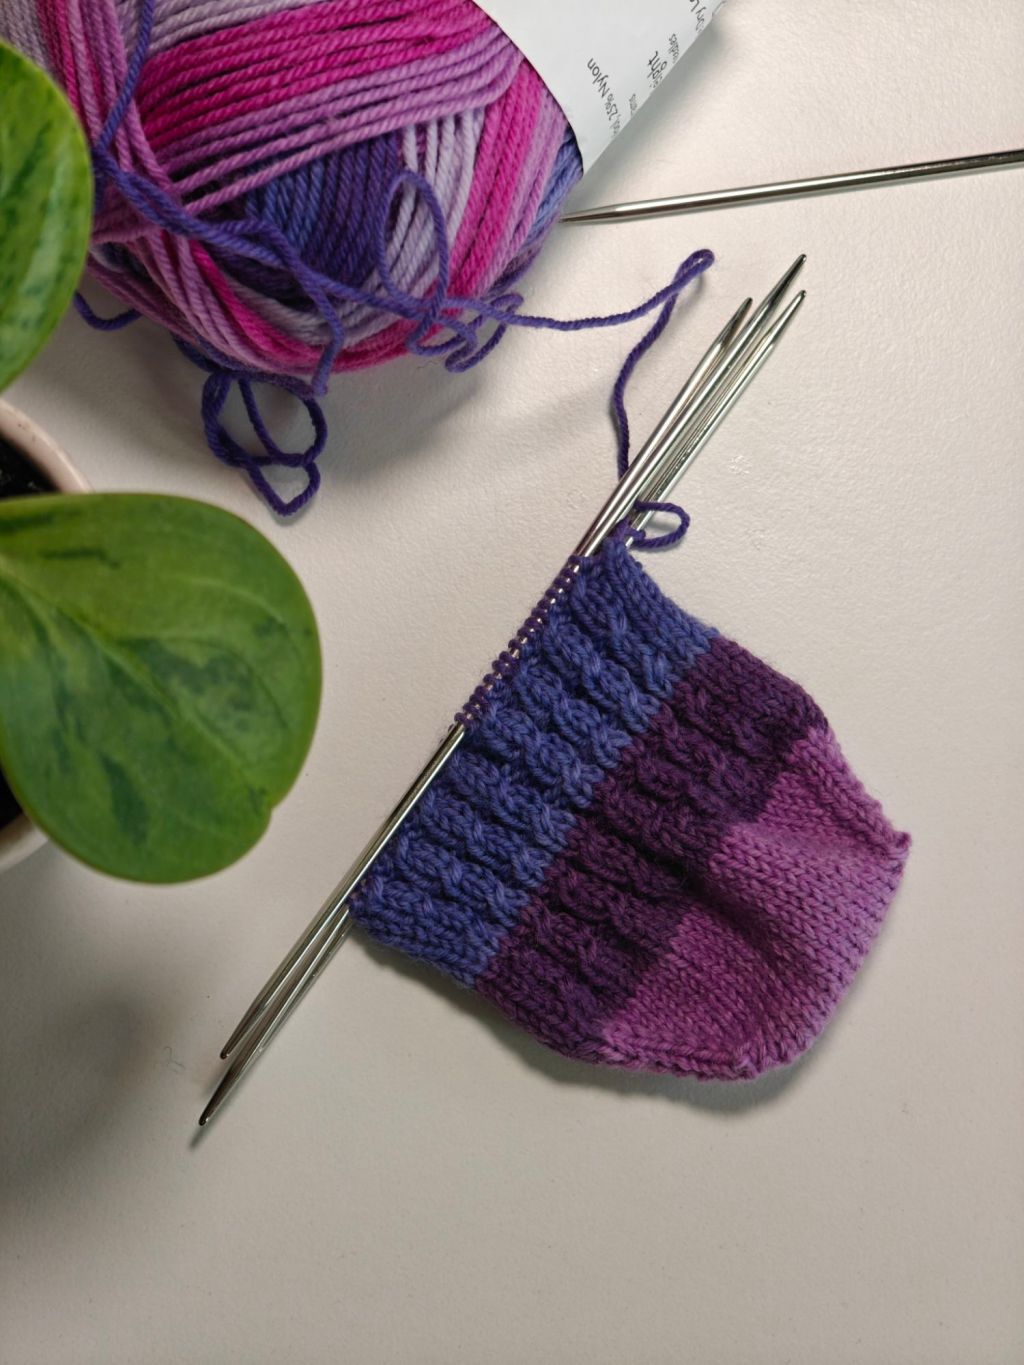
(I’m working on a sample for a new cabled sock pattern, and a lace shrug I’ve had on my needles since 2016… but that I might actually finish this winter!)
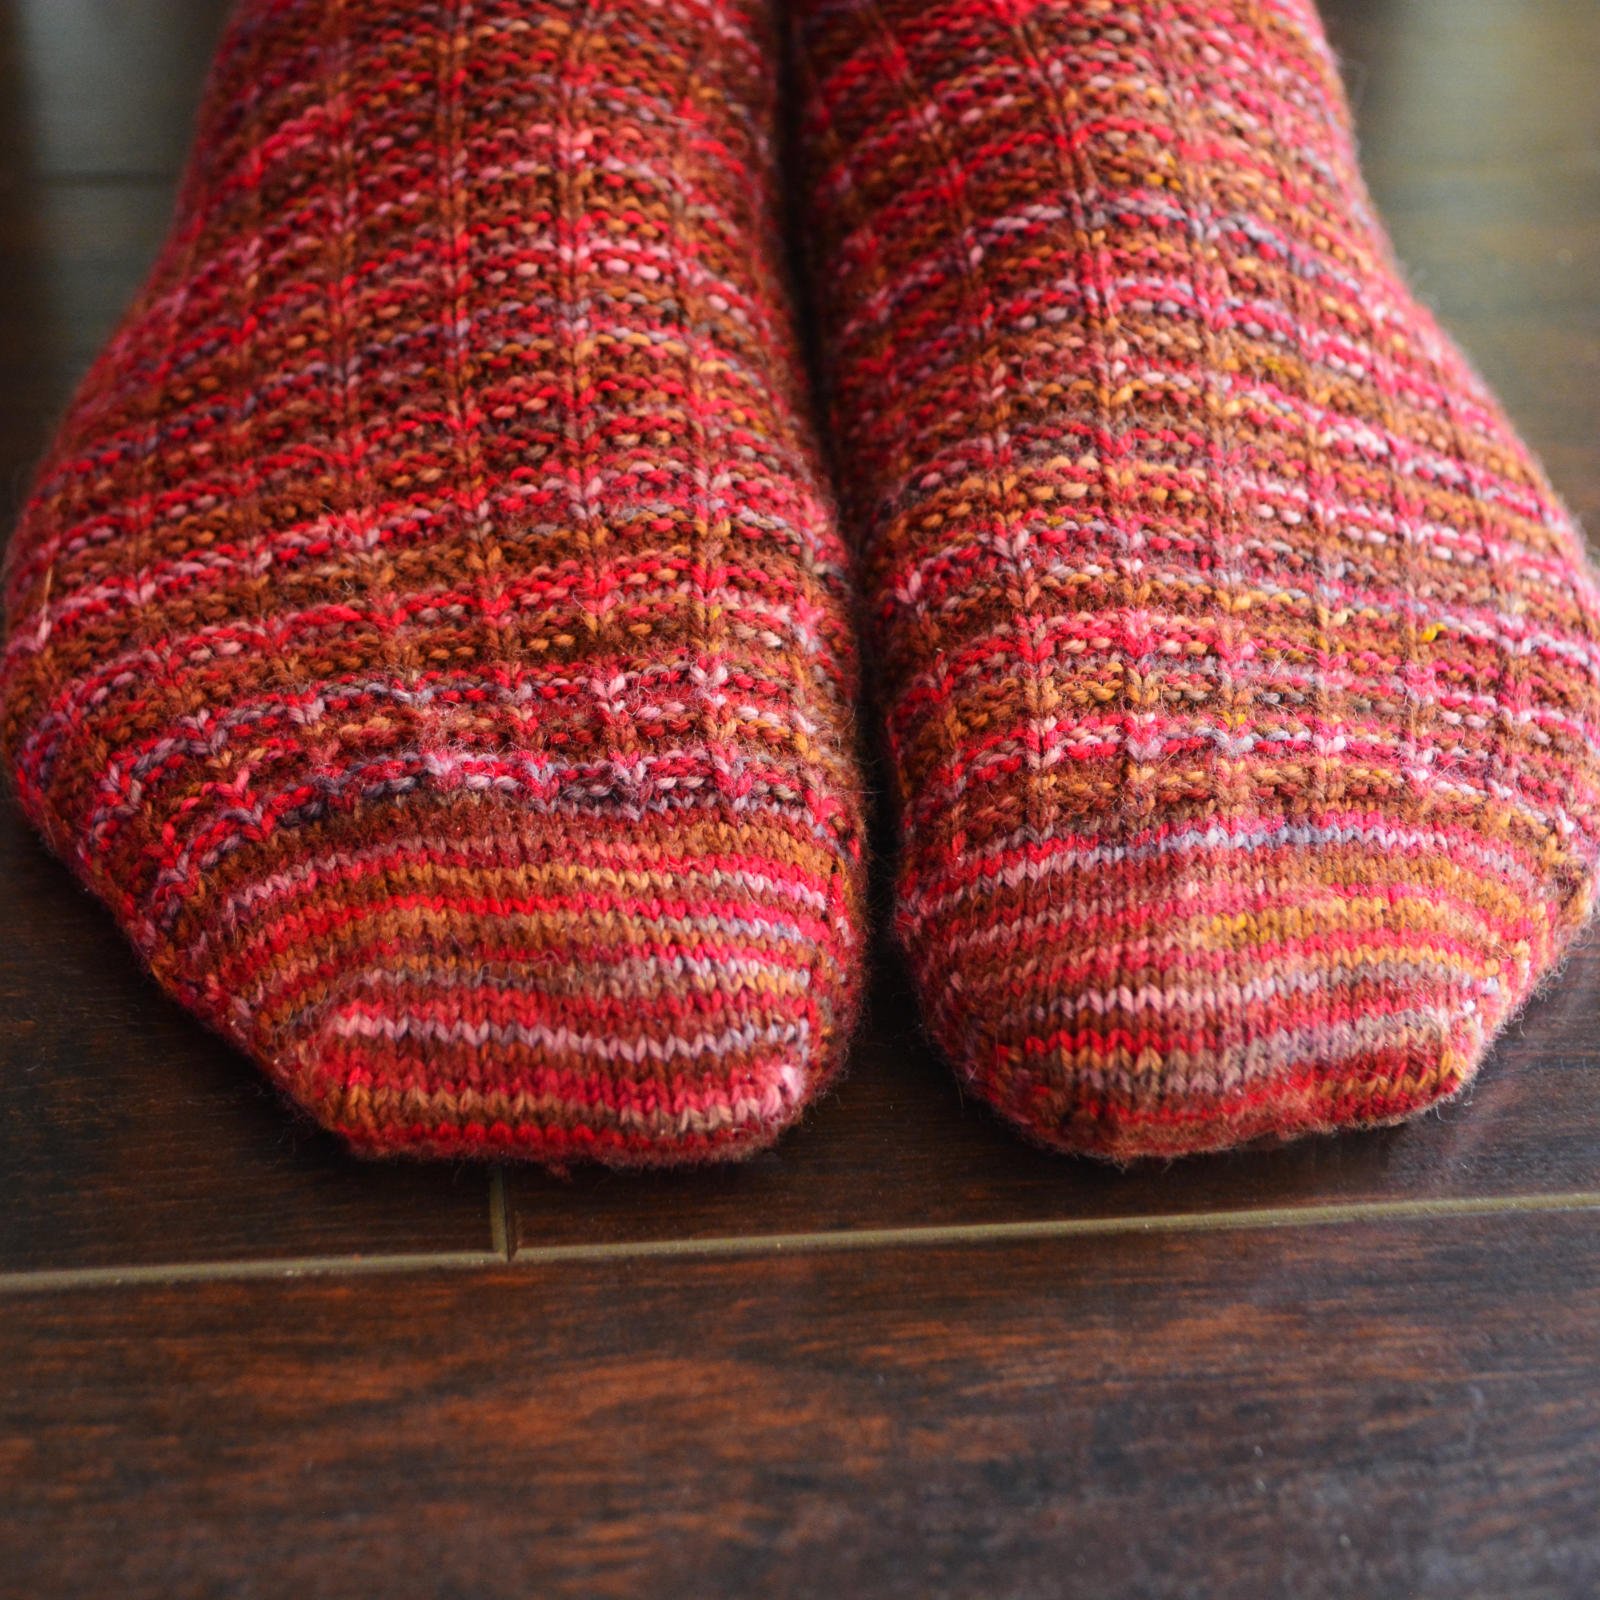
This sock toe is a teaser of my upcoming “Carousel Socks” pattern.
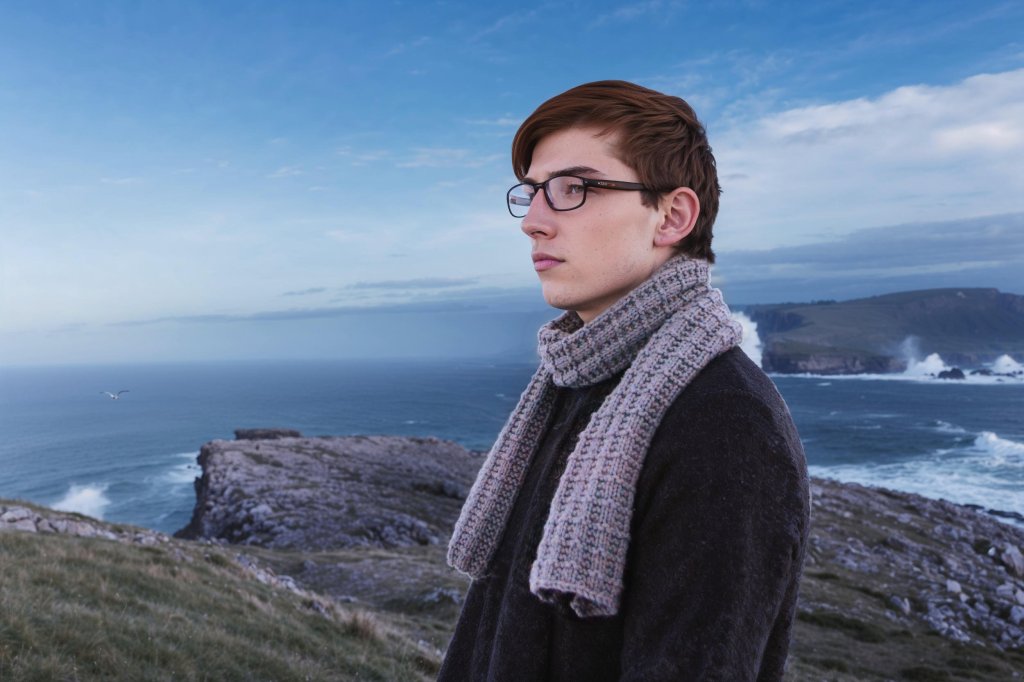
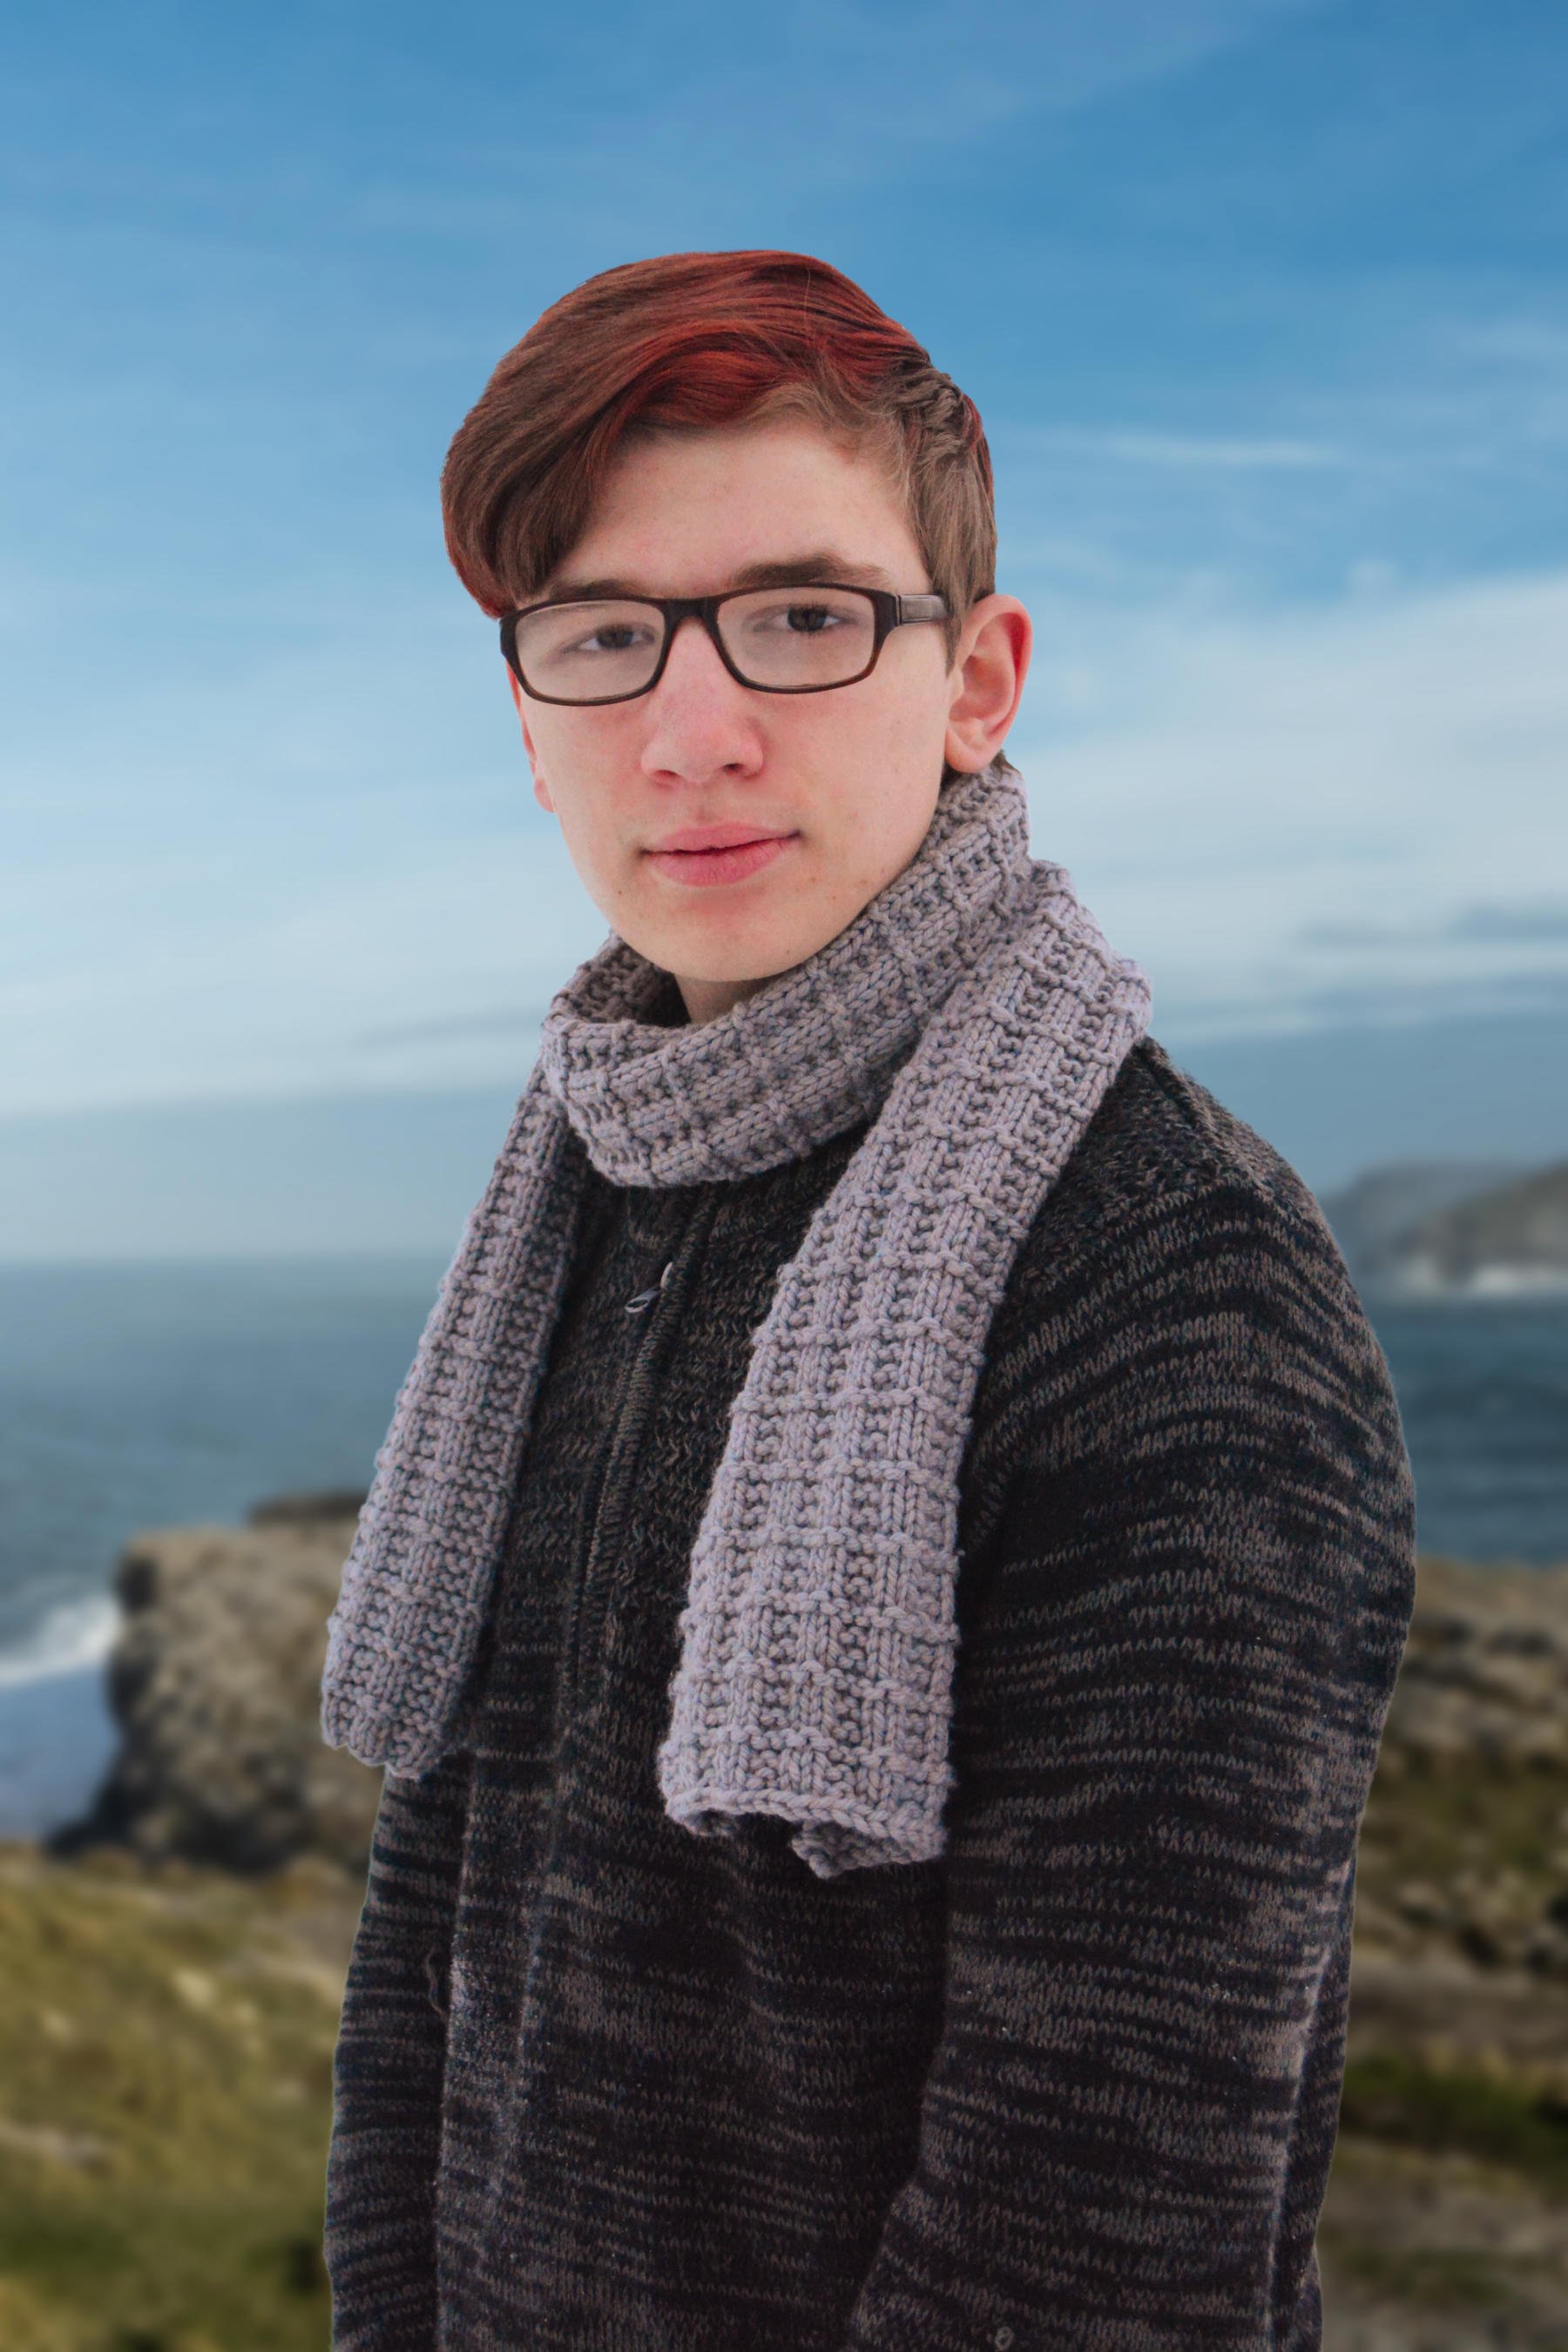
Several years ago, my oldest son asked me to make him a scarf. Since it’s rare for anyone in my immediate family to ask me to make them anything fibre-related (hazards of having all boys, I guess), naturally, I jumped on that.
I came up with several ideas and ran them past him. In his late teens at the time, he already had a classic and slightly hipster fashion sense, despite our rural roots, and I wanted to make sure he was pleased with the outcome. He gave me the go-ahead on the yarn and basic design.
The result was this very simple and classy scarf with a definite masculine ruggedness and confidence to it that he loved. And this month, I finally got it written up into a pattern.
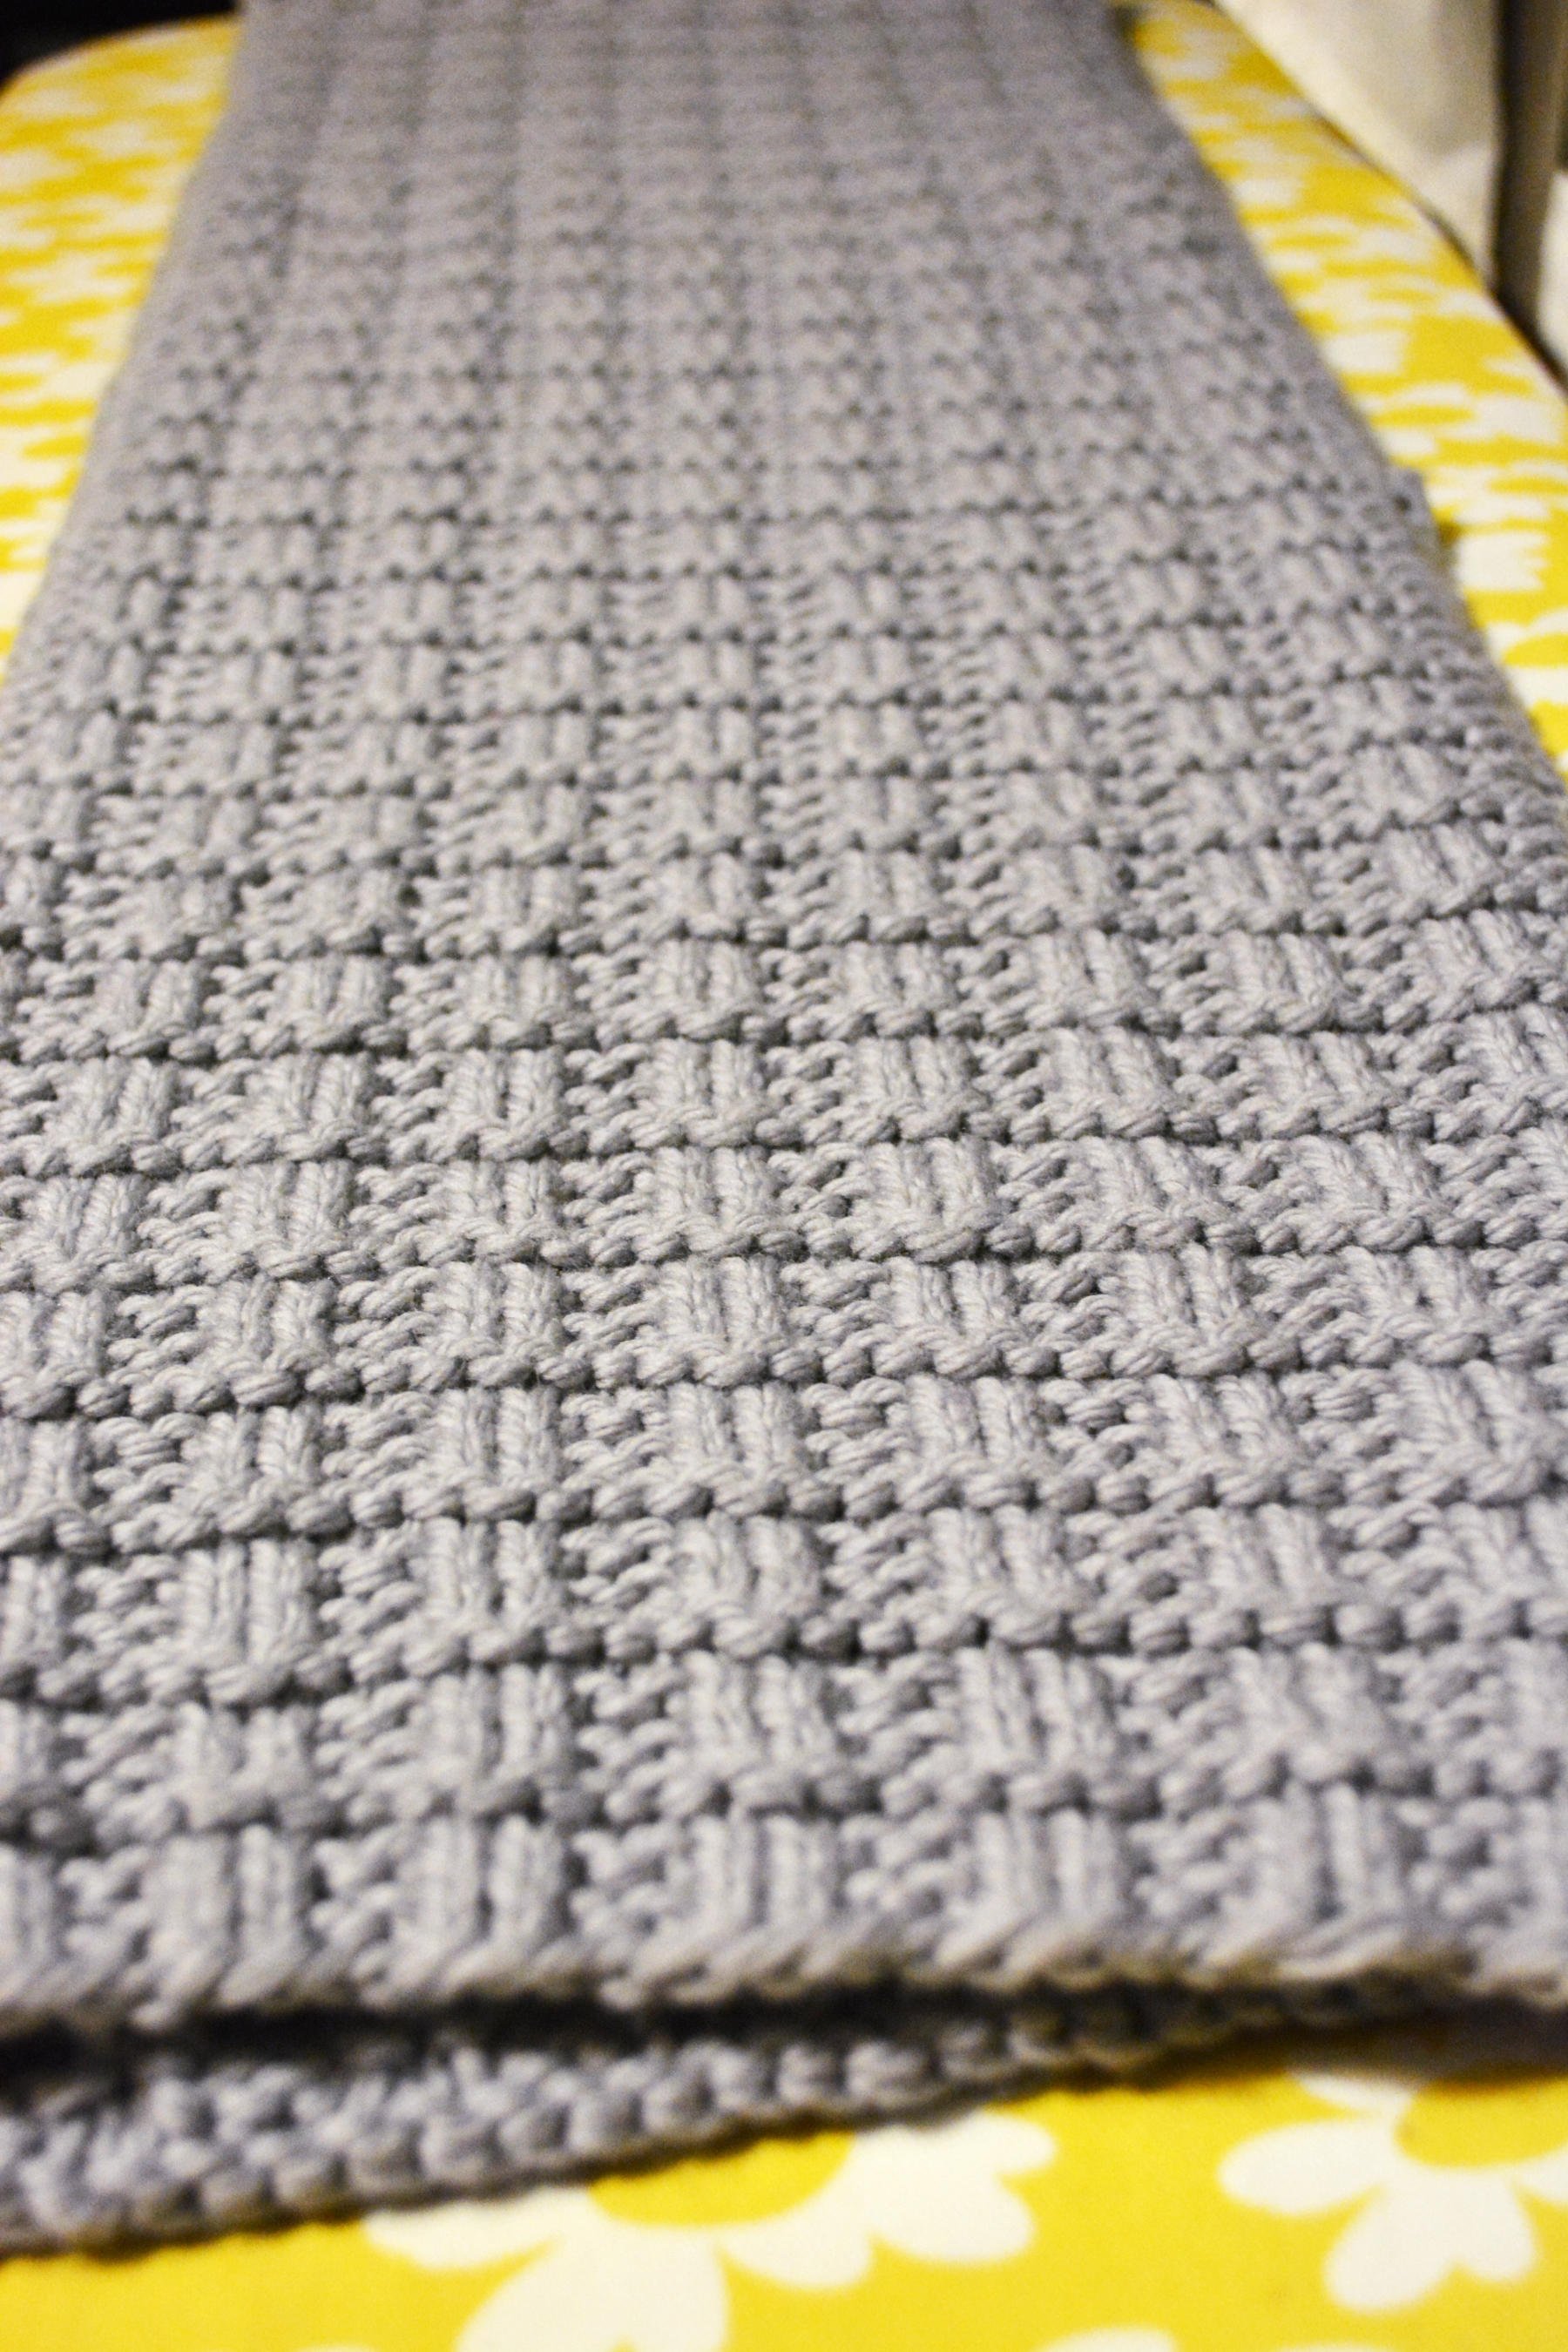
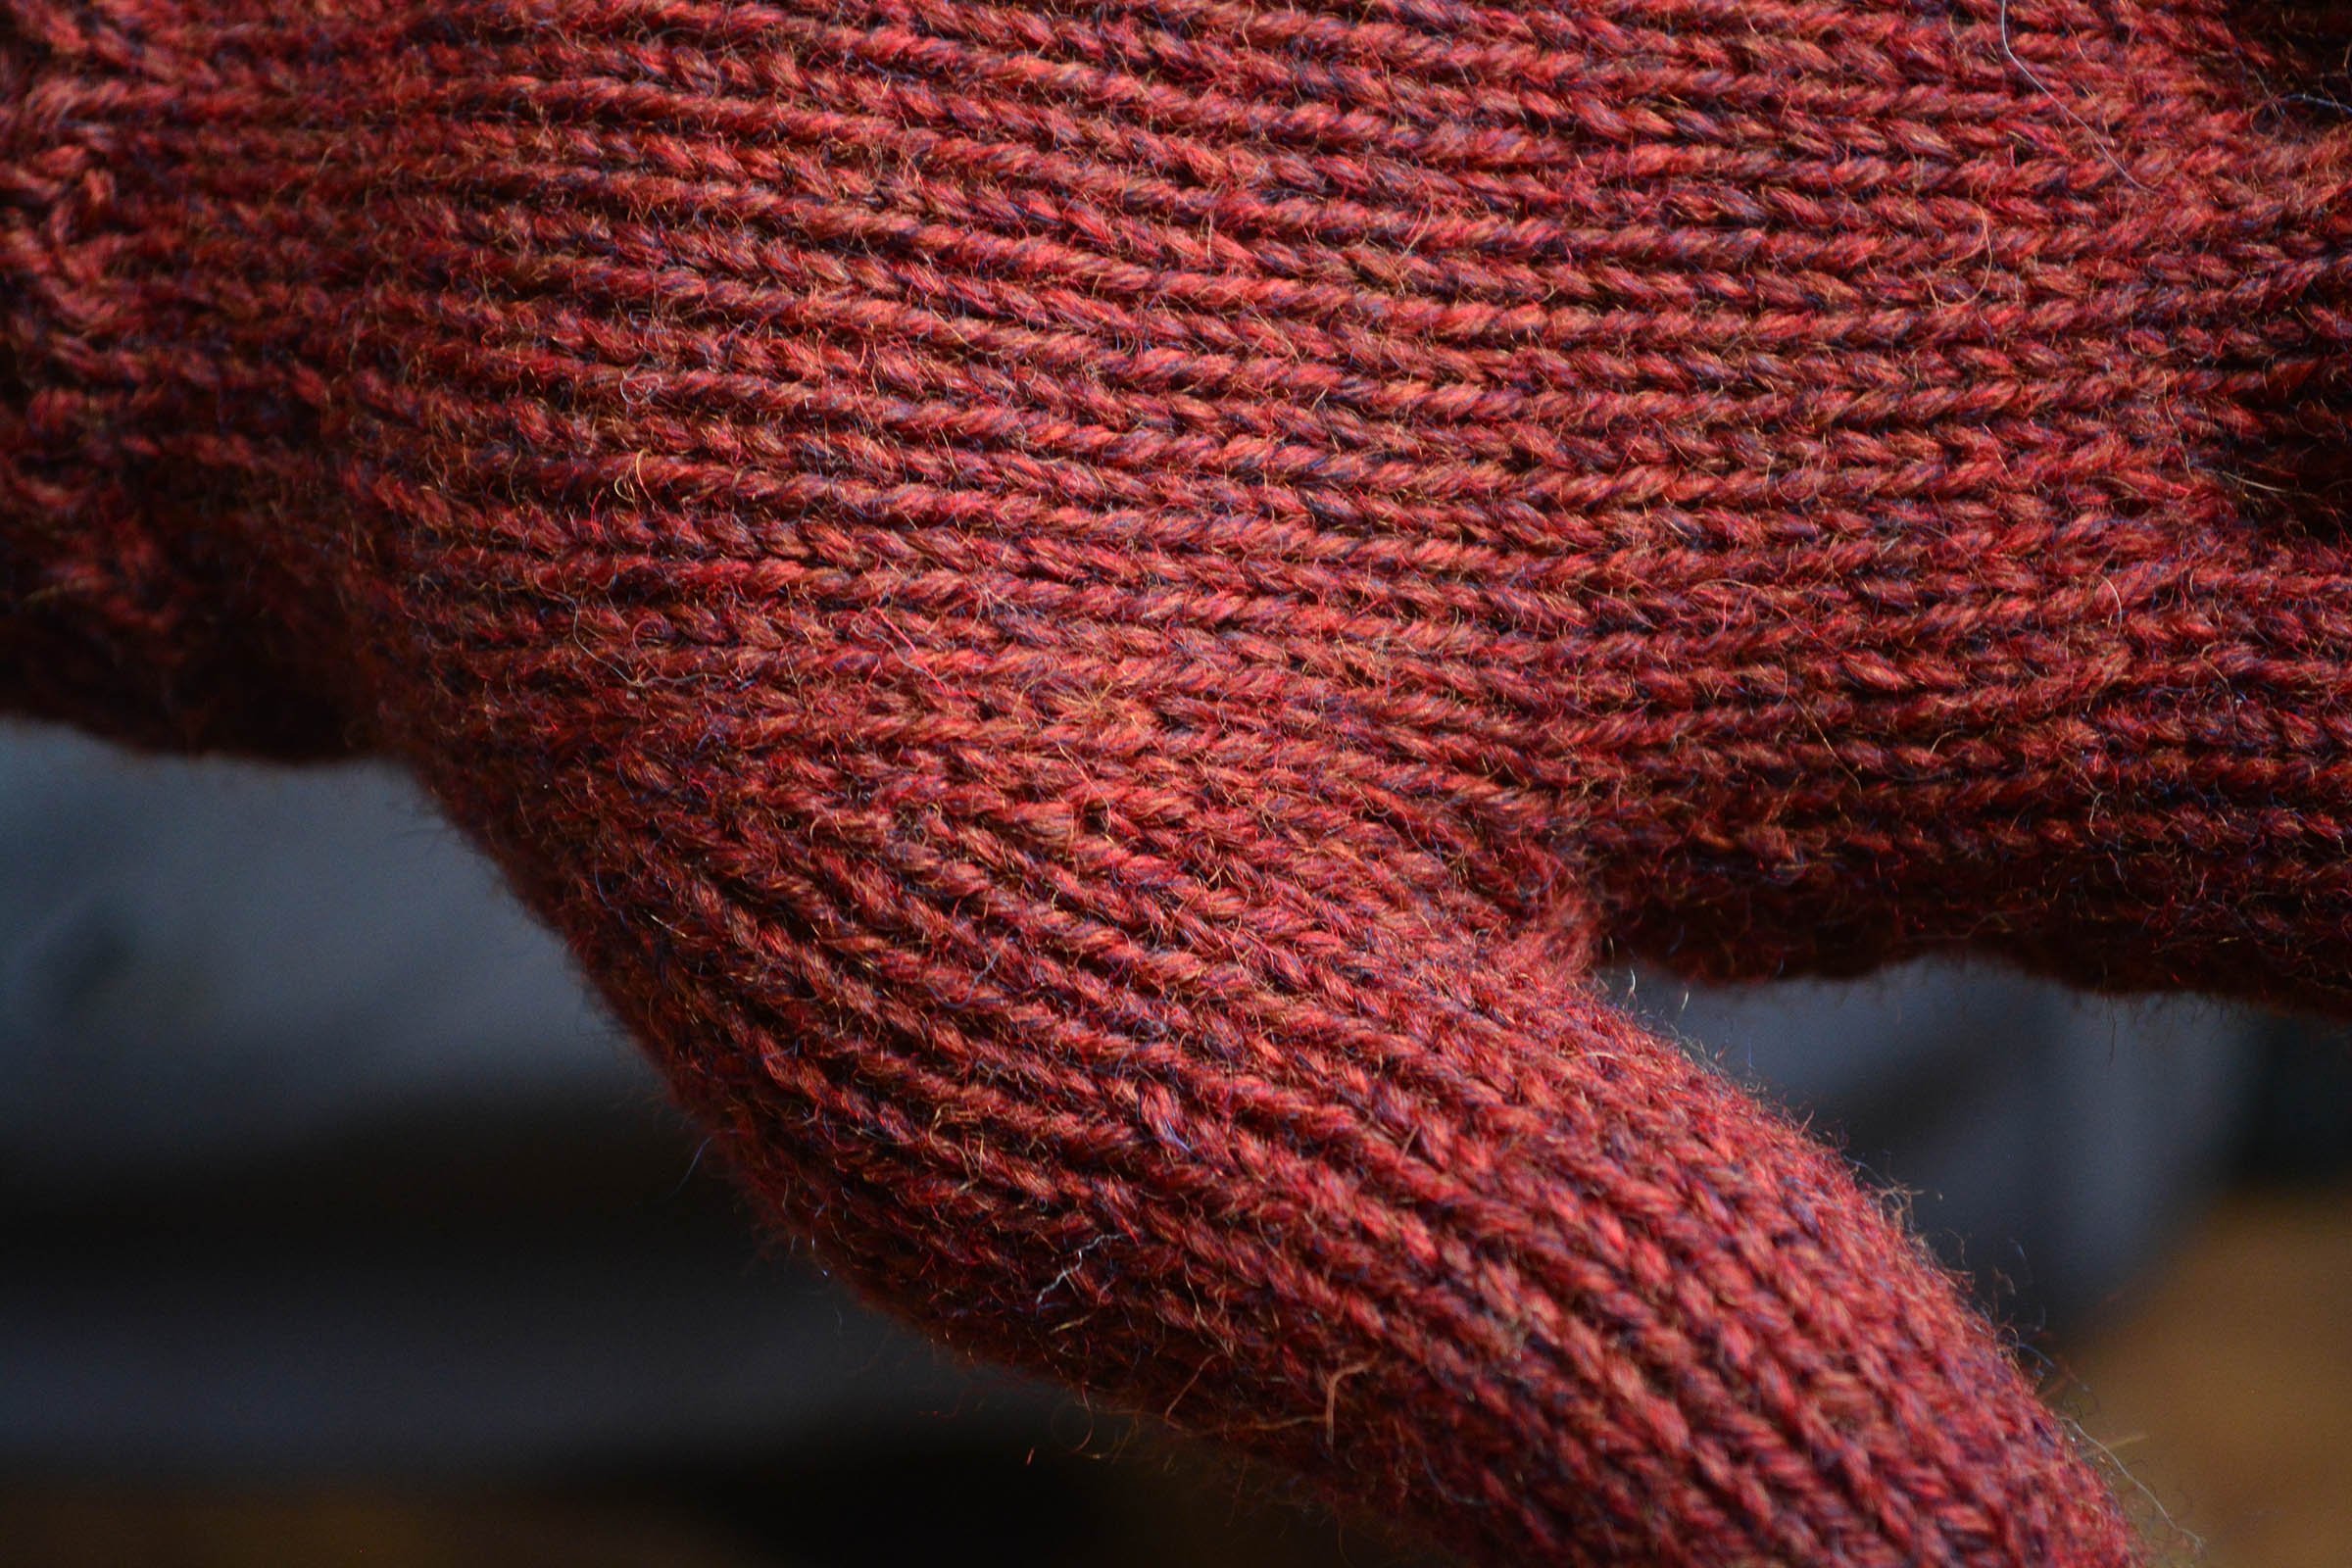
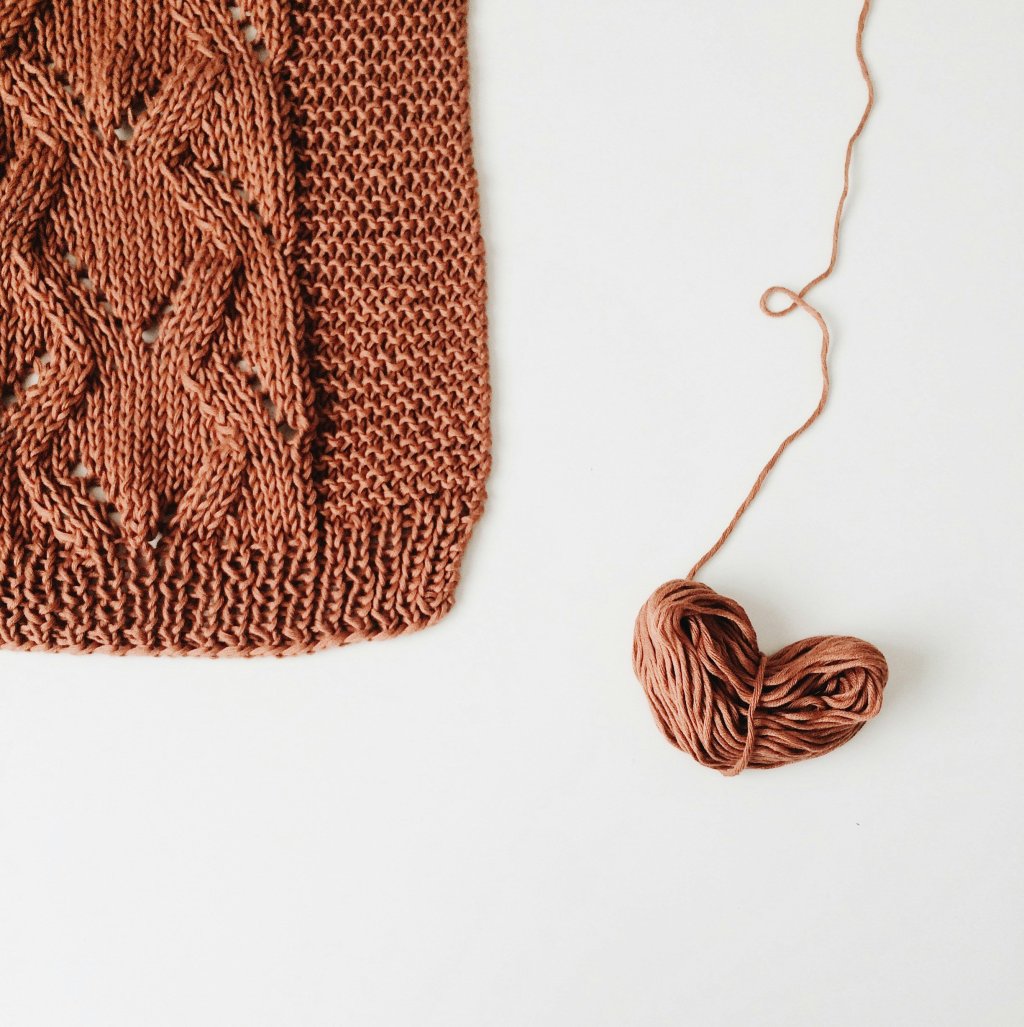
Classic, rugged, and warm, this attractive scarf requires only basic knitting skills. Perfect for beginners!A simple waffle weave pattern creates interesting surface texture on this bulky-knit scarf.The Commander Scarf being modelled by the recipient and inspiration for the name.
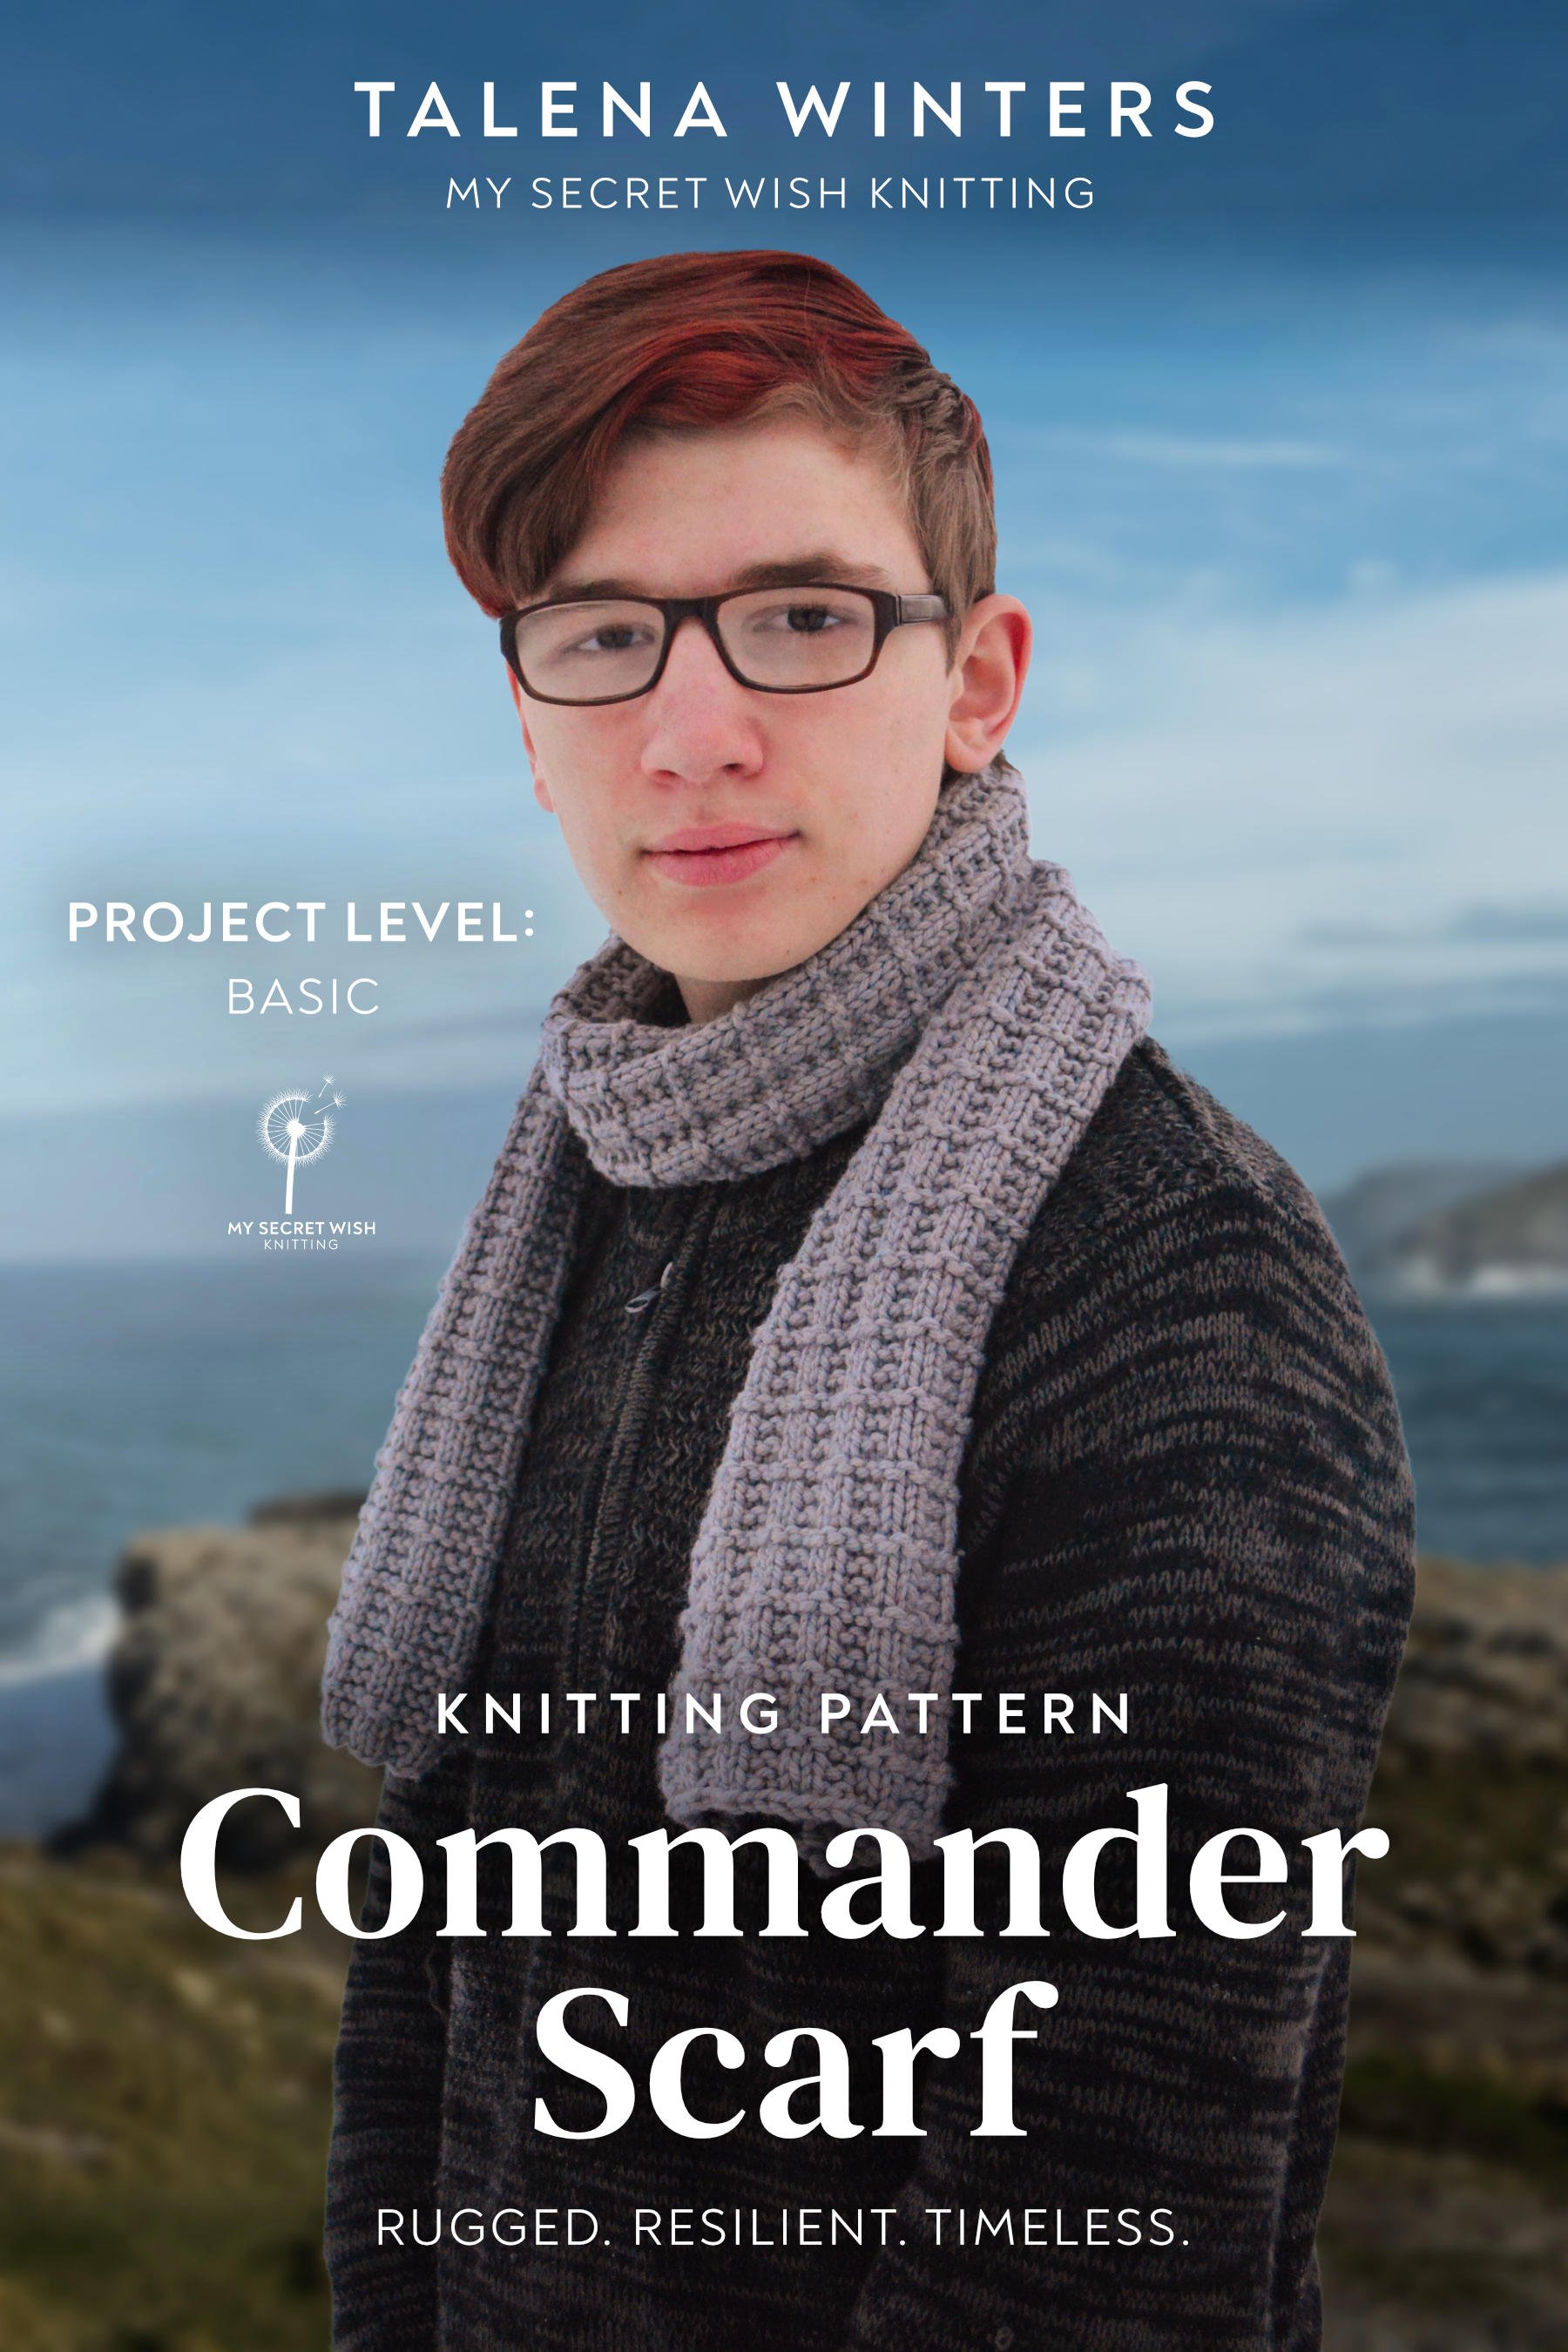
Rugged. Resilient. Timeless. The Commander Scarf is a bold, masculine knit designed for those who face the elements with quiet confidence. Featuring a striking waffle weave texture, this scarf balances warmth and structure, making it the perfect companion for cold, windswept days.
Crafted in bulky-weight yarn, the Commander Scarf works up quickly while maintaining a polished, classic look. Whether wrapped snugly for protection against the chill or worn loose for effortless style, its deep texture and three length options make it a versatile staple for any winter wardrobe.
Pattern Highlights:
Bold waffle weave texture for rich depth and warmth.
Designed for bulky-weight yarn—knits up fast!
Three length options to customize size and fit.
Three pattern formats: standard PDF, low-vision-accessible PDF (large print, screen reader accessible), and ePUB.
Includes charts for visual reference for both right- and left-handed (mirror) knitters.
Masculine, structured look that pairs effortlessly with coats and sweaters.
Ideal for knitters looking to create a classic, wear-everywhere scarf.
Set against the backdrop of a stormy northern sea, the Commander Scarf is inspired by the raw power of the wild coast—where crashing waves meet unyielding cliffs. Knit yours in deep, moody tones for a dramatic effect, or go for neutrals to emphasize its understated strength.
Wrap yourself in warmth. Knit with purpose. Command the season.
Ready to cast on? Get the pattern now and start your next adventure.
On a recent episode of the VeryPink Knits podcast (Episode #317 — WWEZD?), Polly and Staci answered a listener question about what to consider when using knitting patterns for left-handed “mirror knitting.” Given that I’ve made creating patterns that work for both right- and left-handed knitters a priority in the past few years, I was intrigued by their response—and heartbroken at the questioner’s lament that there aren’t more resources for left-handed knitters.
I have to confess, as a righty myself, it broke my brain a bit when I started considering the implications of writing patterns that would work for either hand dominance. And I’m definitely still on a journey of figuring out the best way to make that happen. But after listening to that episode, I had a breakthrough about something that’s stumped me from the start: how to indicate directional increases in an efficient way that doesn’t rely on the directional terms left and right (e.g., M1L or M1R).
But before I get into my solution, let’s discuss the scope of the problem. In case you, like me and the majority of knitters, are right-handed and have never considered the impact that being left-handed might have on how you work up a pattern, let’s review what lefties have to deal with pretty much every time they download a new pattern—aka, “why my brain broke.”
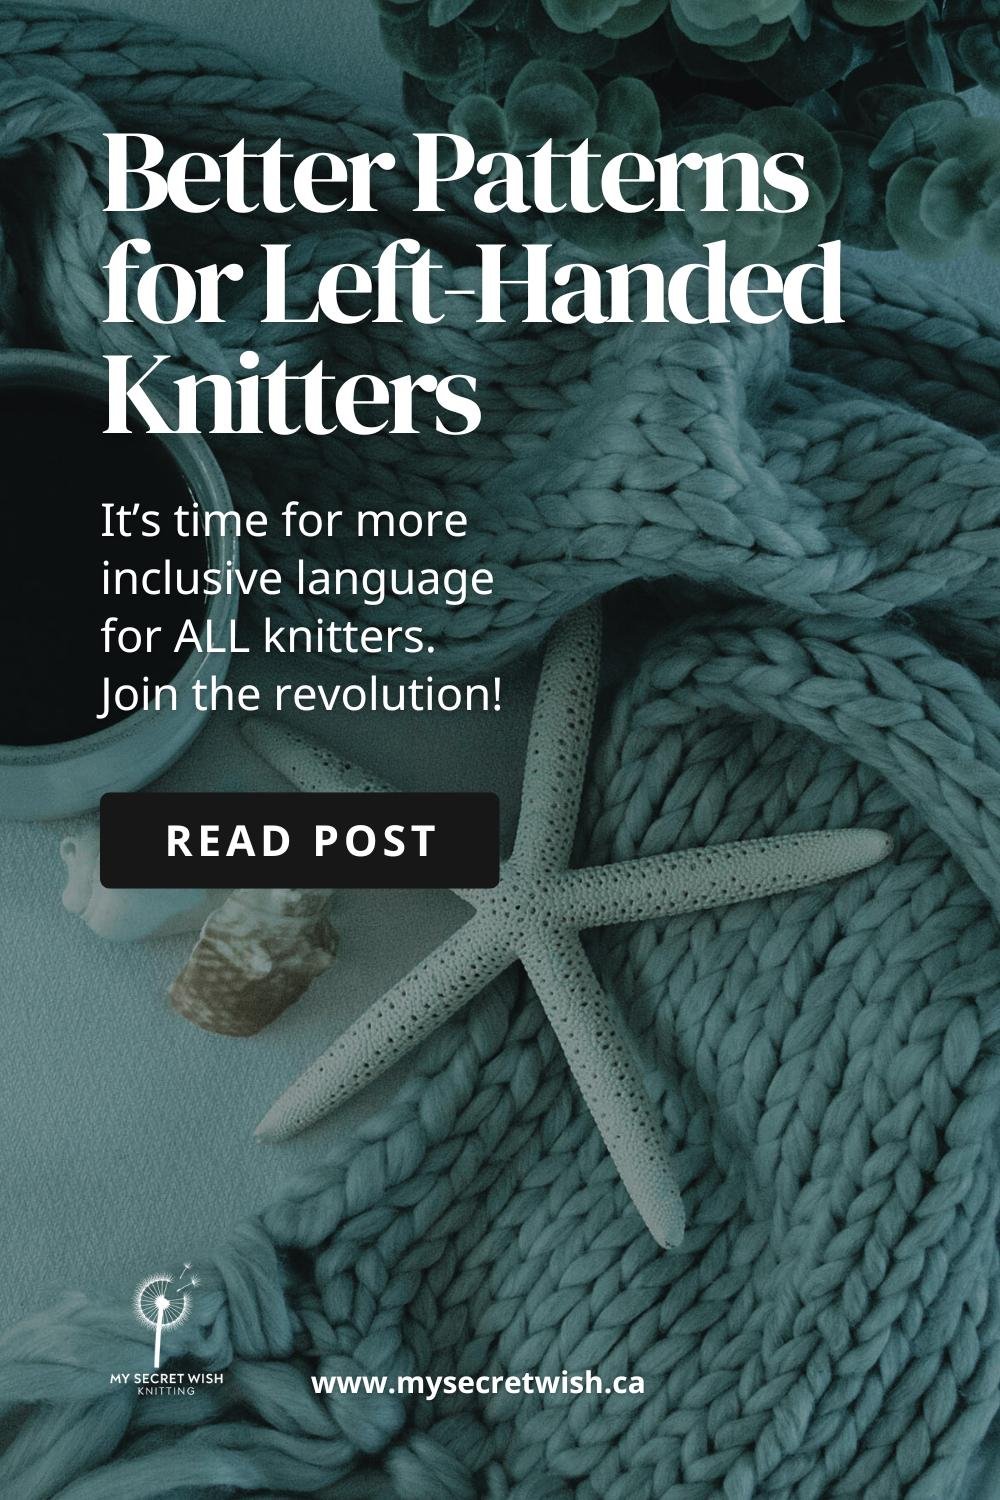
Better Patterns for Left-Handed Knitters. It’s time for more inclusive language for ALL knitters. Join the revolution!
The Right-Handedness of Knitting Patterns and Techniques
As already mentioned, knitting patterns are often rife with instructions that assume you are knitting right-handed. This includes not only directional stitches, but even the way most knitting techniques are described.
For instance, we often talk about right and left needles, stitches, and, of course, hands, not considering that to someone left-handed, they will have to transpose those directions in their mind to make them make sense.
If a pattern is symmetrical, a left-handed knitter could simply “mirror” every direction in the pattern with no dire consequences. For instance, if you’re knitting in the opposite direction of a righty, working a M1R every time a M1L is called for (which would use the same basic instruction as a righty would use for M1L, you’re just working the opposite way so it’s leaning right instead of left) would maybe mess with your head a little, but the result would be a knitted item that looks just like a righty would make. However, there is still the mental burden of transposition.
I’m a pianist and composer by training, and I can tell you that transposing musical keys on the fly can be less complicated than trying to transpose a knitting pattern, especially if the design is not symmetrical or relies heavily on directional stitches or techniques for surface textures or shaping.
If the pattern includes directional increases or cables (as many patterns do), before mirroring all those lefts and rights, the knitter has to think about how it will affect the overall structure and design of the item.Not every pattern can be mirrored equally.
Before mirroring all those lefts and rights, the knitter has to think about how it will affect the overall structure and design of the item. Not every pattern can be mirrored equally.
None of my current designs are asymmetrical (unless you count the offset thumbs on my gloves and mittens, but the designs are symmetrical between hands), so I haven’t had to figure out how to conquer that particular mountain of “asymmetrical design” just yet. But I use cables and directional stitches a lot.
The first design I worked on after I started considering the left-handed knitting experience was the Trailfinder Hat. It has so. many. directional stitches. And that’s when I realized I’d found a yarn snarl that would take some time to unravel.
That was several years ago. Over time, I’ve started to figure out ways to communicate knitting terms and stitches without using directional language.
For anyone who has downloaded one of my newer patterns (released or updated within the past two years), you’ll have seen me switch to terms like leading and trailing stitch, working and non-working needle, and dominant and non-dominant hand when explaining or describing knitting techniques such as stitch creation. (I explain these terms fully on my Glossary and Terms page and use these terms in all of my stitch tutorials.) However, I was still stumped by how to address those directional stitches within the pattern itself.
It’s not fair to place an undue burden of understanding on the ten percent of knitters who are left-hand dominant. Wouldn’t it be better for all of us to find language that would allow each of us to easily work from any pattern we read?
I’m going to be honest—as I was thinking about how to resolve this, I was already nervous about how my non-traditional technique descriptions may potentially be confusing to knitters. And I wasn’t so sure I wanted to upset the entire apple cart by inventing brand-new abbreviations and terms for the stitches themselves.
But, after listening to that left-handed knitter’s question, I realized that it was time to do it. After all, knitters as a whole are a smart, savvy group, and it’s not fair to place an undue burden of understanding on the ten percent of us who are left-hand dominant. Wouldn’t it be better for all of us to find language that would allow each of us to easily work from any pattern we read?
So, last week, I took the plunge.
Inventing Universal Knitting Terms
Here’s my simple, revolutionary solution: Replace all directional stitch language with terms that refer to dominant or non-dominant hands.
In practice, this looks like this:
Increases
M1L (Make One Left) becomes M1N (Make One Non-Dominant). For Righties, this will continue to lean left. For lefties, it will lean right, and they won’t have to think so hard about that transposition (and neither will designers trying to keep their experience in mind).
M1R (Make One Right) becomes M1D (Make One Dominant).
Other increases aren’t usually described in directional terms, but if they are, the same principle would apply. E.g., the lean on bar increases that are being described with the directional terms BincLand BincR(instead of kfb and whatever the other one is otherwise called) would become BincN and BincD.
Cables
The same concept would apply to cables. Instead of 2 / 2 LC for a two-over-two left-cross cable, you would use 2 / 2 NC for a two-over-two non-dominant cross, etc.
So, basically, anywhere L or R appear in traditional knitting abbreviations, I will be substituting N and D. These terms will be fully explained in my glossaries, as always.
Since most knitters are very used to checking glossaries to make sure the abbreviations used in the pattern have the definitions they’re familiar with, I’m confident this will be fairly easy for knitters of my patterns to interpret.
When Lefties Must Still Think Twice
While adopting these new terms will resolve a lot of the tension and obstacles for left-handed knitters for many knitting patterns, it won’t resolve every issue.
For the vast majority of everyday knitting situations, the simple change of replacing left and right with non-dominant and dominant in knitting instructions will resolve the transposition issue for left-handed mirror knitters.
Asymmetrical garments or stitch patterns will still require some thought to reverse construction if the knitter wants to duplicate the original exactly instead of creating a mirrored version. And, due to tradition, plackets and button bands overlap in different directions based on the gender of the person it’s being made for.
Both of these situations will still require the pattern to be modified to produce the desired results. I’ll continue to give these problems some thought.
However, for the vast majority of everyday knitting situations, this simple change of replacing left and right with non-dominant and dominant (as well as the other adaptations I’ve already made) in knitting instructions will resolve the transposition issue.
Small Changes Matter
Do I expect this to start a complete revolution in the knitting world? No. I’m not a well-known designer, and the knitting-verse is already a vast and varied patchwork of traditions and terms that have yet to receive universal adoption. However, if you or someone you know is a left-handed knitter who has struggled to find patterns that make sense to you, I hope you will find my small contribution to the canon helpful and refreshing.
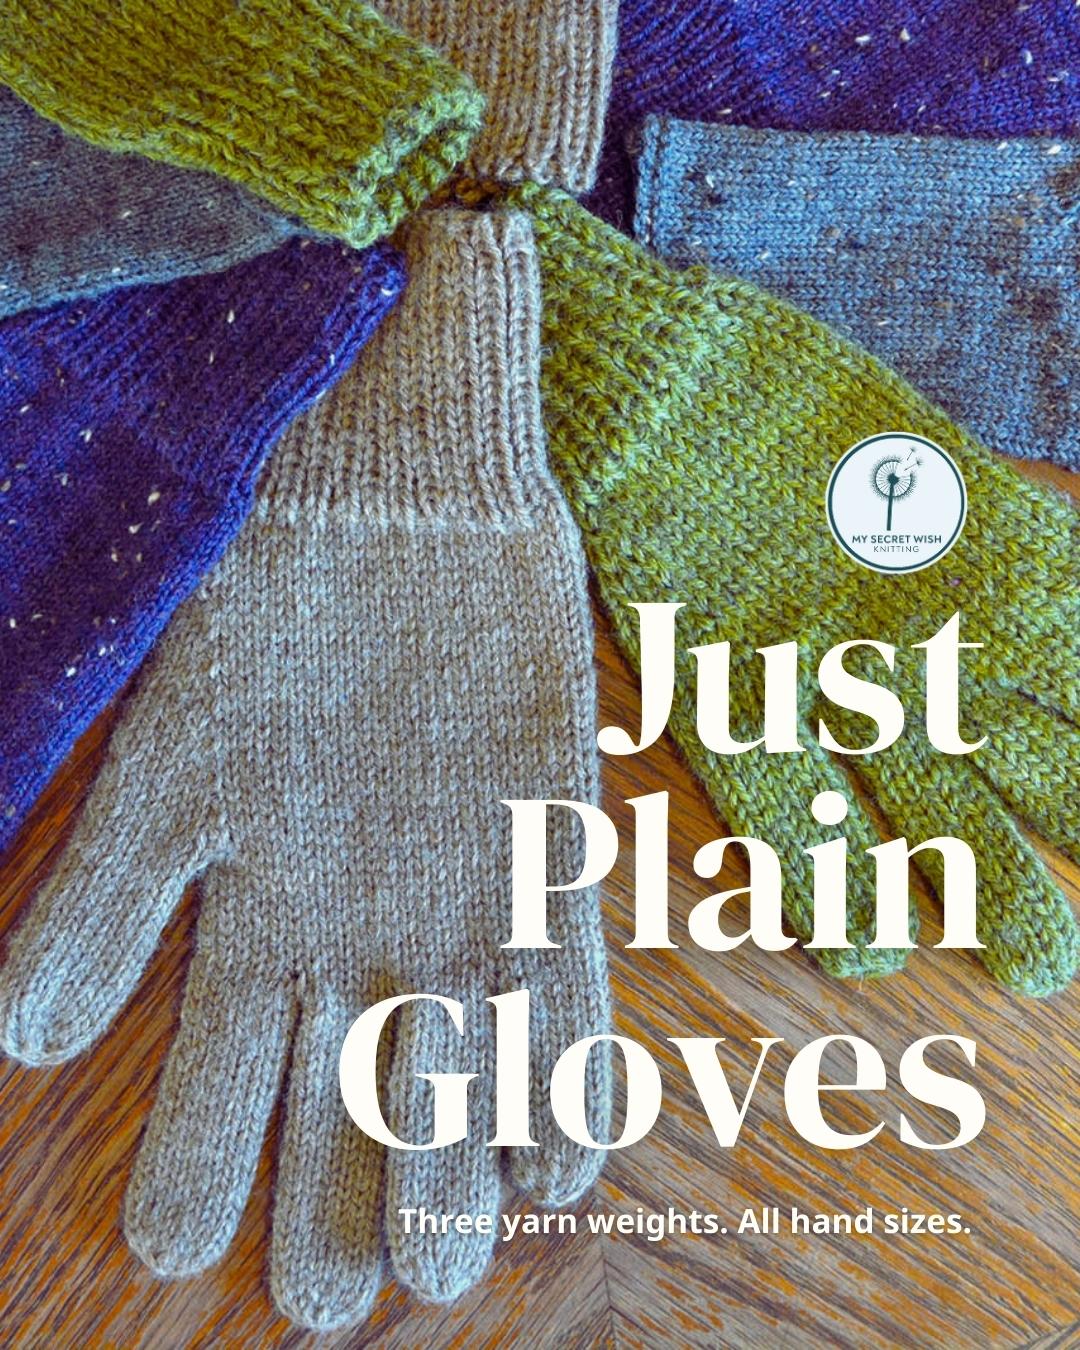
At the moment, the only pattern I’ve updated to include this new concept is the Just Plain Gloves. However, I’ll be working through the rest of my catalogue (and any relevant stitch tutorials) as quickly as I can. (The Trailfinder Hat will be high on the priority list—I’m not so sure I did a great job with making it hand ambiguous when I first created it.)
I would love to hear your thoughts about this shift. Do you think it’s going to be too complicated to adapt to, or is this the solution you’ve been praying some designer would think of for years? Let me know in the comments.
This post comes to you from a crisp, cold -40 day in northern Alberta. Brr! So even if you’re looking at crocuses and spring showers or summer sunshine with hints of autumn in your part of the world, let me remind you that anytime of year is a good time of year to be preparing for colder weather.
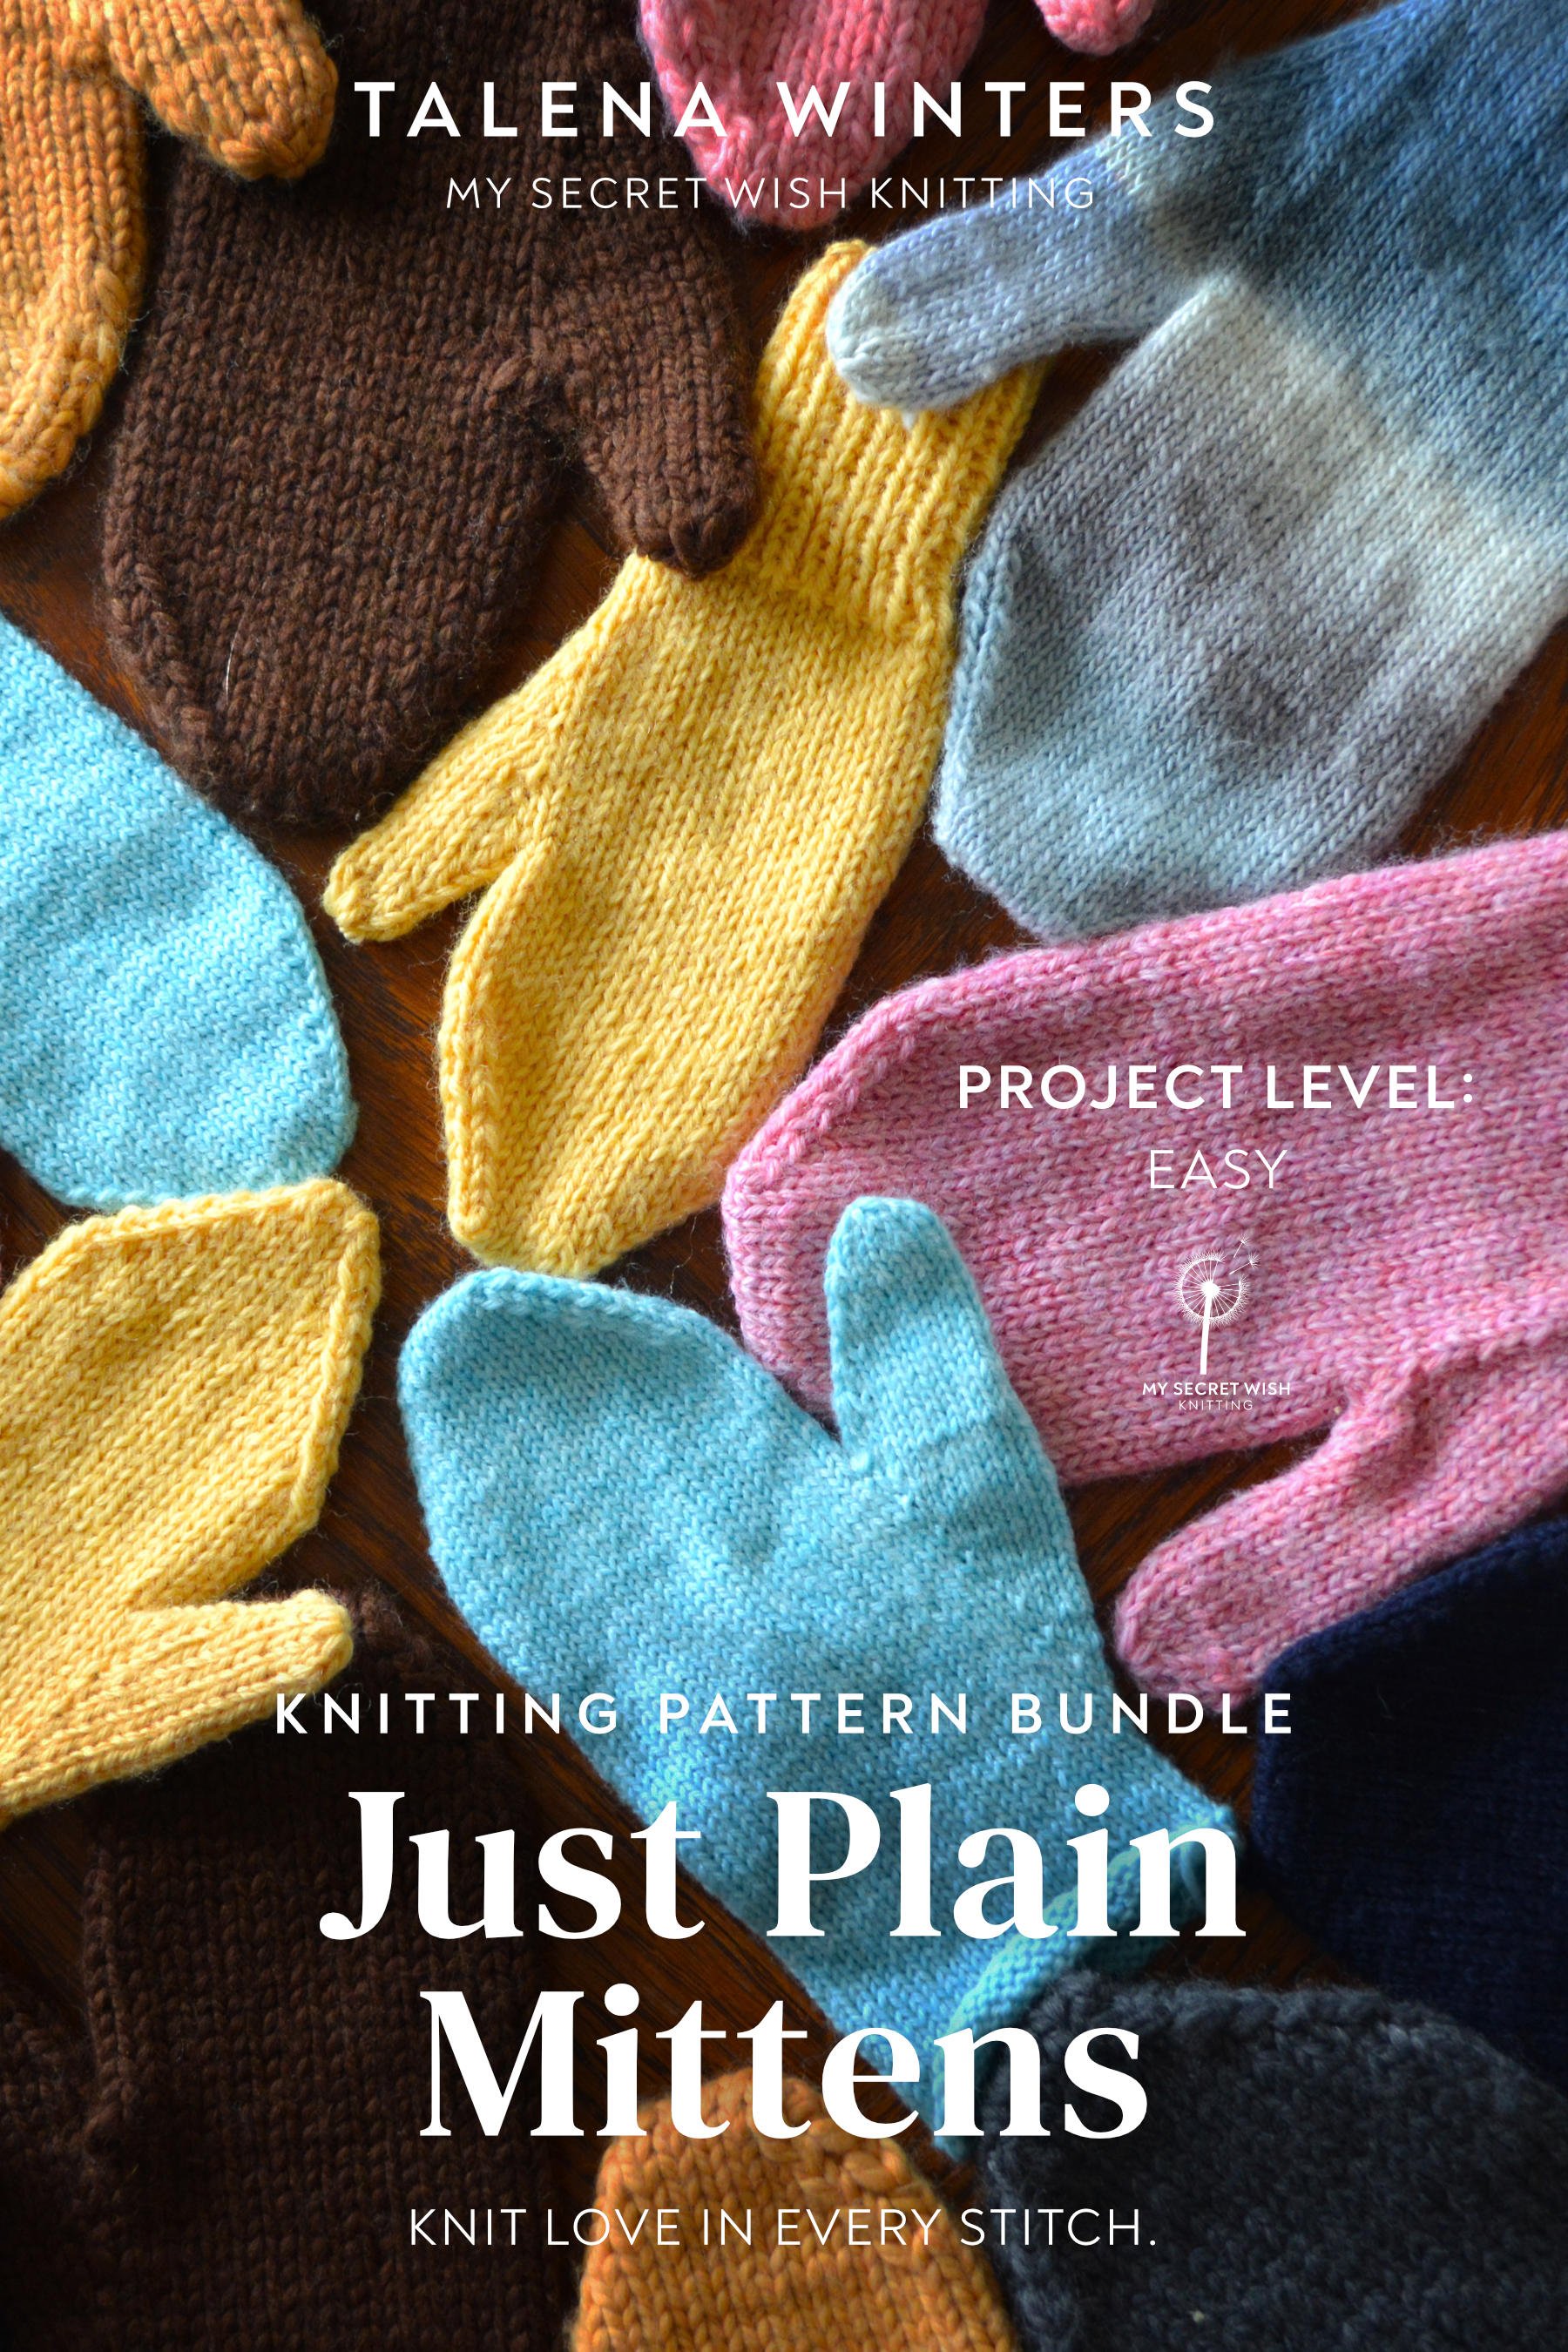
Just Plain Mittens knitting pattern bundle: Knit love in every stitch. Project level: Easy.
But first, a brief history:
One of my very first pattern designs, way back in 2010 when I was first venturing into publishing patterns, was a kind of wonky mitten pattern I called (very imaginatively) Lined Seamless Mittens. I typed it up and posted it for free on my personal blog, where I and many other people used it over the years.
However, it had its limitations—for one thing, it was only available in two sizes, both of which were on the small side. (I was making mittens for my kids, after all.) And I designed it for a chunky yarn that was discontinued two years later and replaced with a yarn that had the same name but a different gauge. (Bernat Chunky—thanks, Bernat.) I’m sure that was fun for people trying to make up the pattern.
Besides, as my kids grew, I needed bigger sizes. So, a few years later, I started on the rather ambitious project of creating the Just Plain Mittens bundle.
The newer version had five sizes, better fit, a better design for the sewn liners, and was available in three yarn weights. However, despite making about a million mittens while designing and testing this pattern, a few issues remained—not so much with the design (though the thumb could use a little tweaking) as with the pattern layout.
Also? The yarn manufacturer discontinued that bulky yarn too, and it had a gauge that was difficult to find substitutes for. (This time, Knit Picks Biggo. I’m so sad. Do you know how much of that yarn I have that I can no longer design with? Sigh. But I digress…)
So, when I decided to move my knitwear design business to my new site and undertake the project of updating all my patterns to have better layout, formatting, and low vision accessible formats in 2023, I knew that this particular pattern would need more than minor tweaking. It was going to need an overhaul. Which is why it is one of the last previously published patterns I tackled.
But now…
The New and Improved Just Plain Mittens are here!
Okay, so what’s so great about these mittens, you ask?
Well, let me tell you. :-)
What’s the same:
The pattern is still available in three yarn weights: Bulky, Worsted, and Fingering.
It still includes both a short- and a long-cuff variation.
The fingering-weight size includes instructions to make a Shell (regular mitten) or a Liner (to go inside a Shell).
The pattern still includes instructions to make a sewn liner out of fleece, if you prefer. (You also don’t need a liner at all, if you don’t want!)
These mittens are a fantastic blank canvas to showcase exciting yarn colourways or your own colourwork designs.
What’s new:
It now comes in six sizes, from Toddler (5.5-inch or 14-cm hand circumference) up to Adult Extra-Large (10.5-inch or 26.5-cm hand circumference). (The largest size is new.)
The thumb has been redesigned for better fit. Instead of tapering to the end as the original design did, it’s now straight, with plenty of wiggle room for holding warmth.
The entire pattern has been redesigned for a more consistent fit in all sizes. This required spreadsheets and some really technical math. So much math. But now they all fit better—even the fleece liners.
It is now available in three formats: standard PDF format for printing, plus the two low-vision-accessible formats—ePUB and large print screen-reader-accessible PDF.
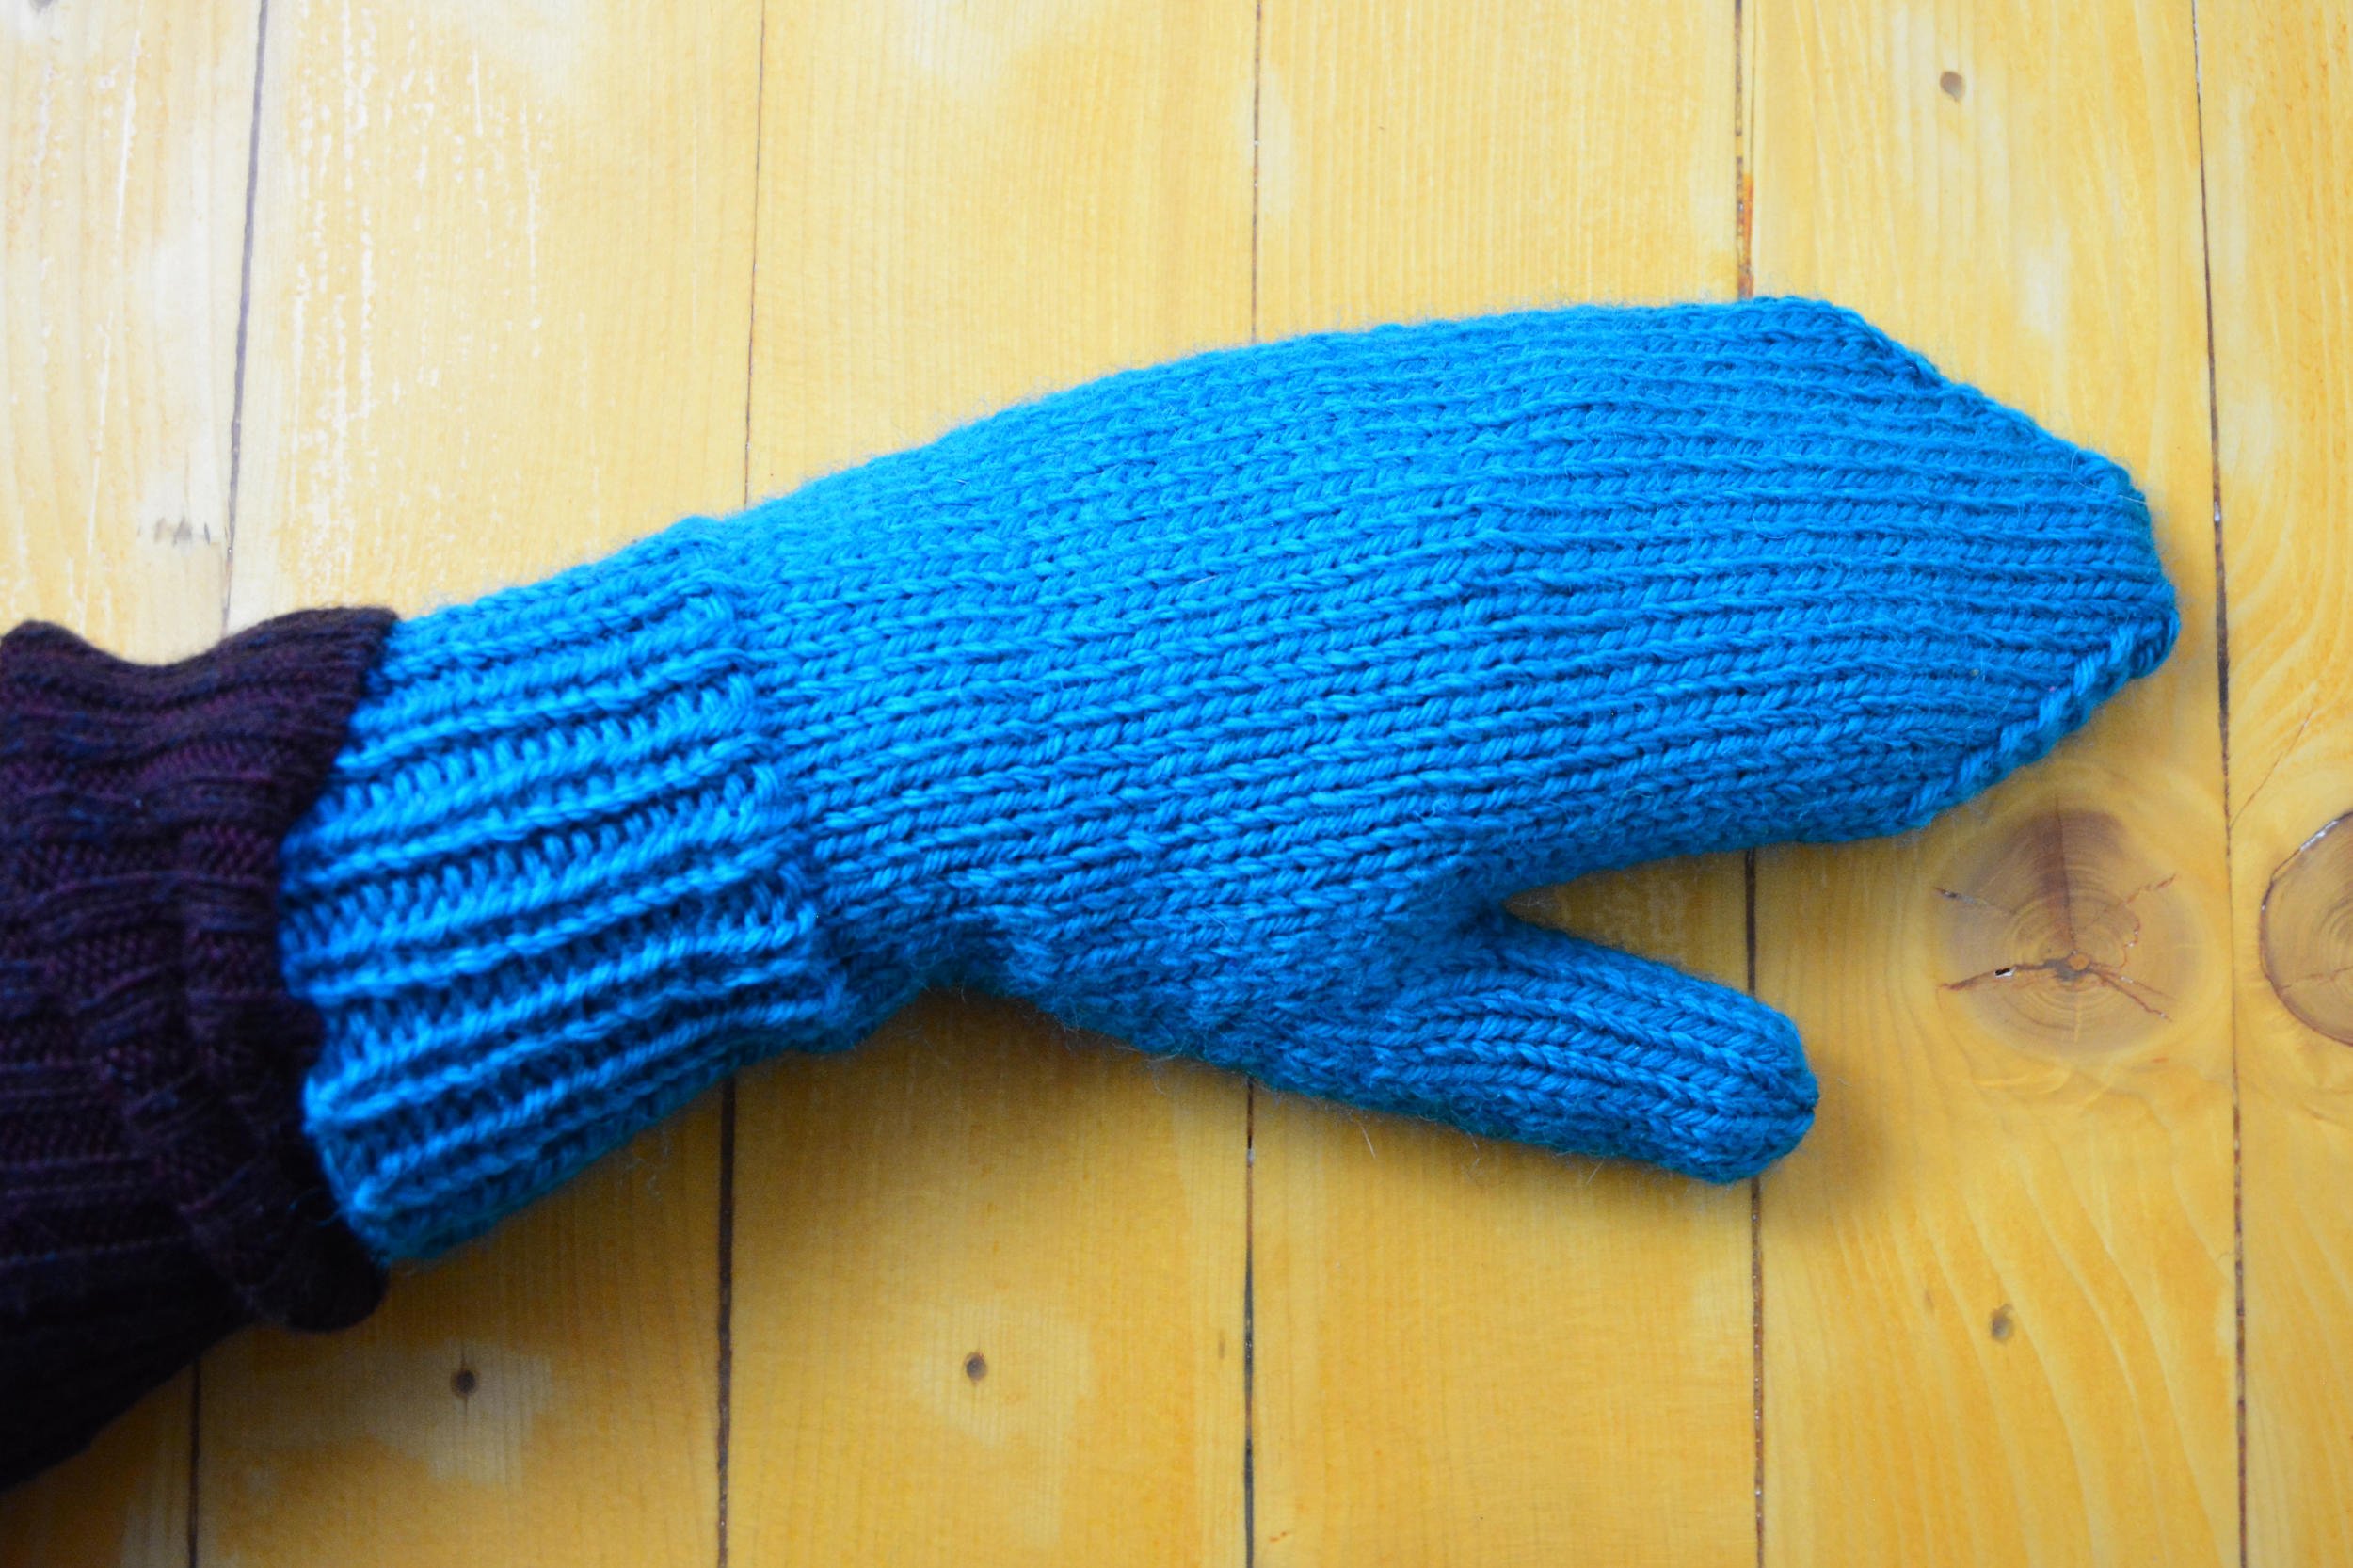
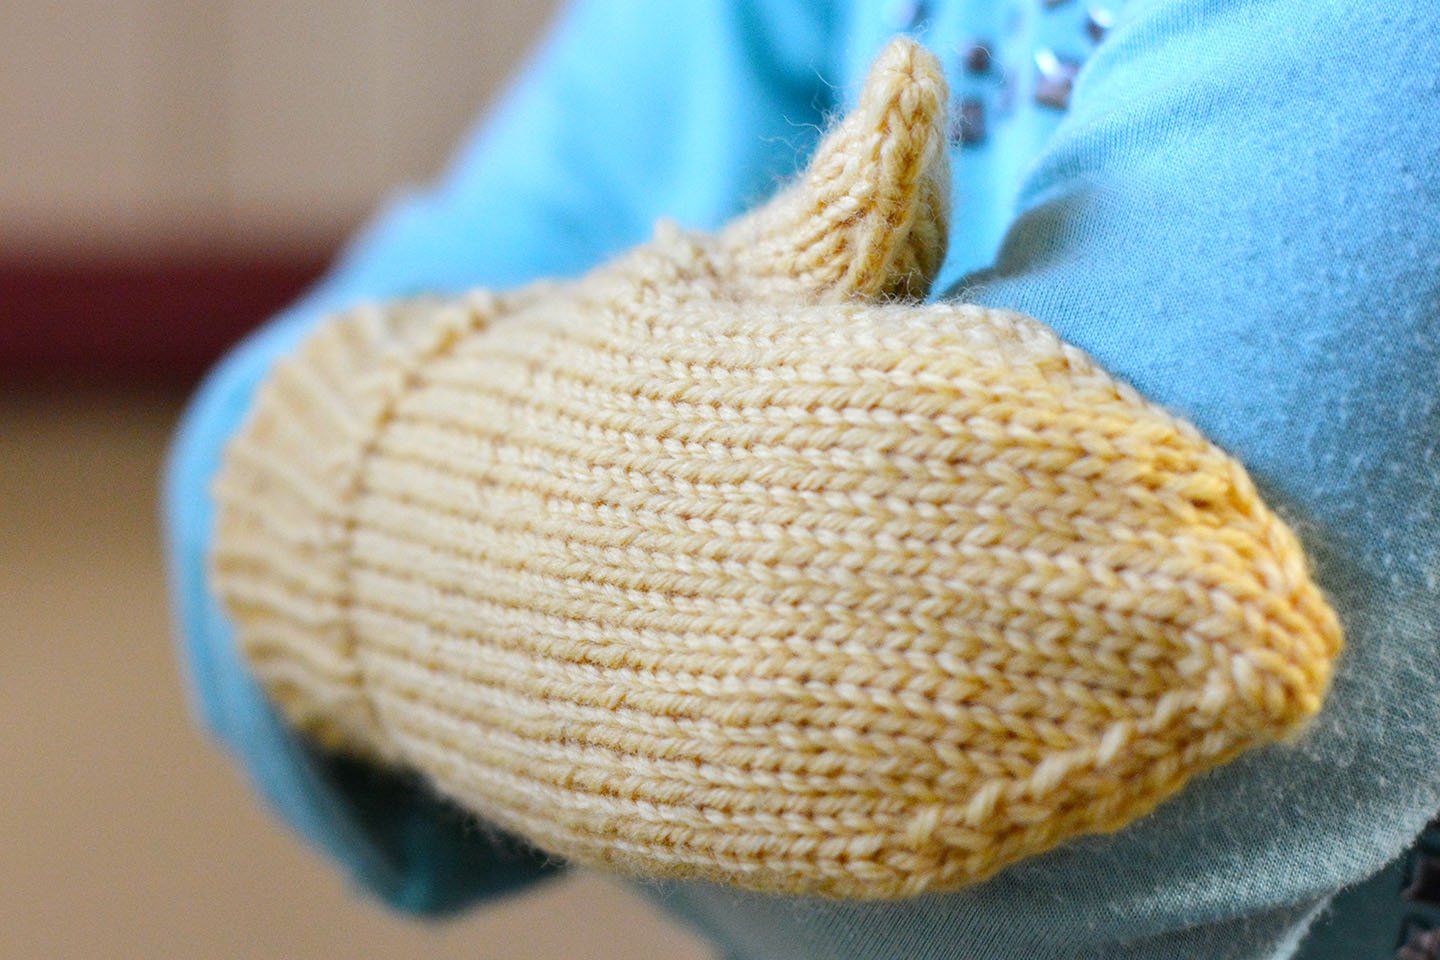
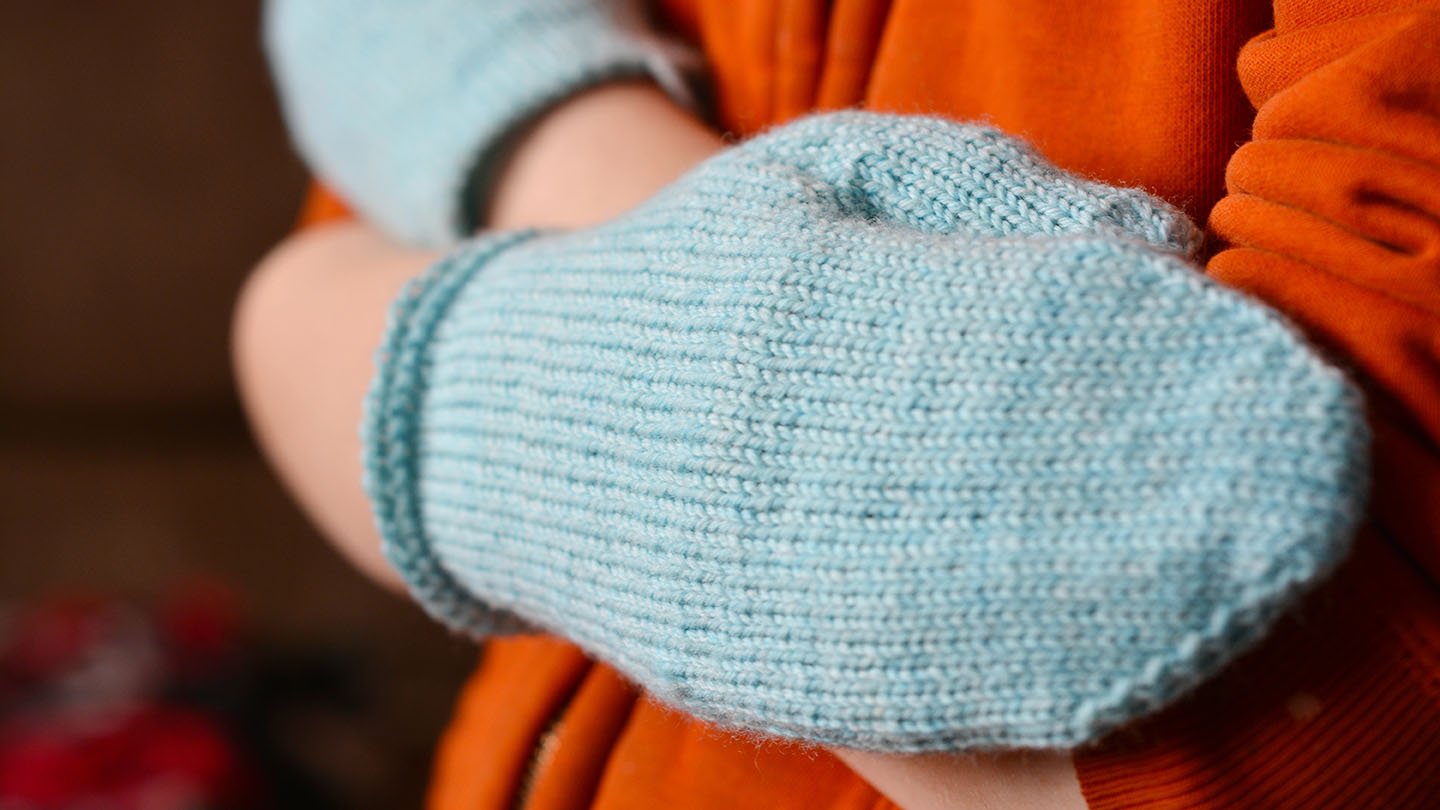
The new bulky weight mittens in Knit Picks Wool of the Andes Superwash Bulky will be a much better fit with these new thumbs. The top pair in teal are Size 3 (Junior & Ladies Small), and the bottom ones in green are Size 2 (Child).Here’s one of the teal ones one my hand. (They are slightly too small for me, but they would still work.)
That’s not all! While I was at it, I learned a whole new software program so I could create a decent schematic and all-new digital sewn liner patterns! (I don’t know if you’ve ever wanted a mitten pattern with a schematic, but after you get one, you’ll wonder how you lived without it! Probably. Heehee.)
I actually learned two software programs while formatting this pattern—the design software for the graphics, and a publishing format software to lay out the Standard PDF pattern in a more professional (and easier to read) layout than I’ve ever been able to achieve before. (No one may notice the difference but me, but I’m celebrating anyway.)
However, here’s one more thing that didn’t change: most of the photos. Many of the sample photos for this pattern feature the old thumb design. I’ve tried to label these as such in the pattern where it’s obvious, but I didn’t want you to be confused, as I didn’t want to take two years to republish this pattern while I sample knit every size.
The new thumbs on the bulky mittens above? All the thumbs are like that now.
But the rest of these images? They have the old thumbs and feature the old Biggo yarn. Just so you know. But still, they’re so bright and cheerful to look at, they always make me smile.
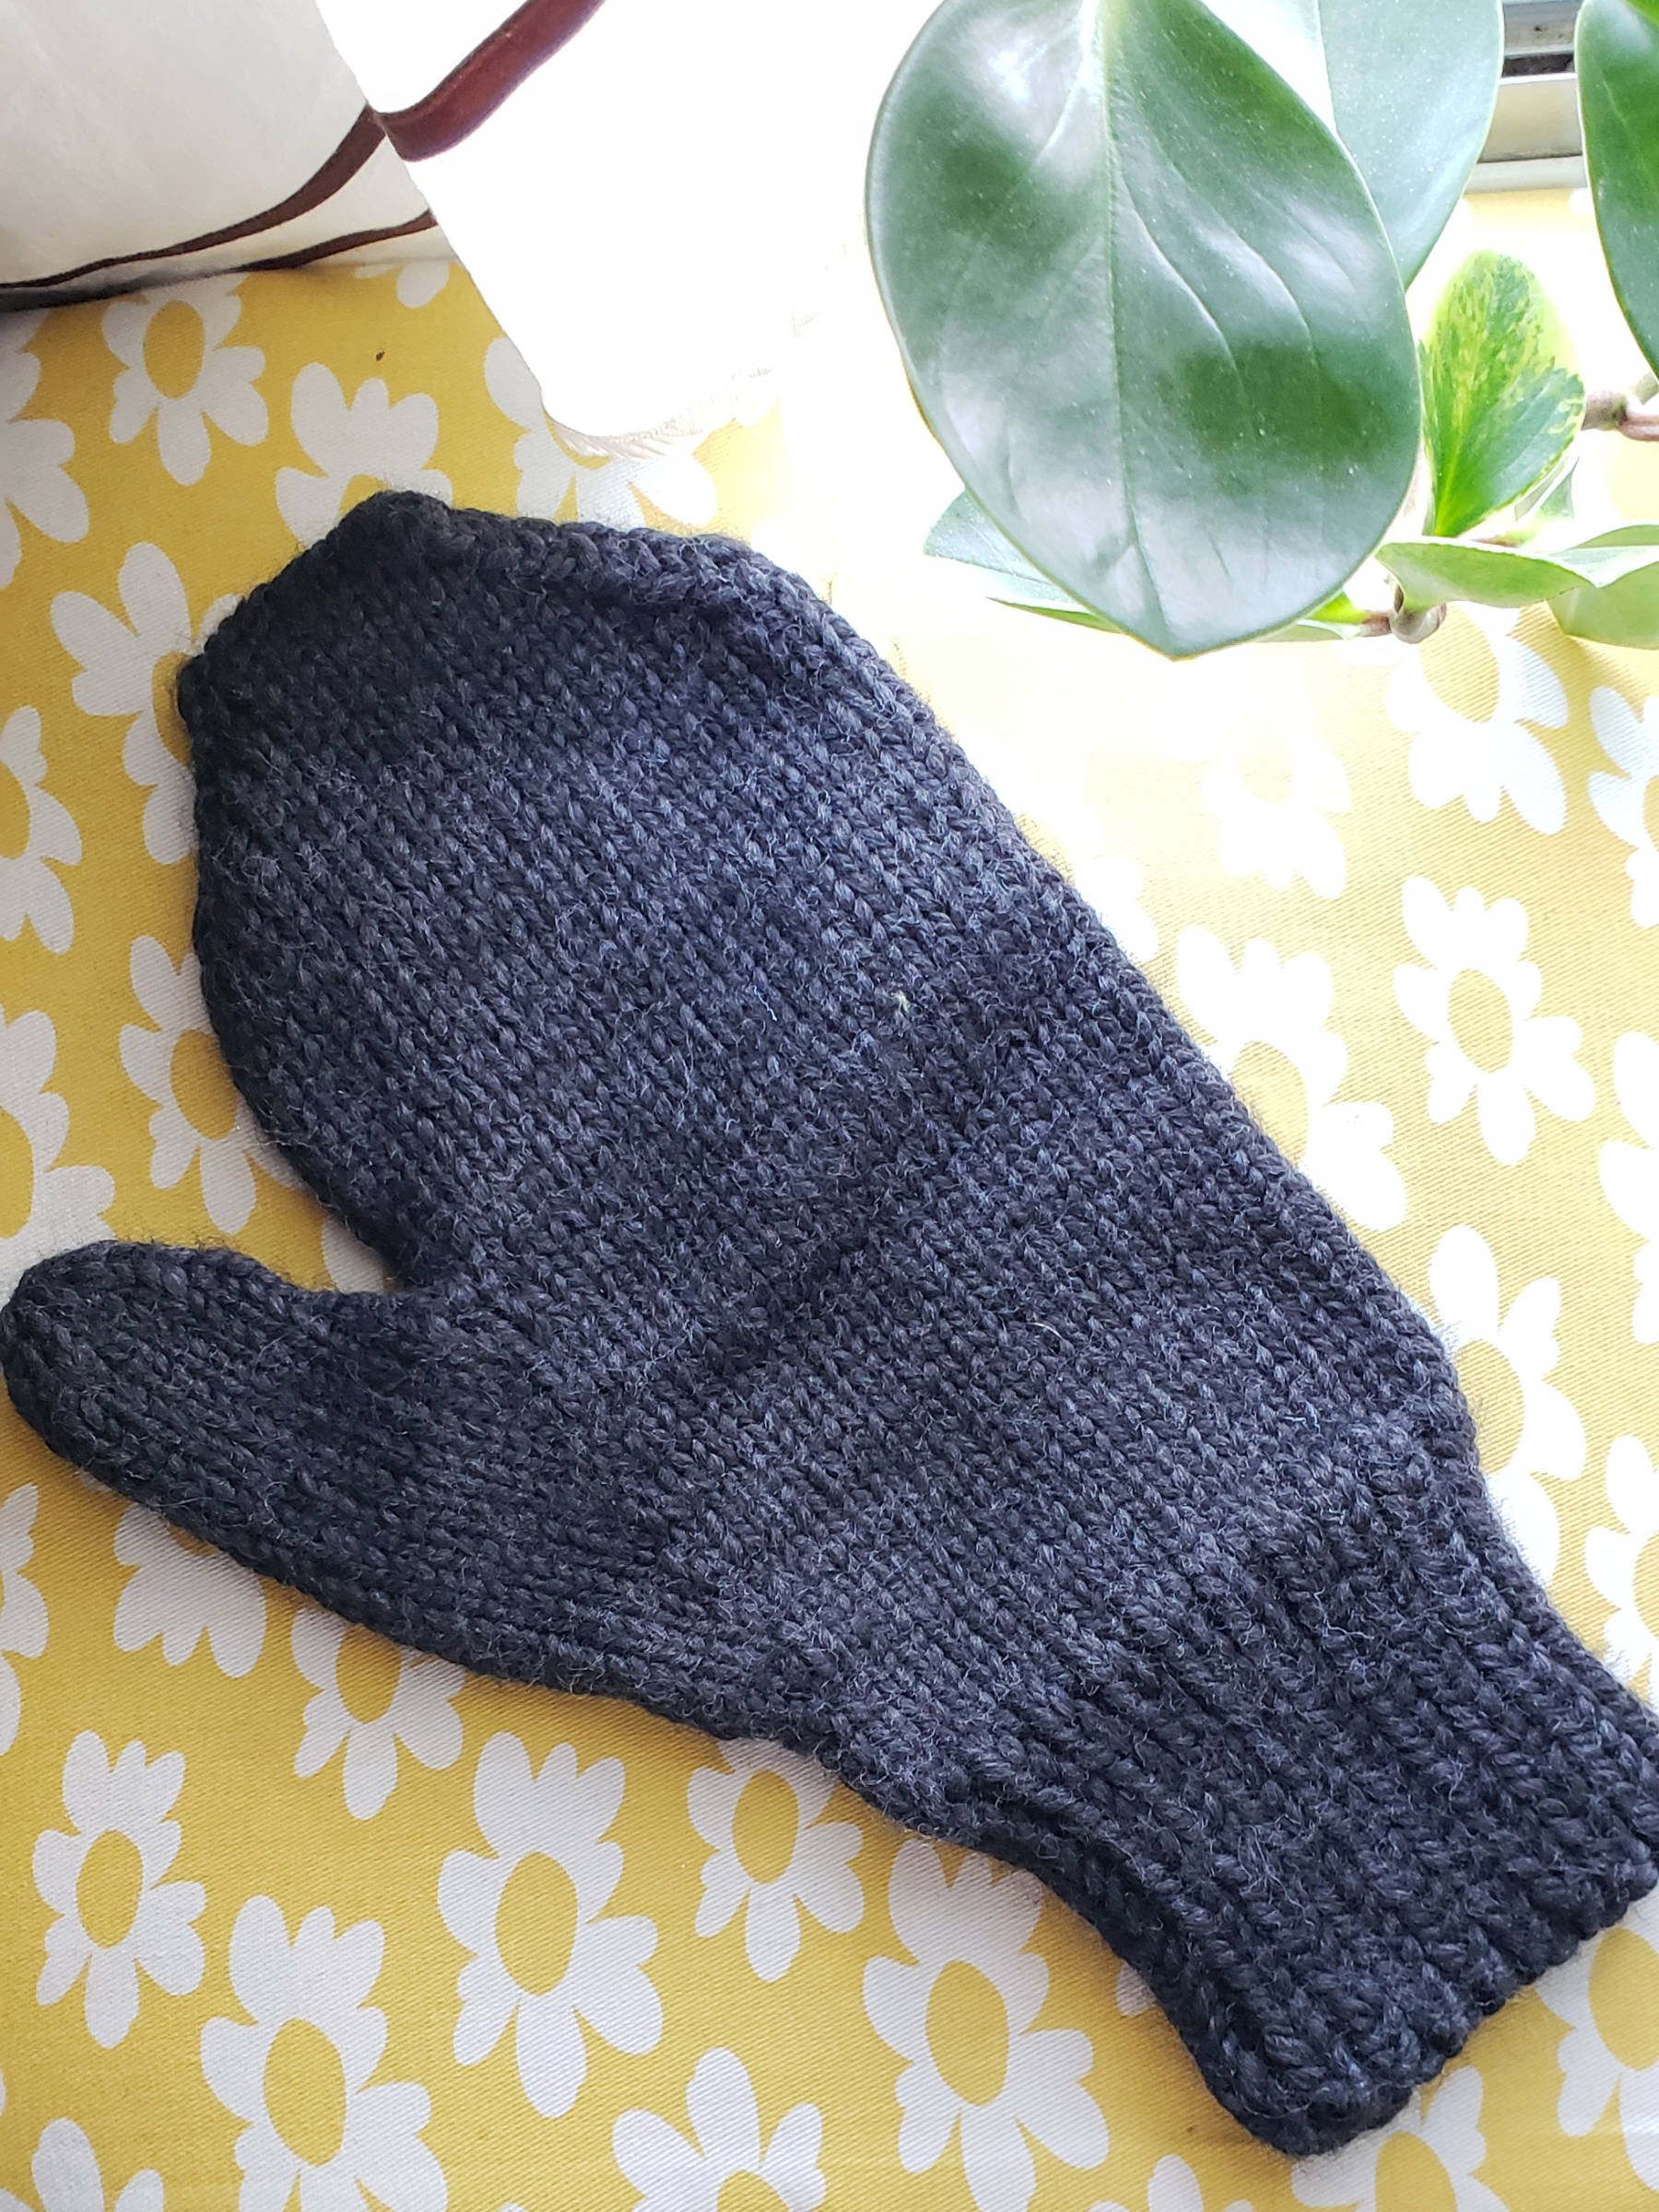
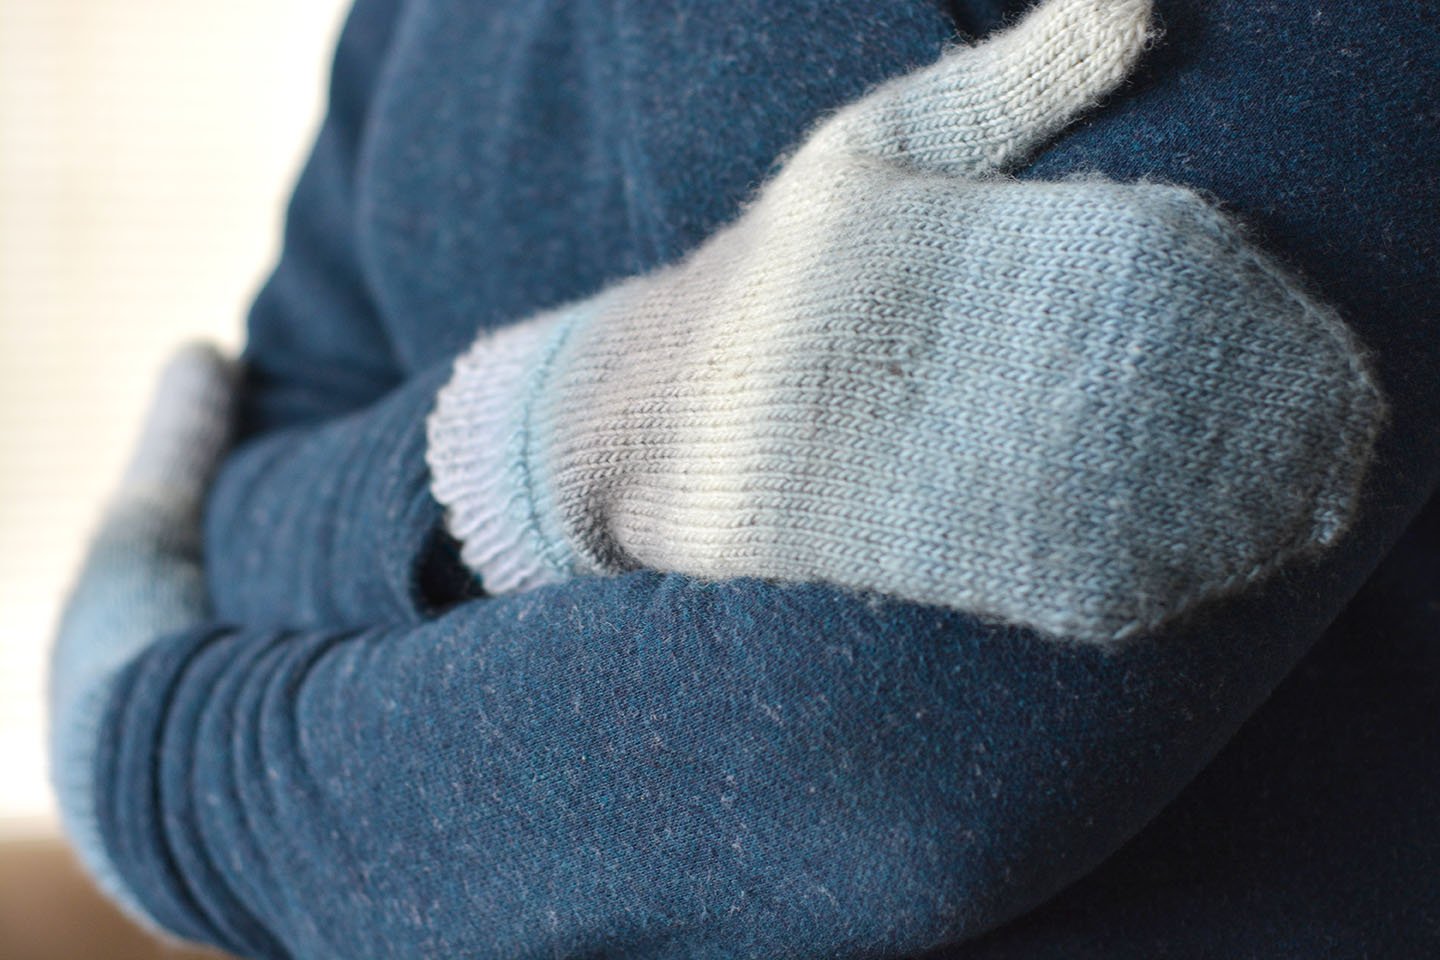
Bulky mitten in Size 5 (Adult Large) with long cuff (and old thumb design).Worsted mitten in Size 1 (Toddler) with long cuff (and old thumb). Yarn: Knit Picks Wool of the Andes Worsted.Fingering-weight mitten in Size 3 (Junior and Adult Small) with a long cuff and old thumb. Also, I’m modeling these again, and again, they’re slightly too small, because they were a gift for a friend. I have really big hands for a woman! Yarn: Knit Picks Chroma in “Avalon”.Fingering-weight liner pattern in Size 2 (Child). Yarn: Knit Picks Stroll in “Wonderland Heather”. Pro tip: if you don’t sew in the liners, you’ll have more flexibility to dress for the weather—but kids are definitely going to have more to lose, so just sew theirs in, okay?
I’m introducing the bundle at 33% off. So make sure you snap it up before this deal goes away!
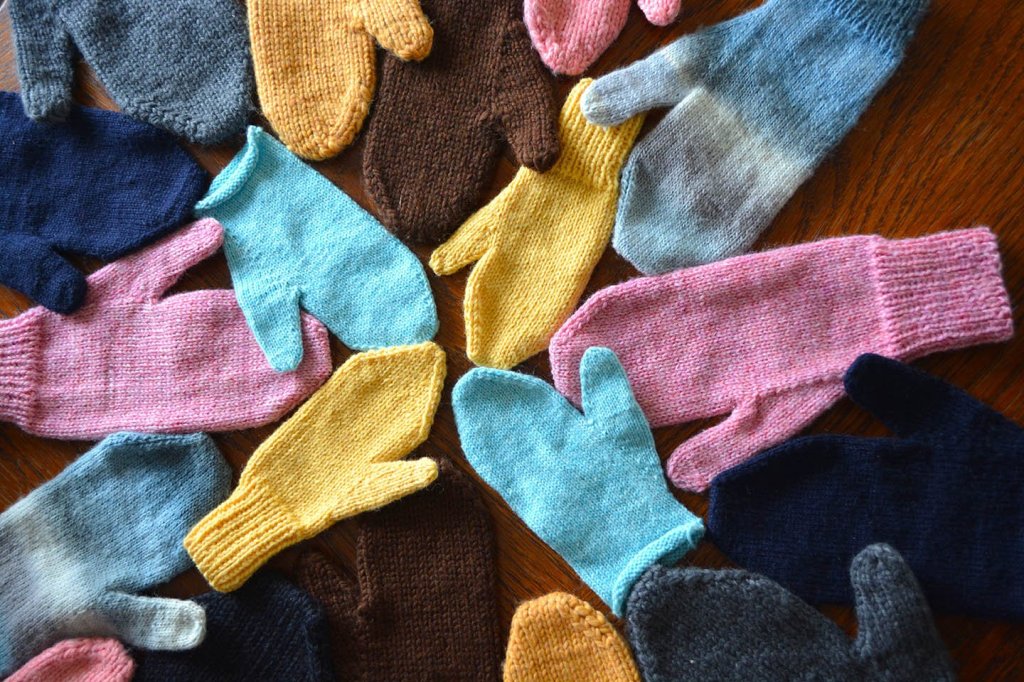
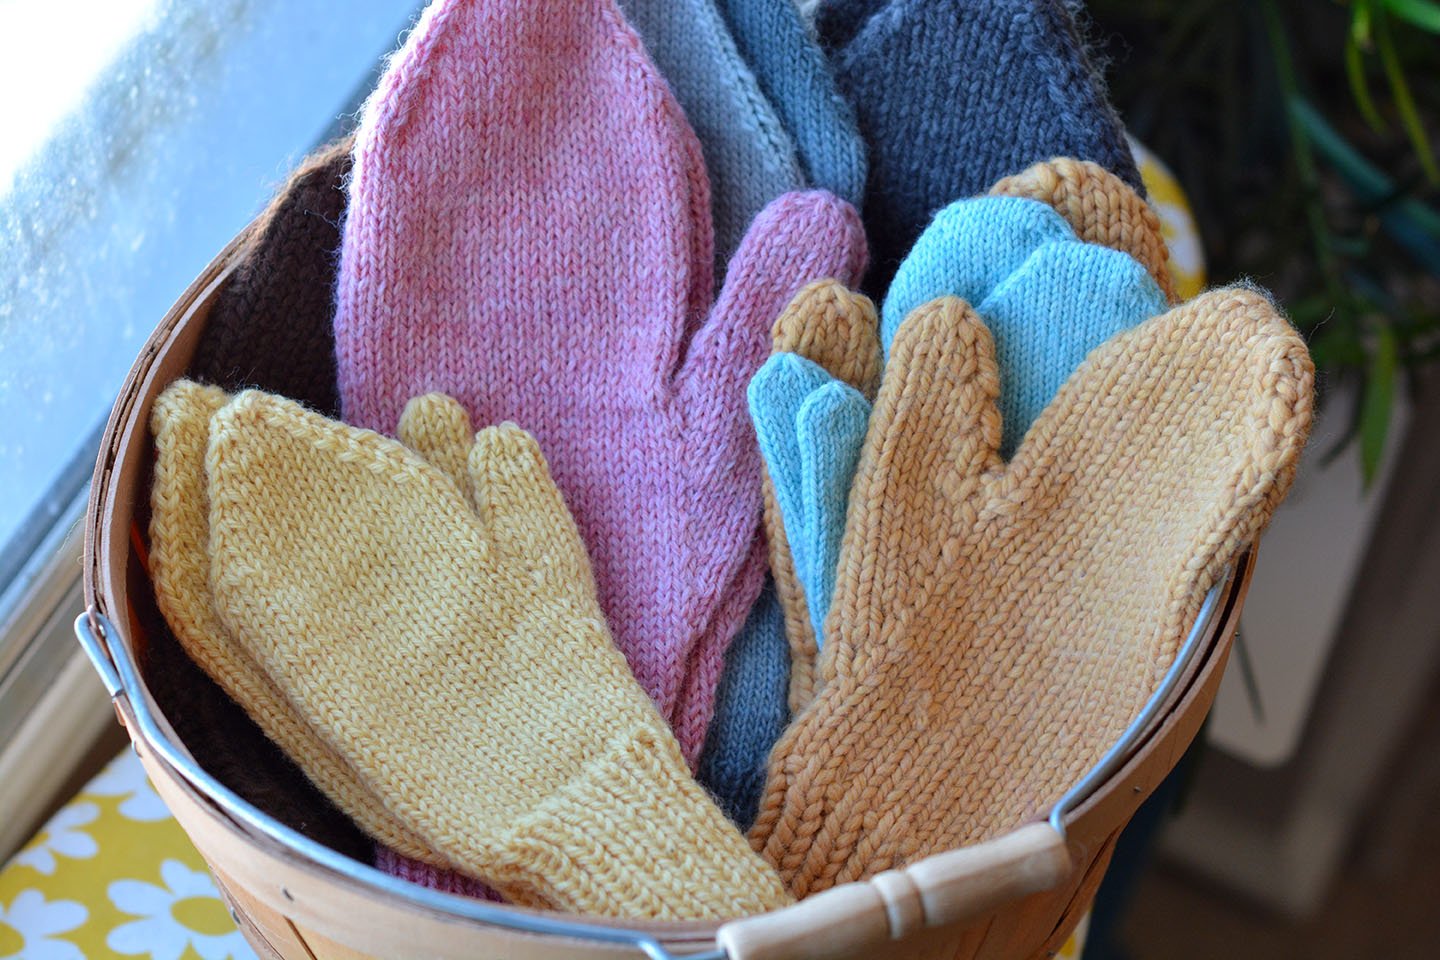
Just a basket o’ mittens, hangin’ out and bein’ chill.
I would love to hear your thoughts on this new pattern bundle! What will you do to make it your own? Are you looking forward to making some extra-warm mittens with liners?
Let me know in the comments!
Show off your Finished Objects!
Has one of my patterns helped you create some knitting magic? I would love a chance to showcase your amazing work to the rest of the community in an upcoming blog post and newsletter. To be featured, share your project in the new thread I just created in my Ravelry community or send me an email. Make sure to include “Permission to repost” so I know you’re okay with me sharing it here. (I’ll confirm with you before I use it and give credit.)
While you’re in my Ravelry community, please pop over to the Introductions thread and let me know who you are. It’s been pretty quiet in the community, and I’d love to hear from you. More than that, I can’t wait to see what you’ve been making!
After learning the basics of knitting (knit, purl, casting on, and binding off, which I cover in my free How to Knit course), learning how to shape fabric is the next step to unlocking knitting mastery. Fortunately, the techniques for how to increase and decrease are relatively easy to learn. What’s trickier is knowing which one to use in which context.
In my last post, I covered how Mastering Knitted Increases: M1, KFB, and YO. In this post, we’ll discuss the counterparts of increases—knitted decreases—and when and where to use each one.
Onward!
Directional Decreases: k2tog, ssk, p2tog, and ssp
The two most common knitted decreases are the knit two together (abbreviated k2tog) and slip-slip-knit (abbreviated ssk) (and their purl-side counterparts). Both of these decreases turn two columns of stitches into one by working through two stitches at once. Which decrease you choose is determined by which of the two columns you want to remain unbroken, and which you want to disappear.
The directional slant inherent in these decreases can be used to good effect to make some very interesting surface textures (often paired with increases to manage stitch count). They can also be used on their own or in pairs to shape fabric around body parts for good fit.
What Directional Decreases are Used For:
To create symmetrical paired decreases in sock toes, mitten fingers, or shoulder shaping. When the pairs occur very close together (within a few stitches), this is called raglan shaping.
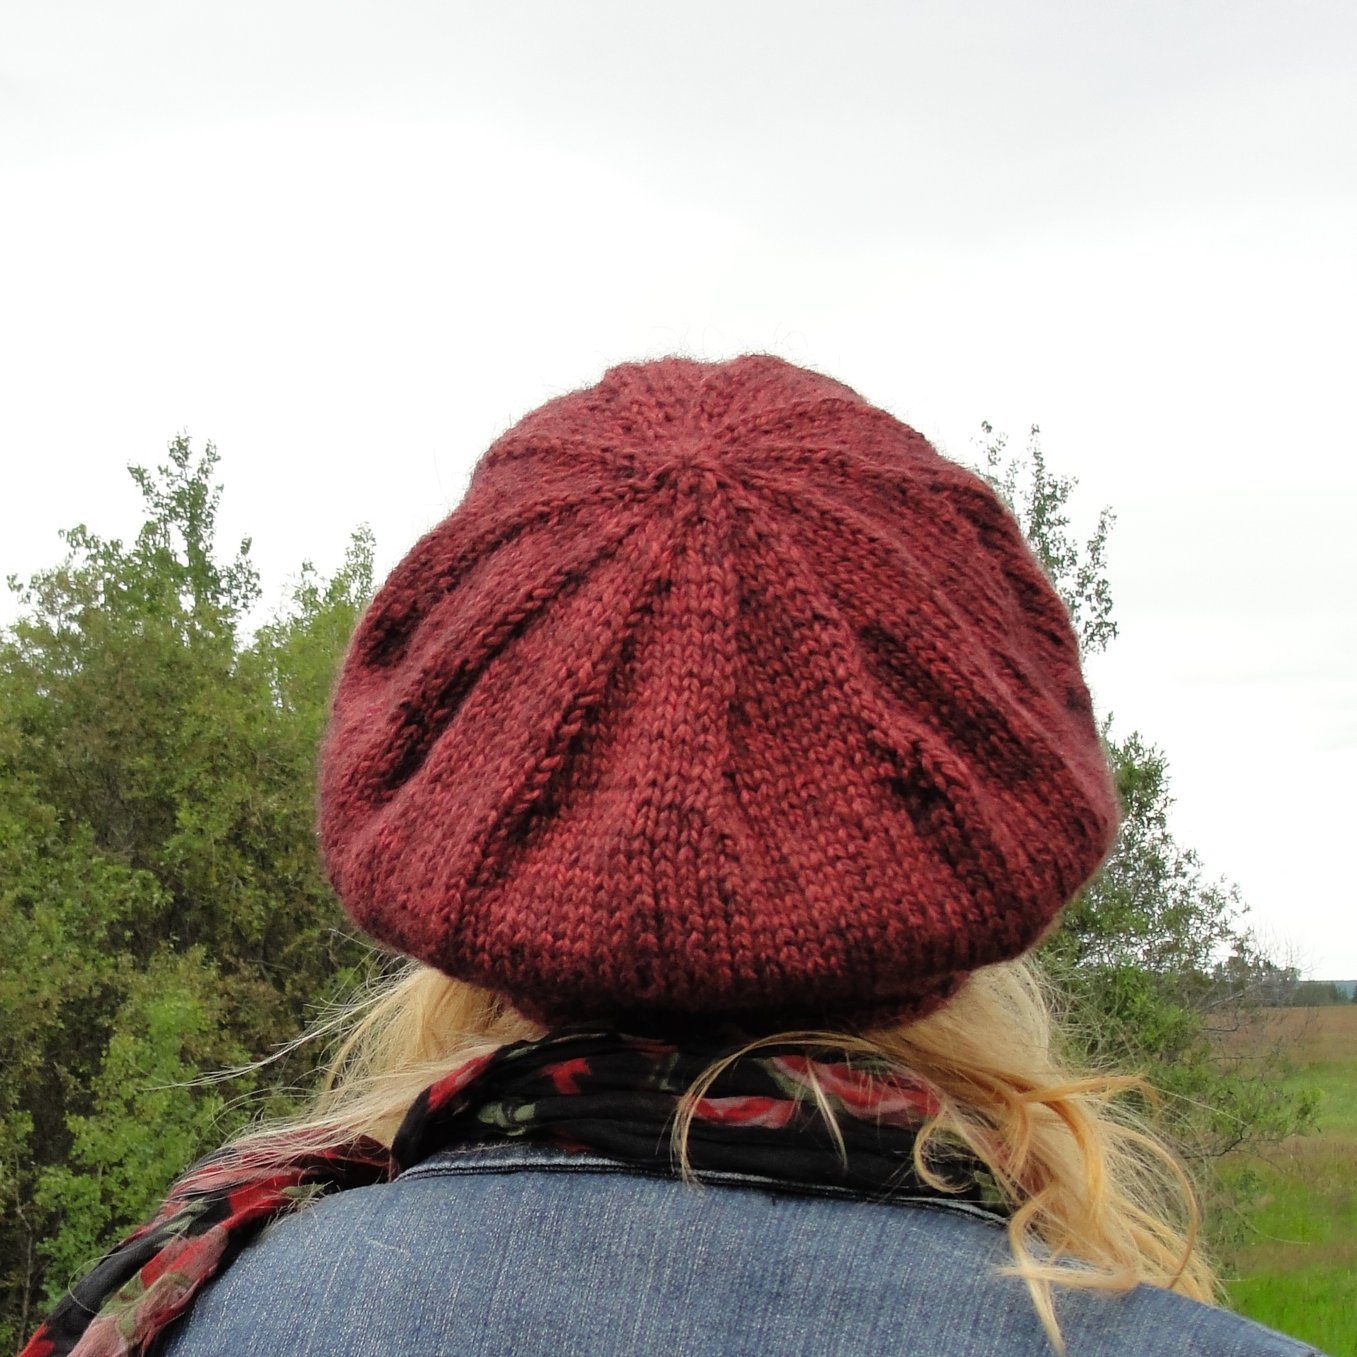
To shape hat crowns. (If only one type of decrease is used the effect will be a slight bias or swirl in the fabric.)
To balance out the extra stitches created by yarn overs in lace fabric.
To create fabrics that have a bias (paired with increases) or other surface textures without changing the shape of the fabric.
How to Make It:
k2tog (knit two together): Knit two stitches together as one. This results in the column on the trailing side* of your work (left column for righties, right column for lefties) remaining unchanged and the column on the leading side merging into it.
ssk (slip-slip-knit): Slip two stitches one at a time as if to knit (which changes the direction they’re lying on the needle so the trailing leg is in front), insert non-working needle tip through both stitches from trailing side, k2tog. This places the stitch from the leading side* column on top, so that column remains unbroken while the other one disappears.
p2tog (purl two together): Purl two stitches together as one. Places trailing-side column on top.
ssp (slip-slip-purl): Slip two stitches one at a time as if to knit, insert non-working needle tip through both stitches from trailing side, p2tog. Places leading-side column on top.
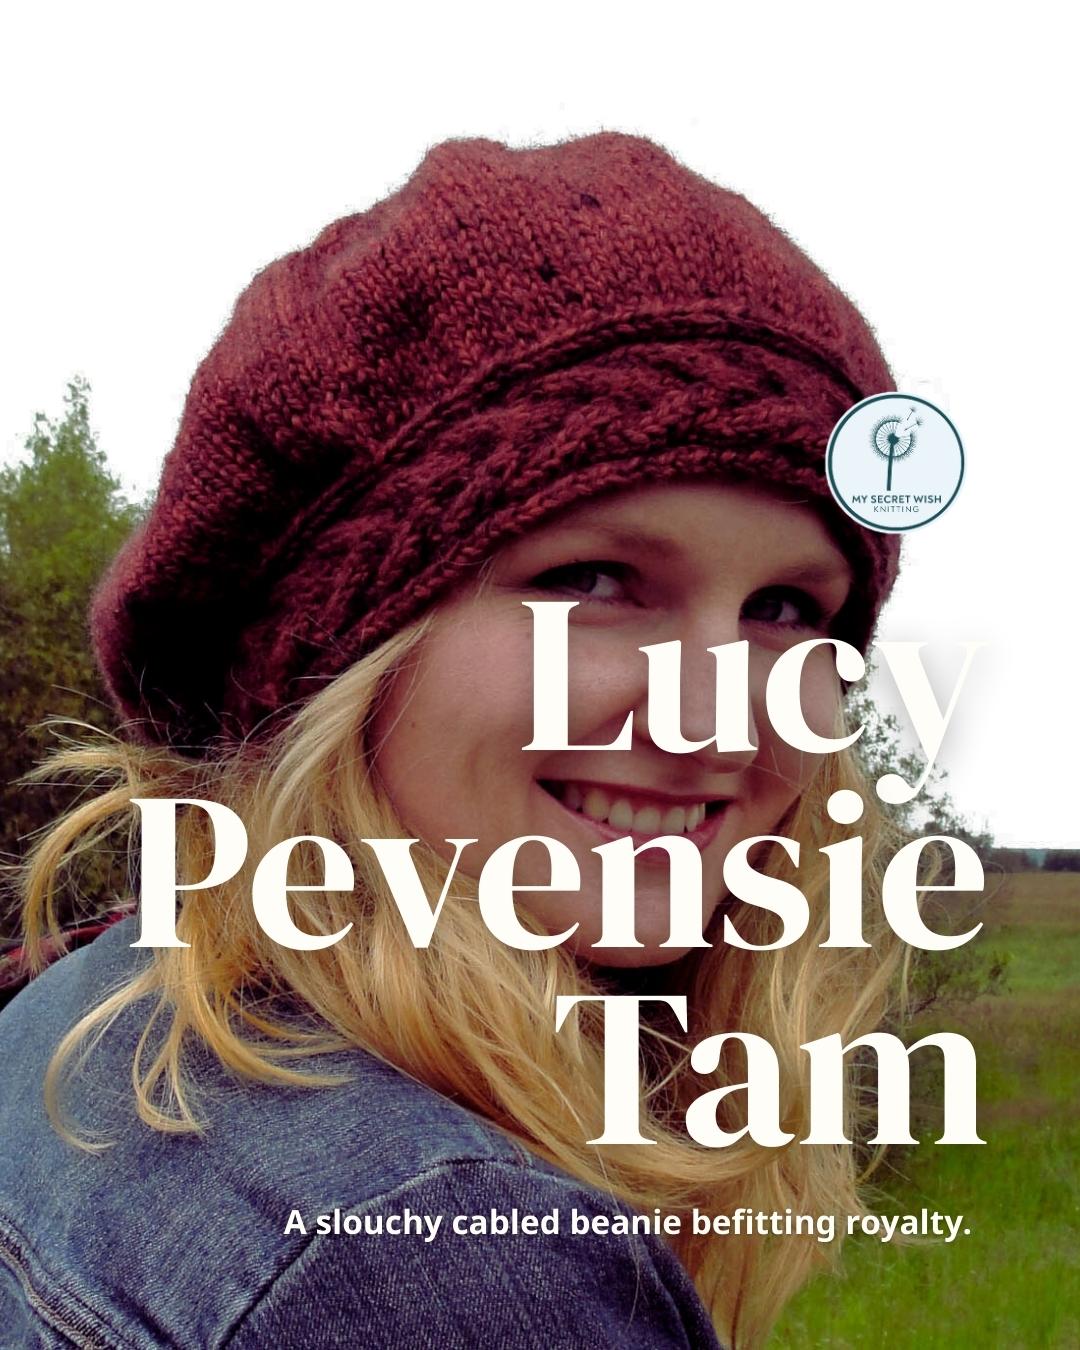
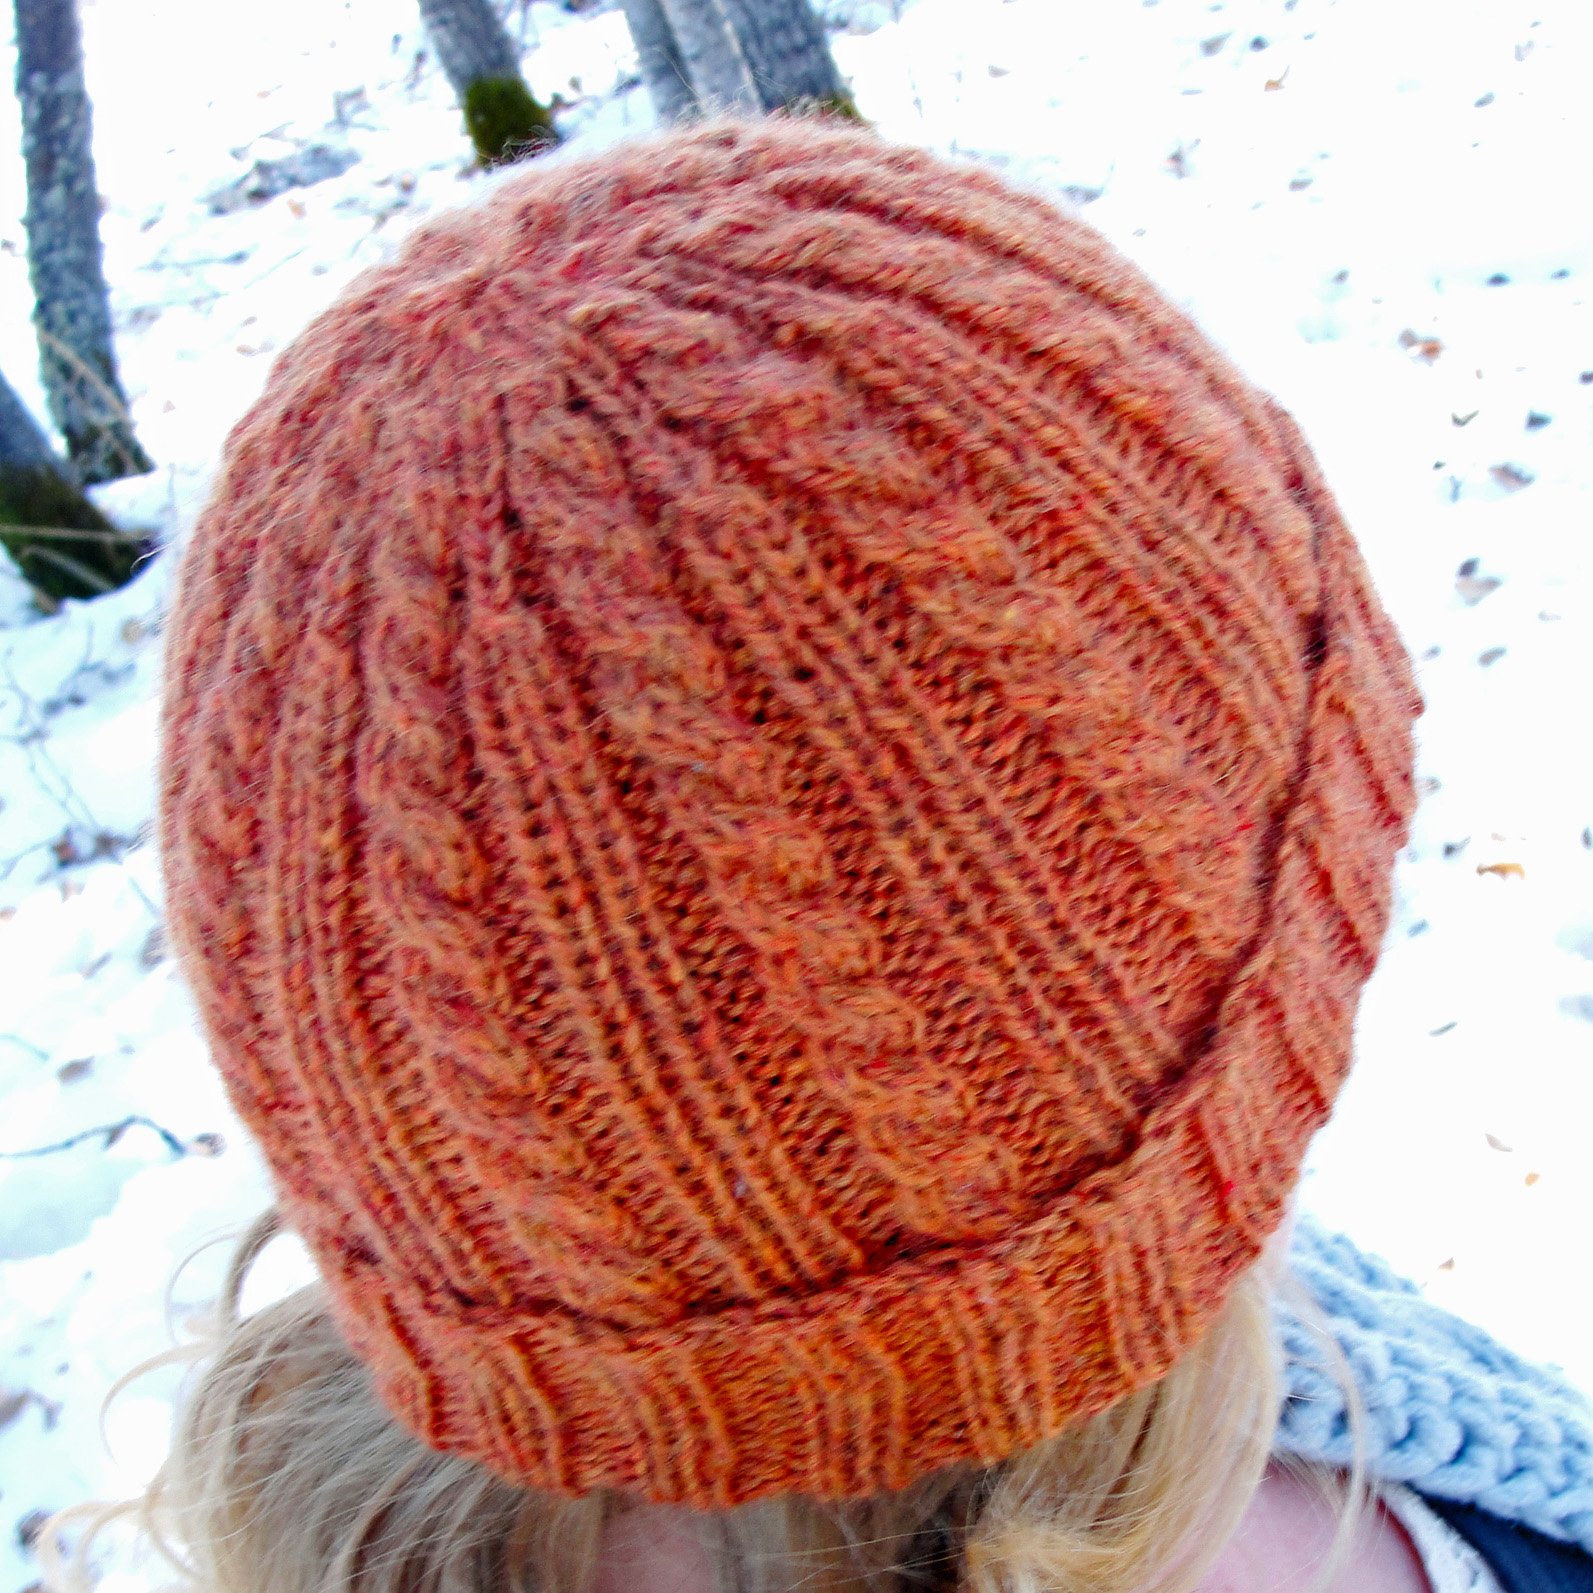
The toes of these cuff-down Just Plain Socks are shaped with paired k2tog and ssk decreases on either edge.The crown of this Brock Beanie is shaped using raglan pairs of k2tog and ssk, as well.The raglan decreases on the crown of the Killick Cap occur in six places for more rounded shaping.The crown of the Lucy Pevensie Tam is decreased using repeated k2tog stitches, which creates this slightly swirled effect.
Centred Decreases: CCD and DCD
What if you don’t want your fabric to slant in a single direction when you decrease, but you want something more centred?
One option is to use raglan decreases, as discussed above. But sometimes, decreasing three stitches into one is the preferred option. In that case, you’ll want to use a centred decrease, which brings the two columns on either side of it into the centre. Again, whether the side stitches lay on top or behind the centre column will create two entirely different looks.
Centre column on top: Central Chain Decrease (abbreviated CCD).
Centre column on the bottom: Double Central Decrease (abbreviated DCD).
What Centred Decreases are Used For:
Creating hat crowns that don’t shift as they decrease, but ascend straight up to the top.
Anywhere you want to decrease two stitches at once while creating an intriguing effect between them.
How to Make It:
CCD (central chain decrease): Slip two stitches together as if to knit, slip next stitch as if to knit, insert non-working needle into all three stitches from trailing side and knit together. This creates a prominent centre column, with the other two disappearing behind it.
DCD (double central decrease): Slip stitch as if to knit, k2tog, use non-working needle to pass the first slipped stitch back over the stitch just worked. This creates a less noticeable texture, with the side columns creating a little upside-down chevron over the centre column.
The Brennan Hat pattern uses a combination of k2tog & ssk decreases (in the cables) and DCD decreases (on the ribs) to slowly taper the stitch count to the top.The original design of the Just Plain Mittens pattern used multiple CCD decreases along the thumb, creating an interesting ridge. The fingers were shaped with raglan pairs of k2tog and ssk. (Note: This pattern has been re-released with a different thumb design.)
Binding Off (BO)
Unless you’re still working on your very first swatch or project, you likely already know at least the Basic Bind Off. Of course, there are many other bind offs you can use to finish your work, but when it comes to decreasing stitches for fabric shaping, the Basic Bind Off is the most common.
What Bind Off Decreases are Used For:
Finishing a fabric piece so the stitches don’t unravel.
Creating shaping at the shoulder, underarm, or anywhere else you need a few stitches finished perpendicular to the fabric columns for structure or shape purposes.
How to Make It:
Work two stitches in pattern. Using non-working needle, insert tip into first stitch worked and pass it over the second stitch worked and over the end of the needle. (One stitch bound off.) Work another stitch, then bind one off in a similar manner for as many stitches as you need to bind off.
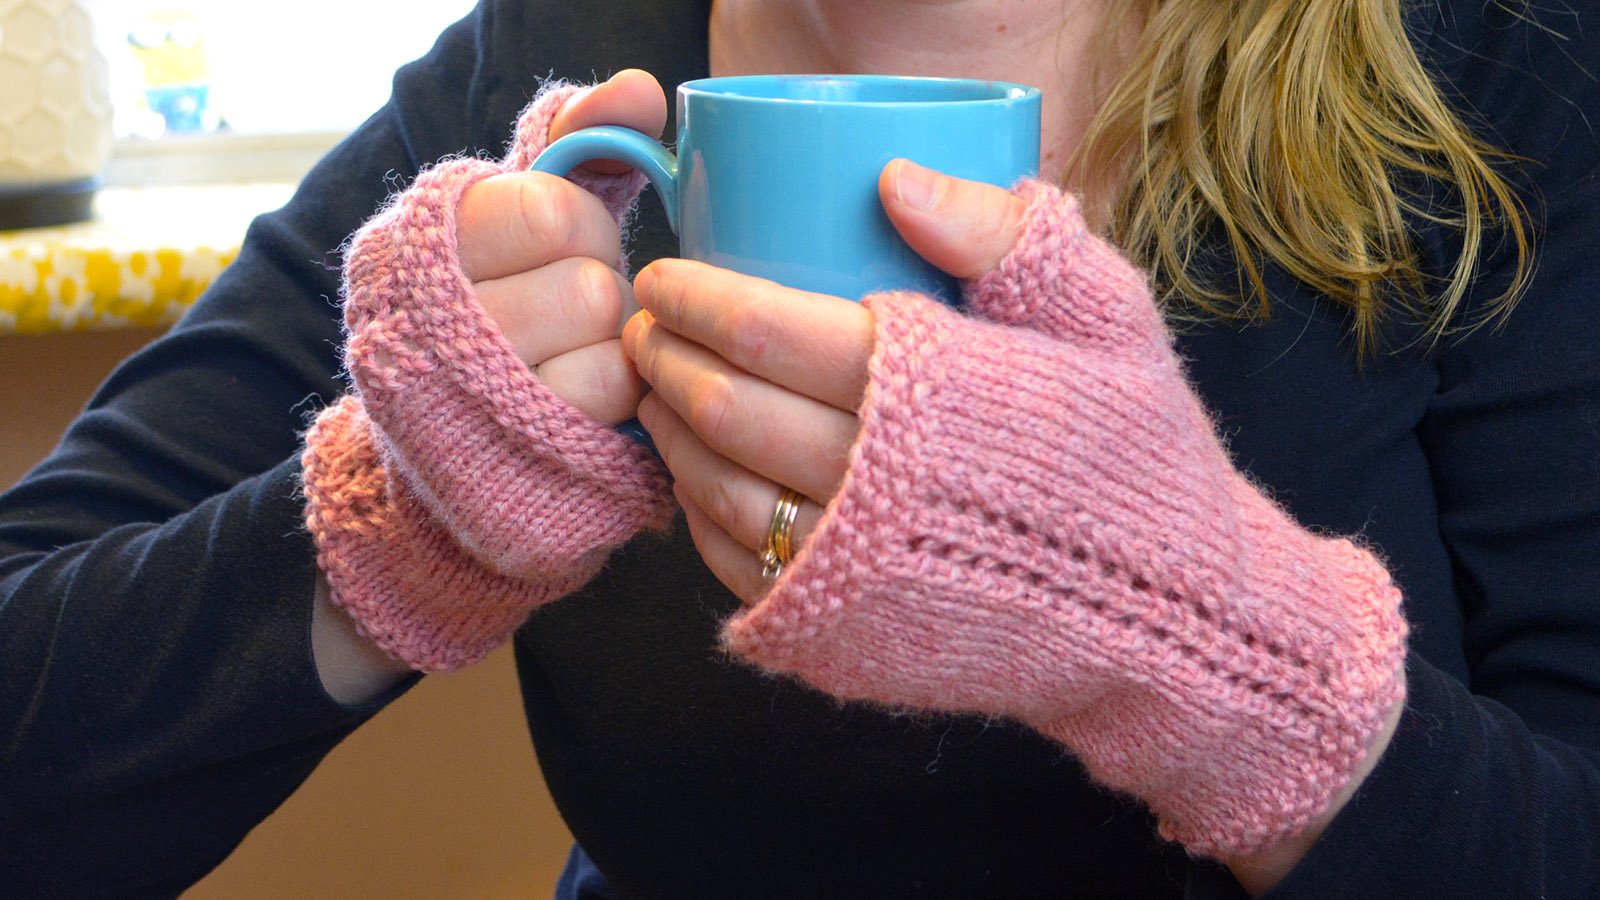
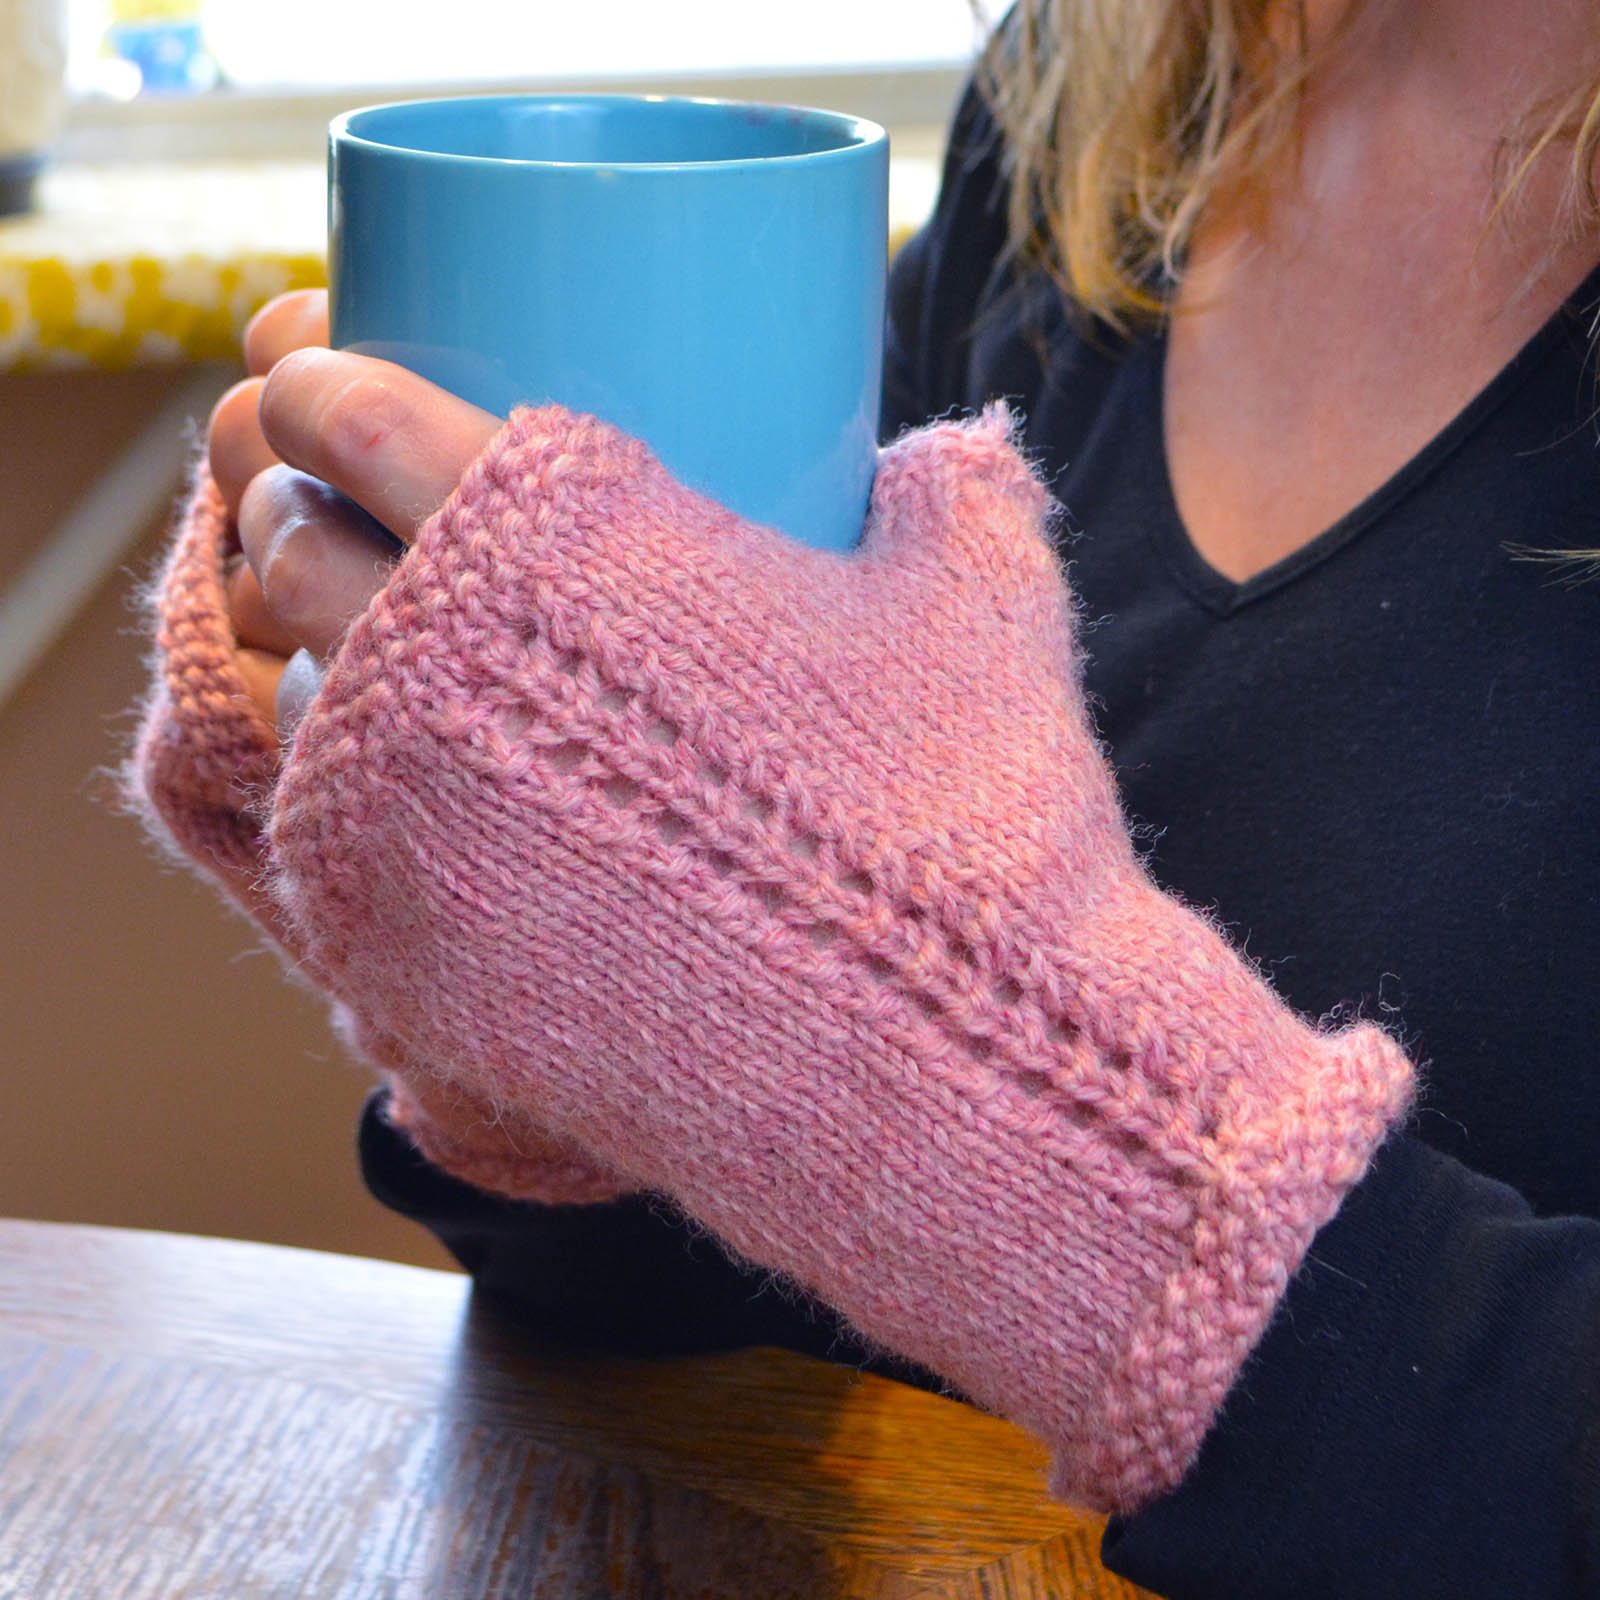
These Secret Garden Fingerless Mittens are bound off at the top using Basic Bind Off. The centre column is created using yarn overs paired with ssk and k2tog decreases.
Keeping Track
Like increases, decreases often occur at regular intervals across rows or columns.
One way to keep track of where you need to increase or decrease is to put a stitch marker right before or after the required stitch (depending on which way it leans).
To keep track of rows between decreases, you could use a row counter or make tally marks on your pattern or another paper.
However, it can be helpful to be able to recognize what your decreases look like at a glance, and what counts as the “last row decreased.” For help with this, check out Recognizing Increases and Decreases.
And be sure to check out my shop to pick up any of the patterns mentioned in this post that you find interesting.
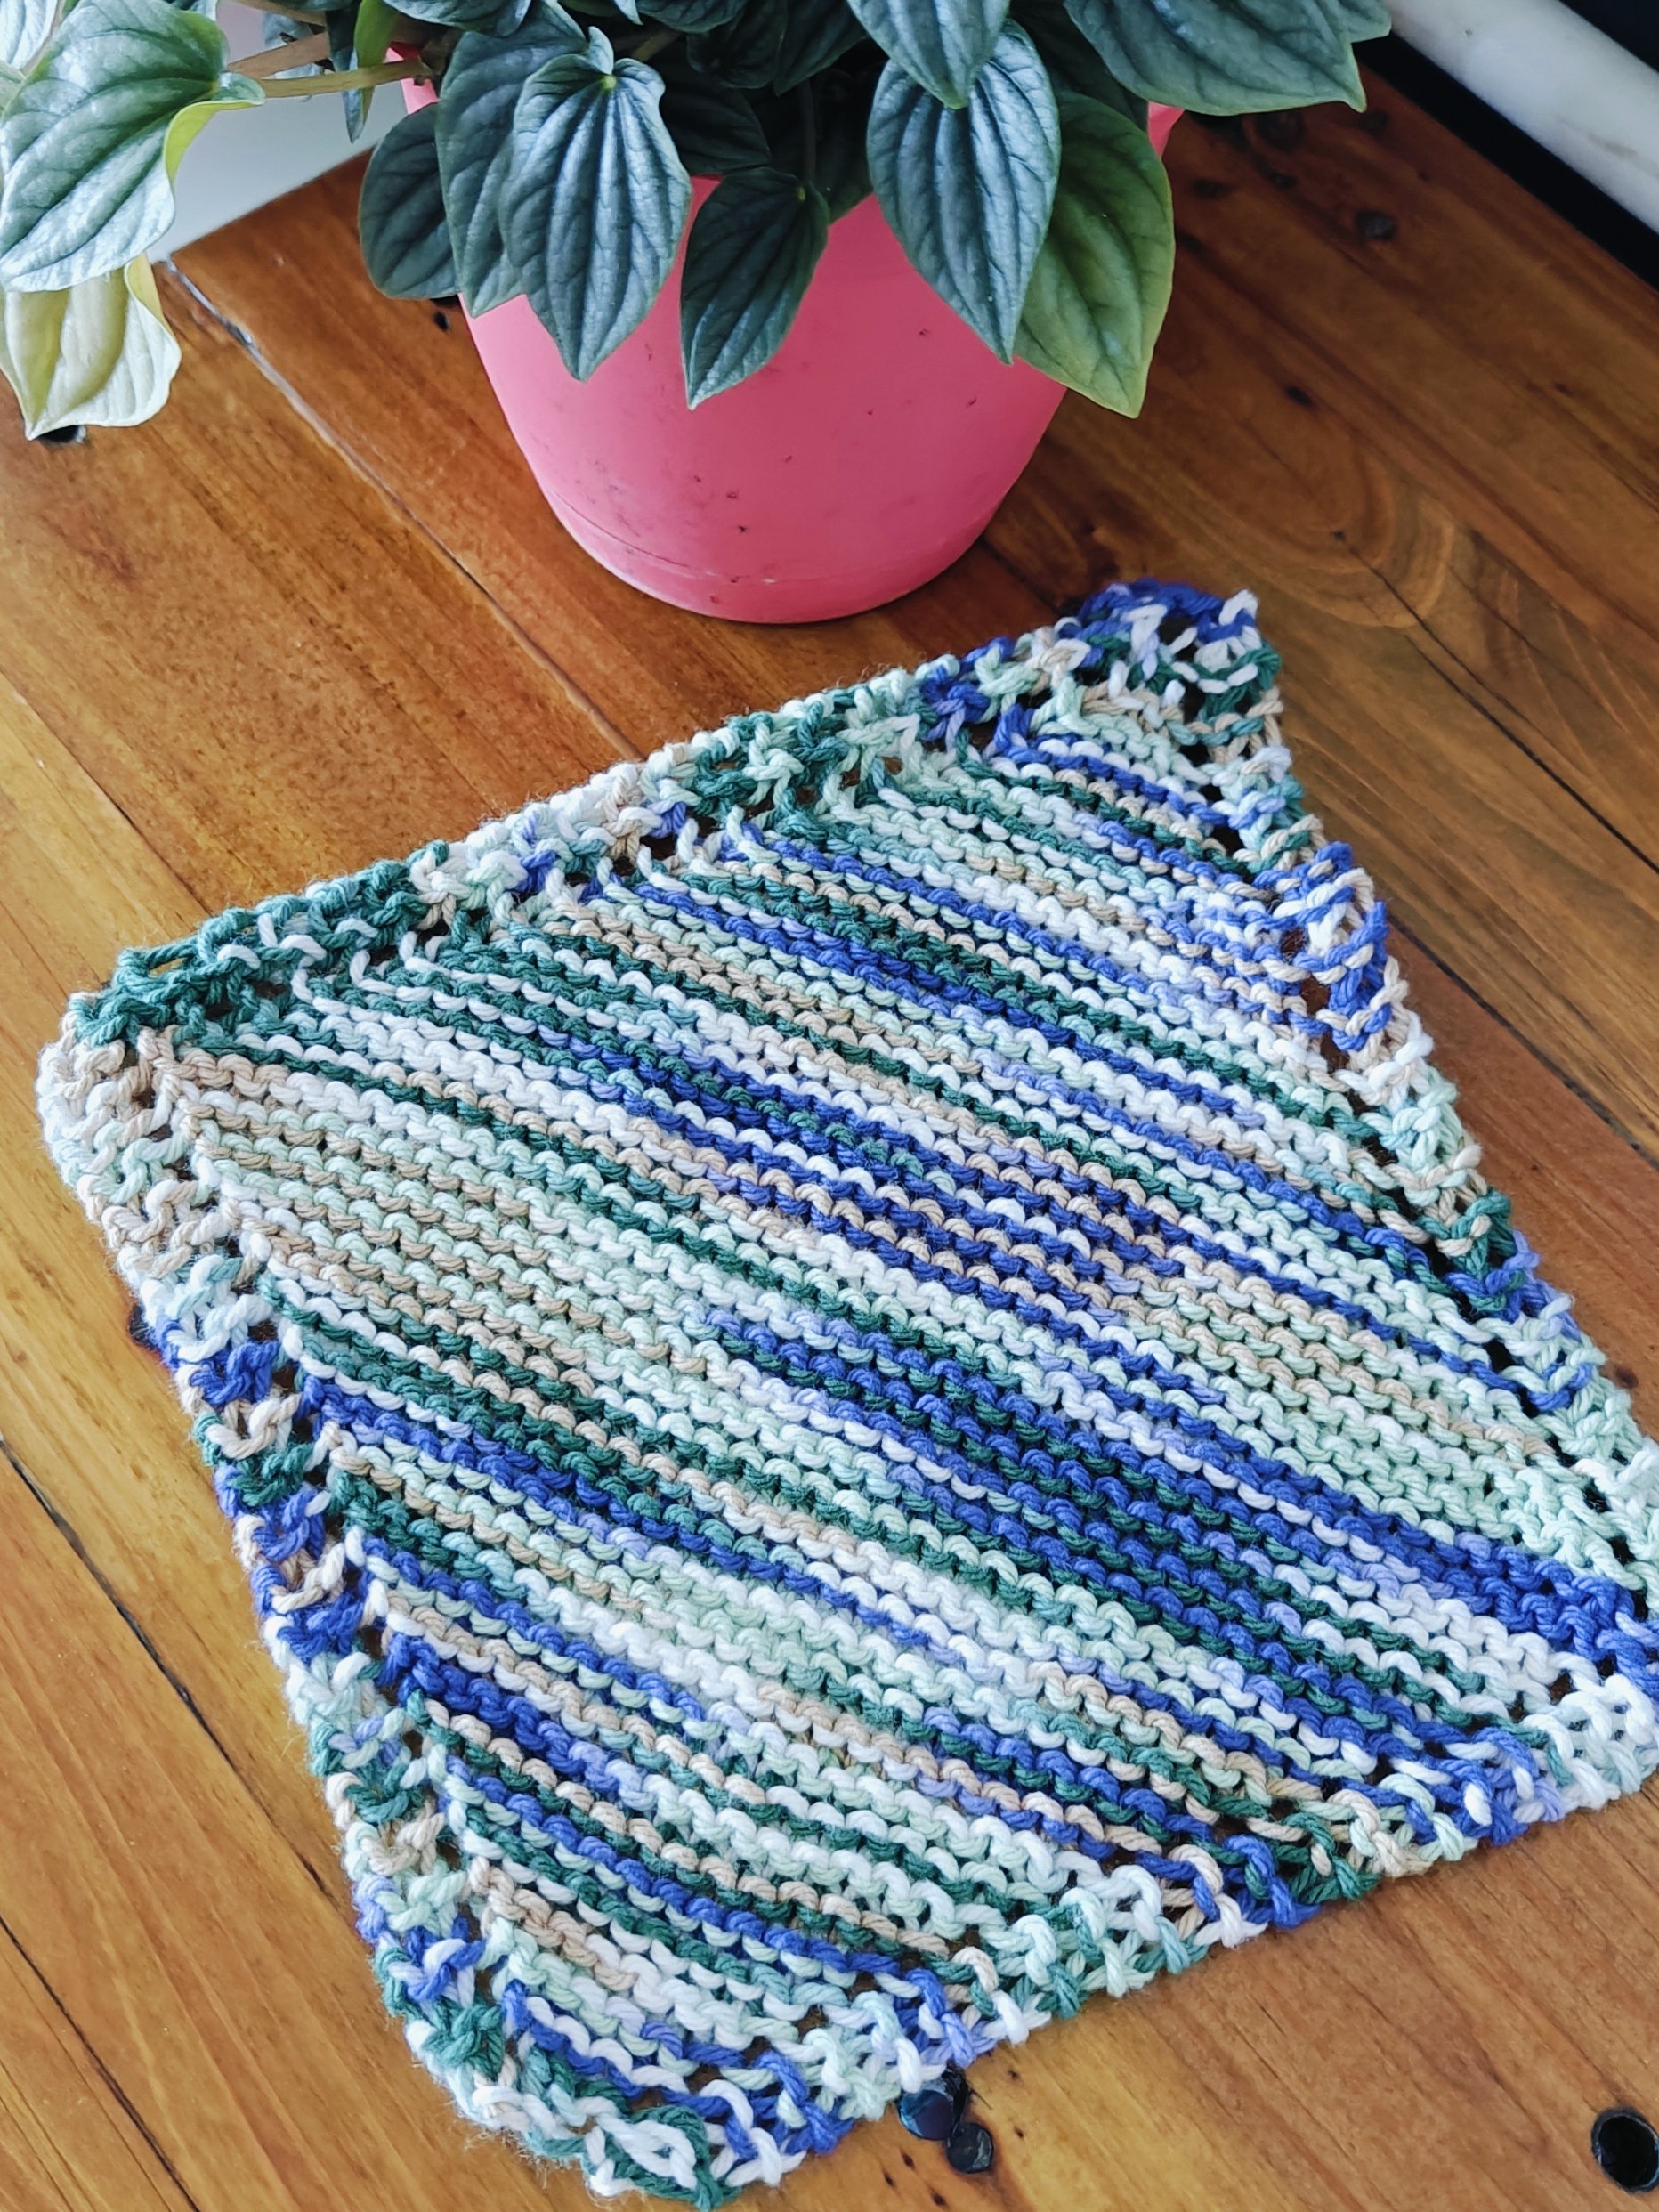
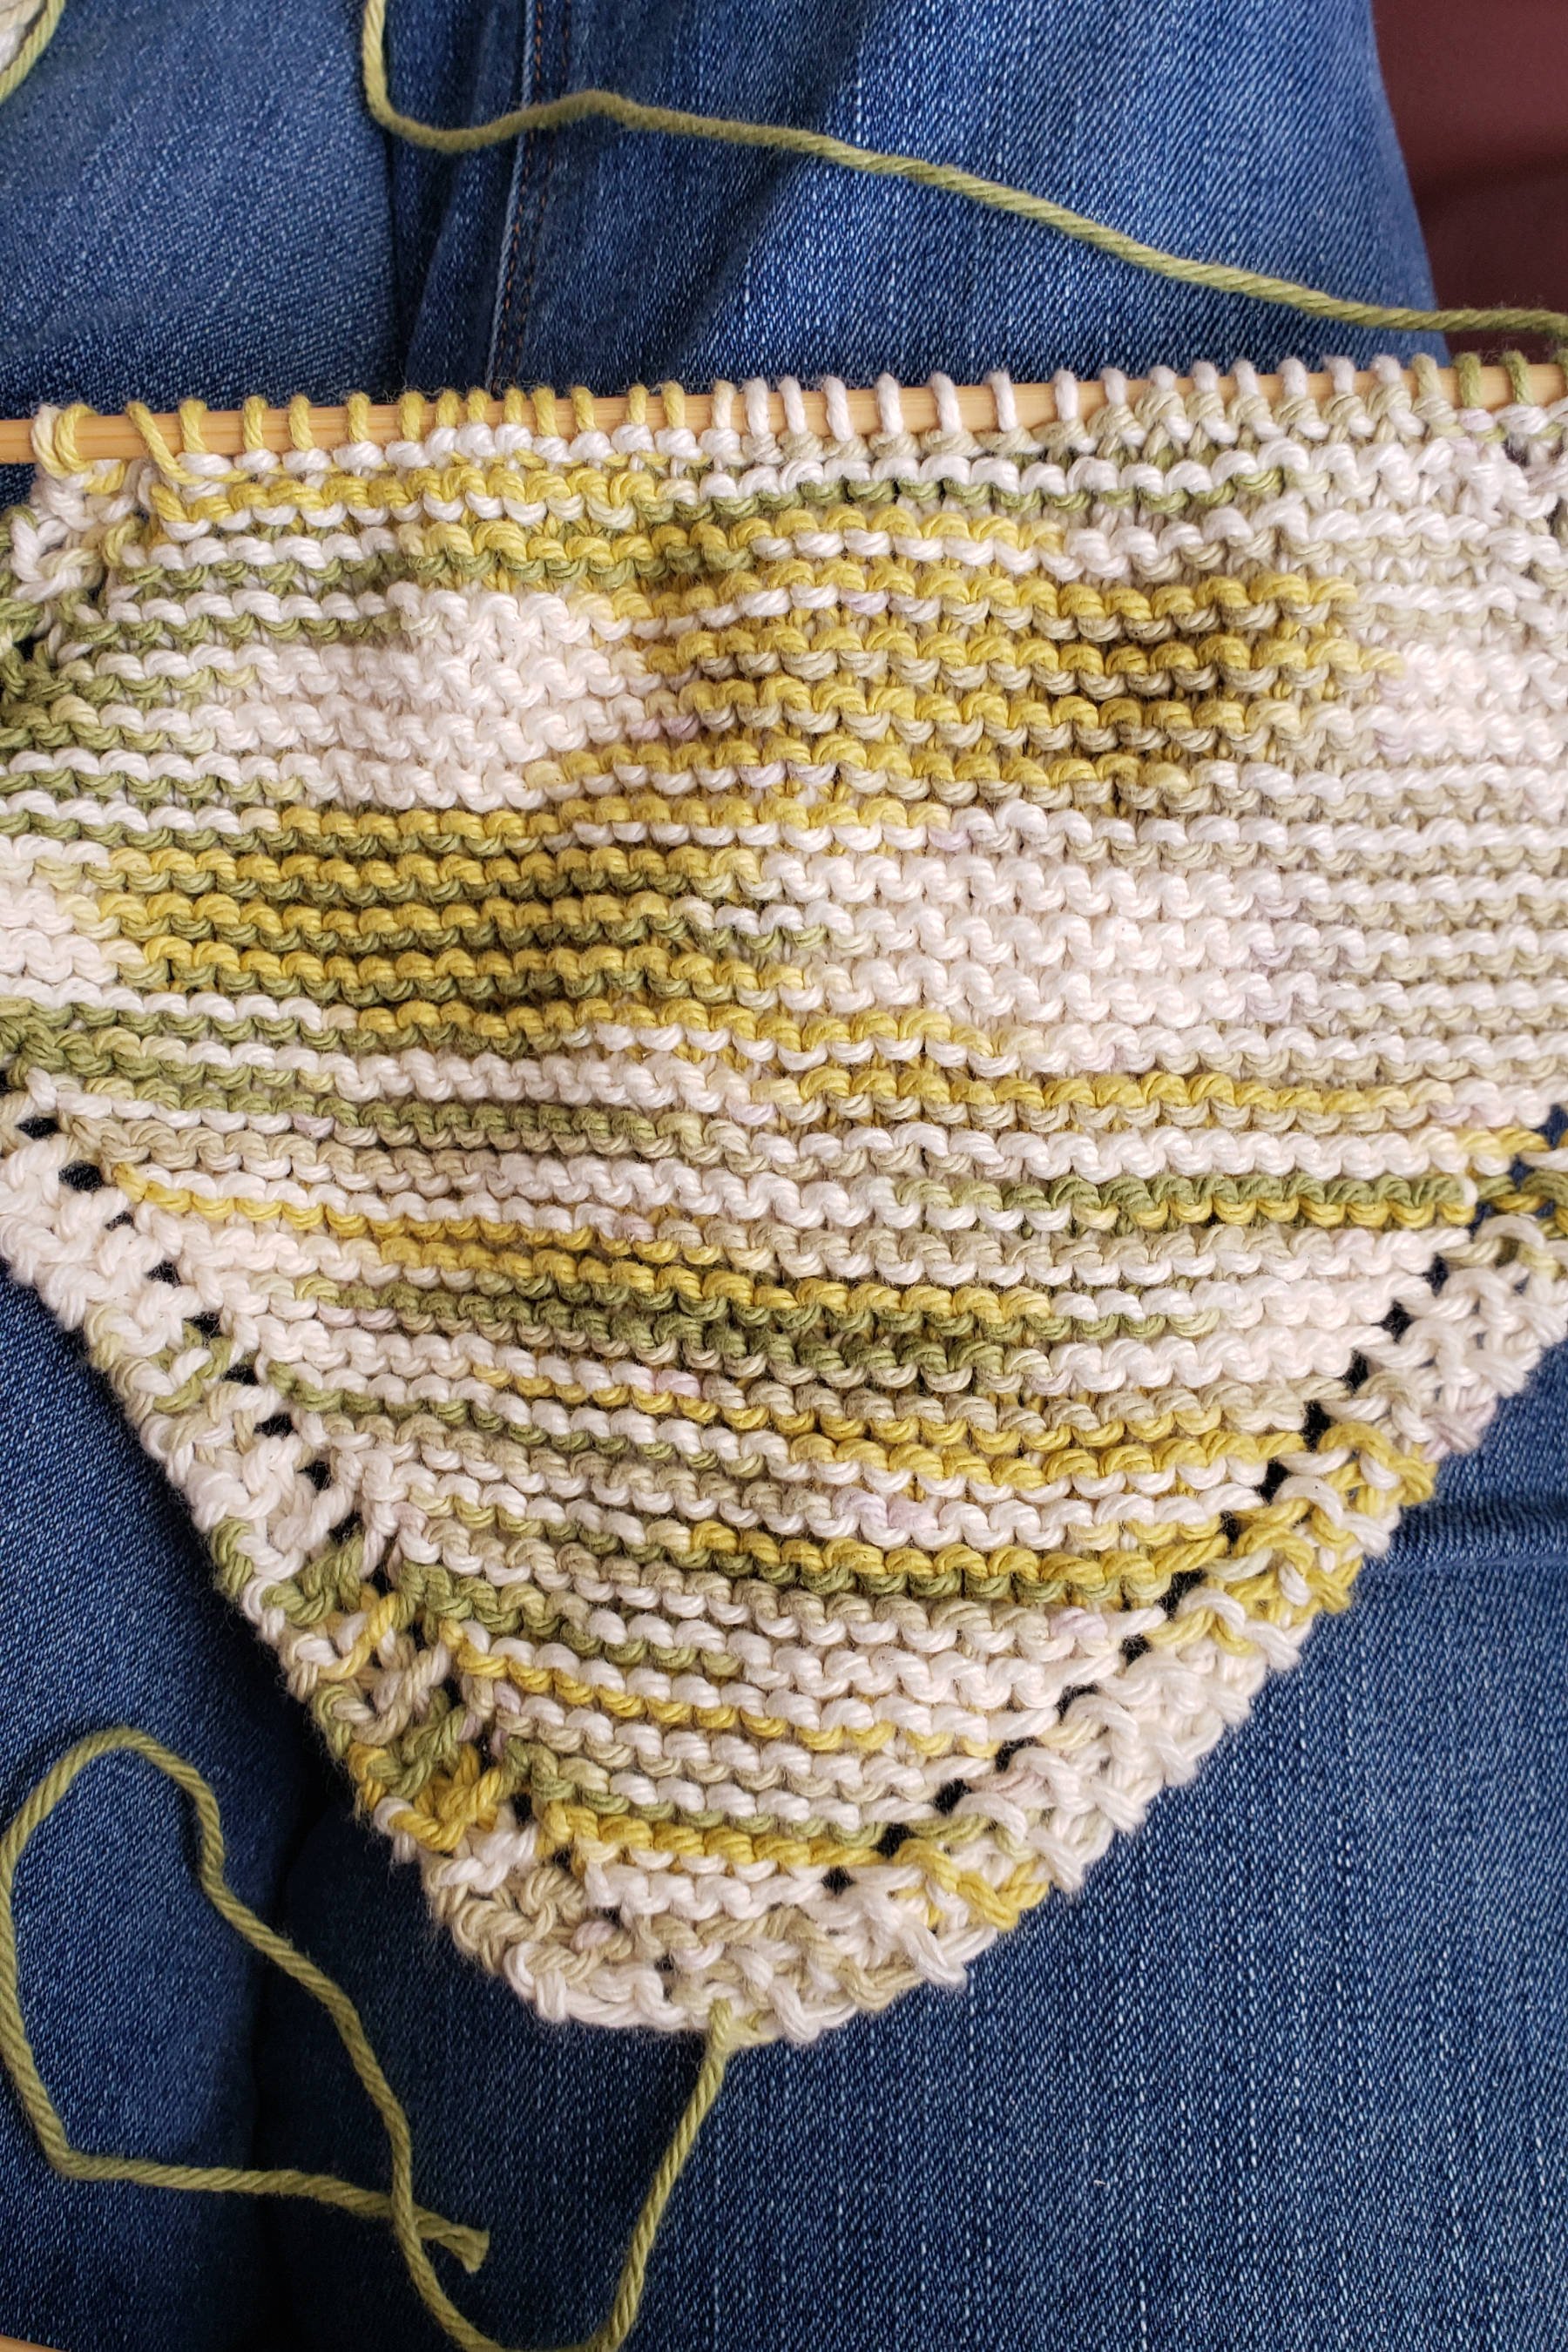
To practice some basic increases and decreases so you can start to see how they change the fabric, I recommend practicing with a knit dishcloth. This common pattern is knit on the bias (from corner to corner).
Basic Knit Dishcloth
This traditional knitted dishcloth pattern makes cloths that are roughly 7 (8, 9) inches [or 18 (20.5, 23) cm] square.
You’ll need:
5 mm (or US 8 or UK 6) straight needles
1 50-gram (or 1.76-ounce) ball worsted-weight kitchen cotton yarn (such as Bernat Handicrafter Cotton or Knit Picks Dishie).
Have you ever been knitting along on a project and hit the rather vague instruction to “increase one” and wondered what, exactly, you should do now?
Or maybe you only know one increase, so that’s your go-to. But what if a different increase would do the job better?
You’re not alone, my friend. Increases are a particularly handy tool in the knitter’s toolkit to shape your fabric and create textural interest, but knowing which stitch to use and how to make it can feel a little overwhelming. After all, every increase produces a different effect in the fabric, and can even affect fit.
Knowing which increase to put to work when will help you level up your craft and produce stunning results. So join me as we demystify three knitted increases that you’ll be able to use for nearly any project. Onward!
Decorative Increases: Yarn Overs (YO)
A yarn over, abbreviated YO or yo, is the easiest type of increase to make, because you literally just move your yarn over the needle from front to back between stitches. When you get back to the yarn over on the next row or round, you work it as if it were a regular stitch. Because it wasn’t anchored into the previous row, the result is a little hole in fabric, like this:
The little lines of eyelets on these shawl swatches were made with yarn overs.
Yarn overs are often used for decorative effects or when you need a little hole for a button or ribbon to go through, and because of this, they are frequently paired with decreases to balance stitch count.
One thing to be aware of with yarn overs is that they loosen the gauge in the area around them, which makes them less than ideal for increases around thumb gussets or other areas where you need firm and sturdy fabric.
What Yarn Overs are Used For:
Buttonholes
Eyelets for ribbon to be laced through
Eyelets in geometric patterns to create lace
To create “bumps” in a folded picot edging
To create interesting surface textures
Anywhere you want a little hole effect
How to Make It:
At the desired location in your row, move your working yarn over your needle from front to back, then work the next stitch (which will often be a decrease such as k2tog—knit two together as one).
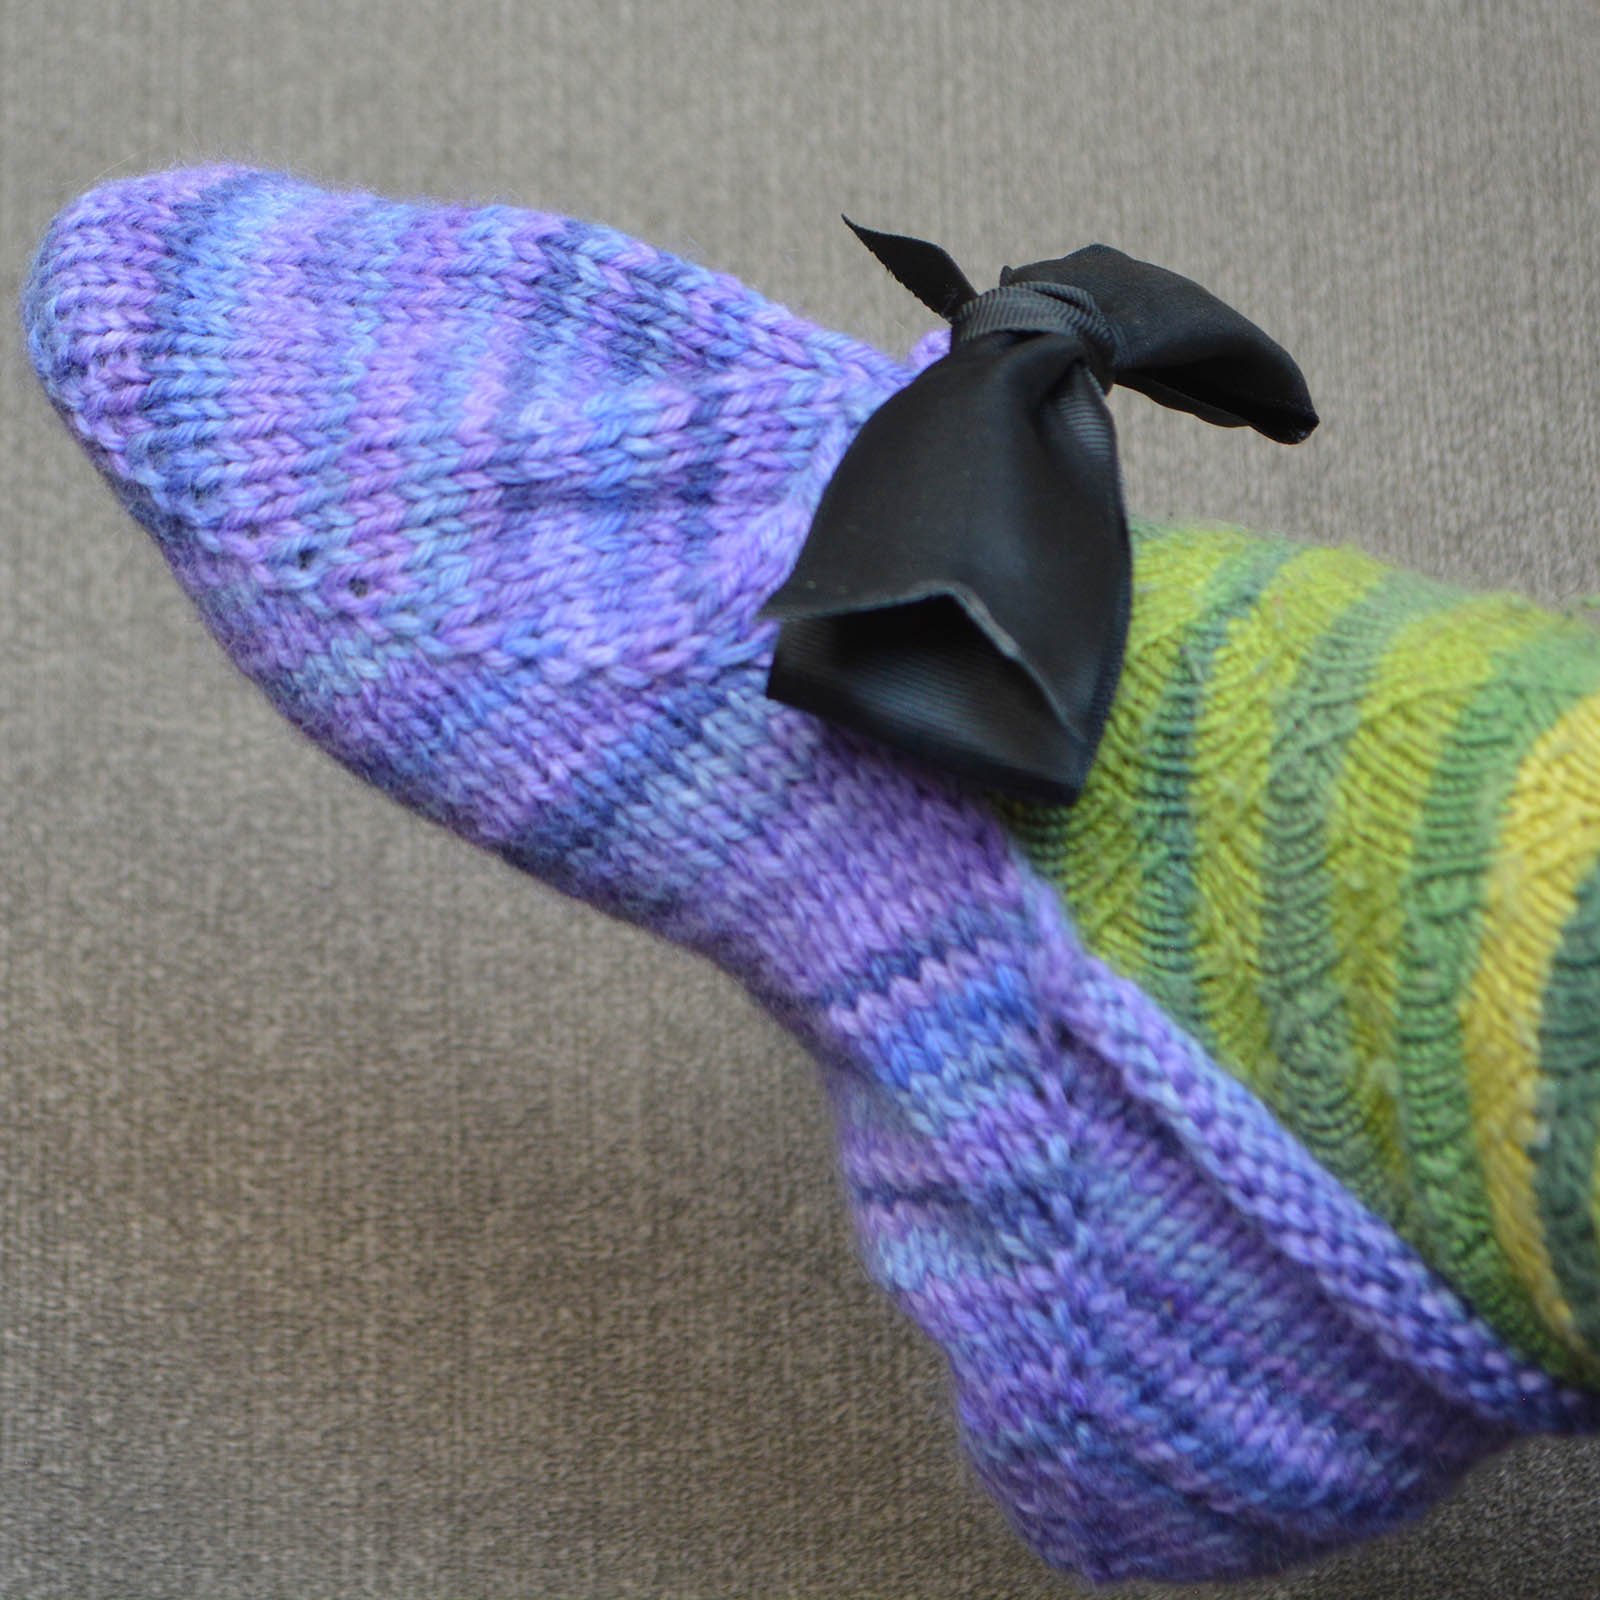
The Secret Garden Fingerless Mittens use yarn overs to create a pair of eyelet columns running up the back on either side of a centre one-stitch column.The eyelets aren’t visible in this photo, but the Graceful Slippers use a row of eyelets at intervals to create a path for the ribbon bow to travel through in order to gather the front together.
Mirrored Increases
While yarn overs leaves a little hole, they are unidirectional—the column of stitches rising from a yarn over appears to come out of nowhere and ascend straight up.
However, most knitted increases are directional. This means that your increase will create a new stitch column, but it will appear to “sprout” from the left or right side of neighbouring stitch columns, depending on which increase you used, and angle away from it.
Sometimes, this won’t matter. For instance, if you’re knitting a top-down sweater yoke or hat that increases at regular intervals to achieve the right stitch count for the head or body circumference, you’ll likely use the same increase at every repeat. This will create a swirly effect.
This image shows the Lucy Pevensie Tam, a hat design that is decreased toward the crown instead of increased away from it, but the pinwheel effect in the fabric is the same as using a single type of repeated increase at intervals would create.
However, if you’re creating a design where different increases are creating a mirror effect for symmetry, such as on either side of a sweater with raglan shoulder shaping, you need to be aware of which direction your chosen increase leans and use the mirror-image version at the appropriate places.
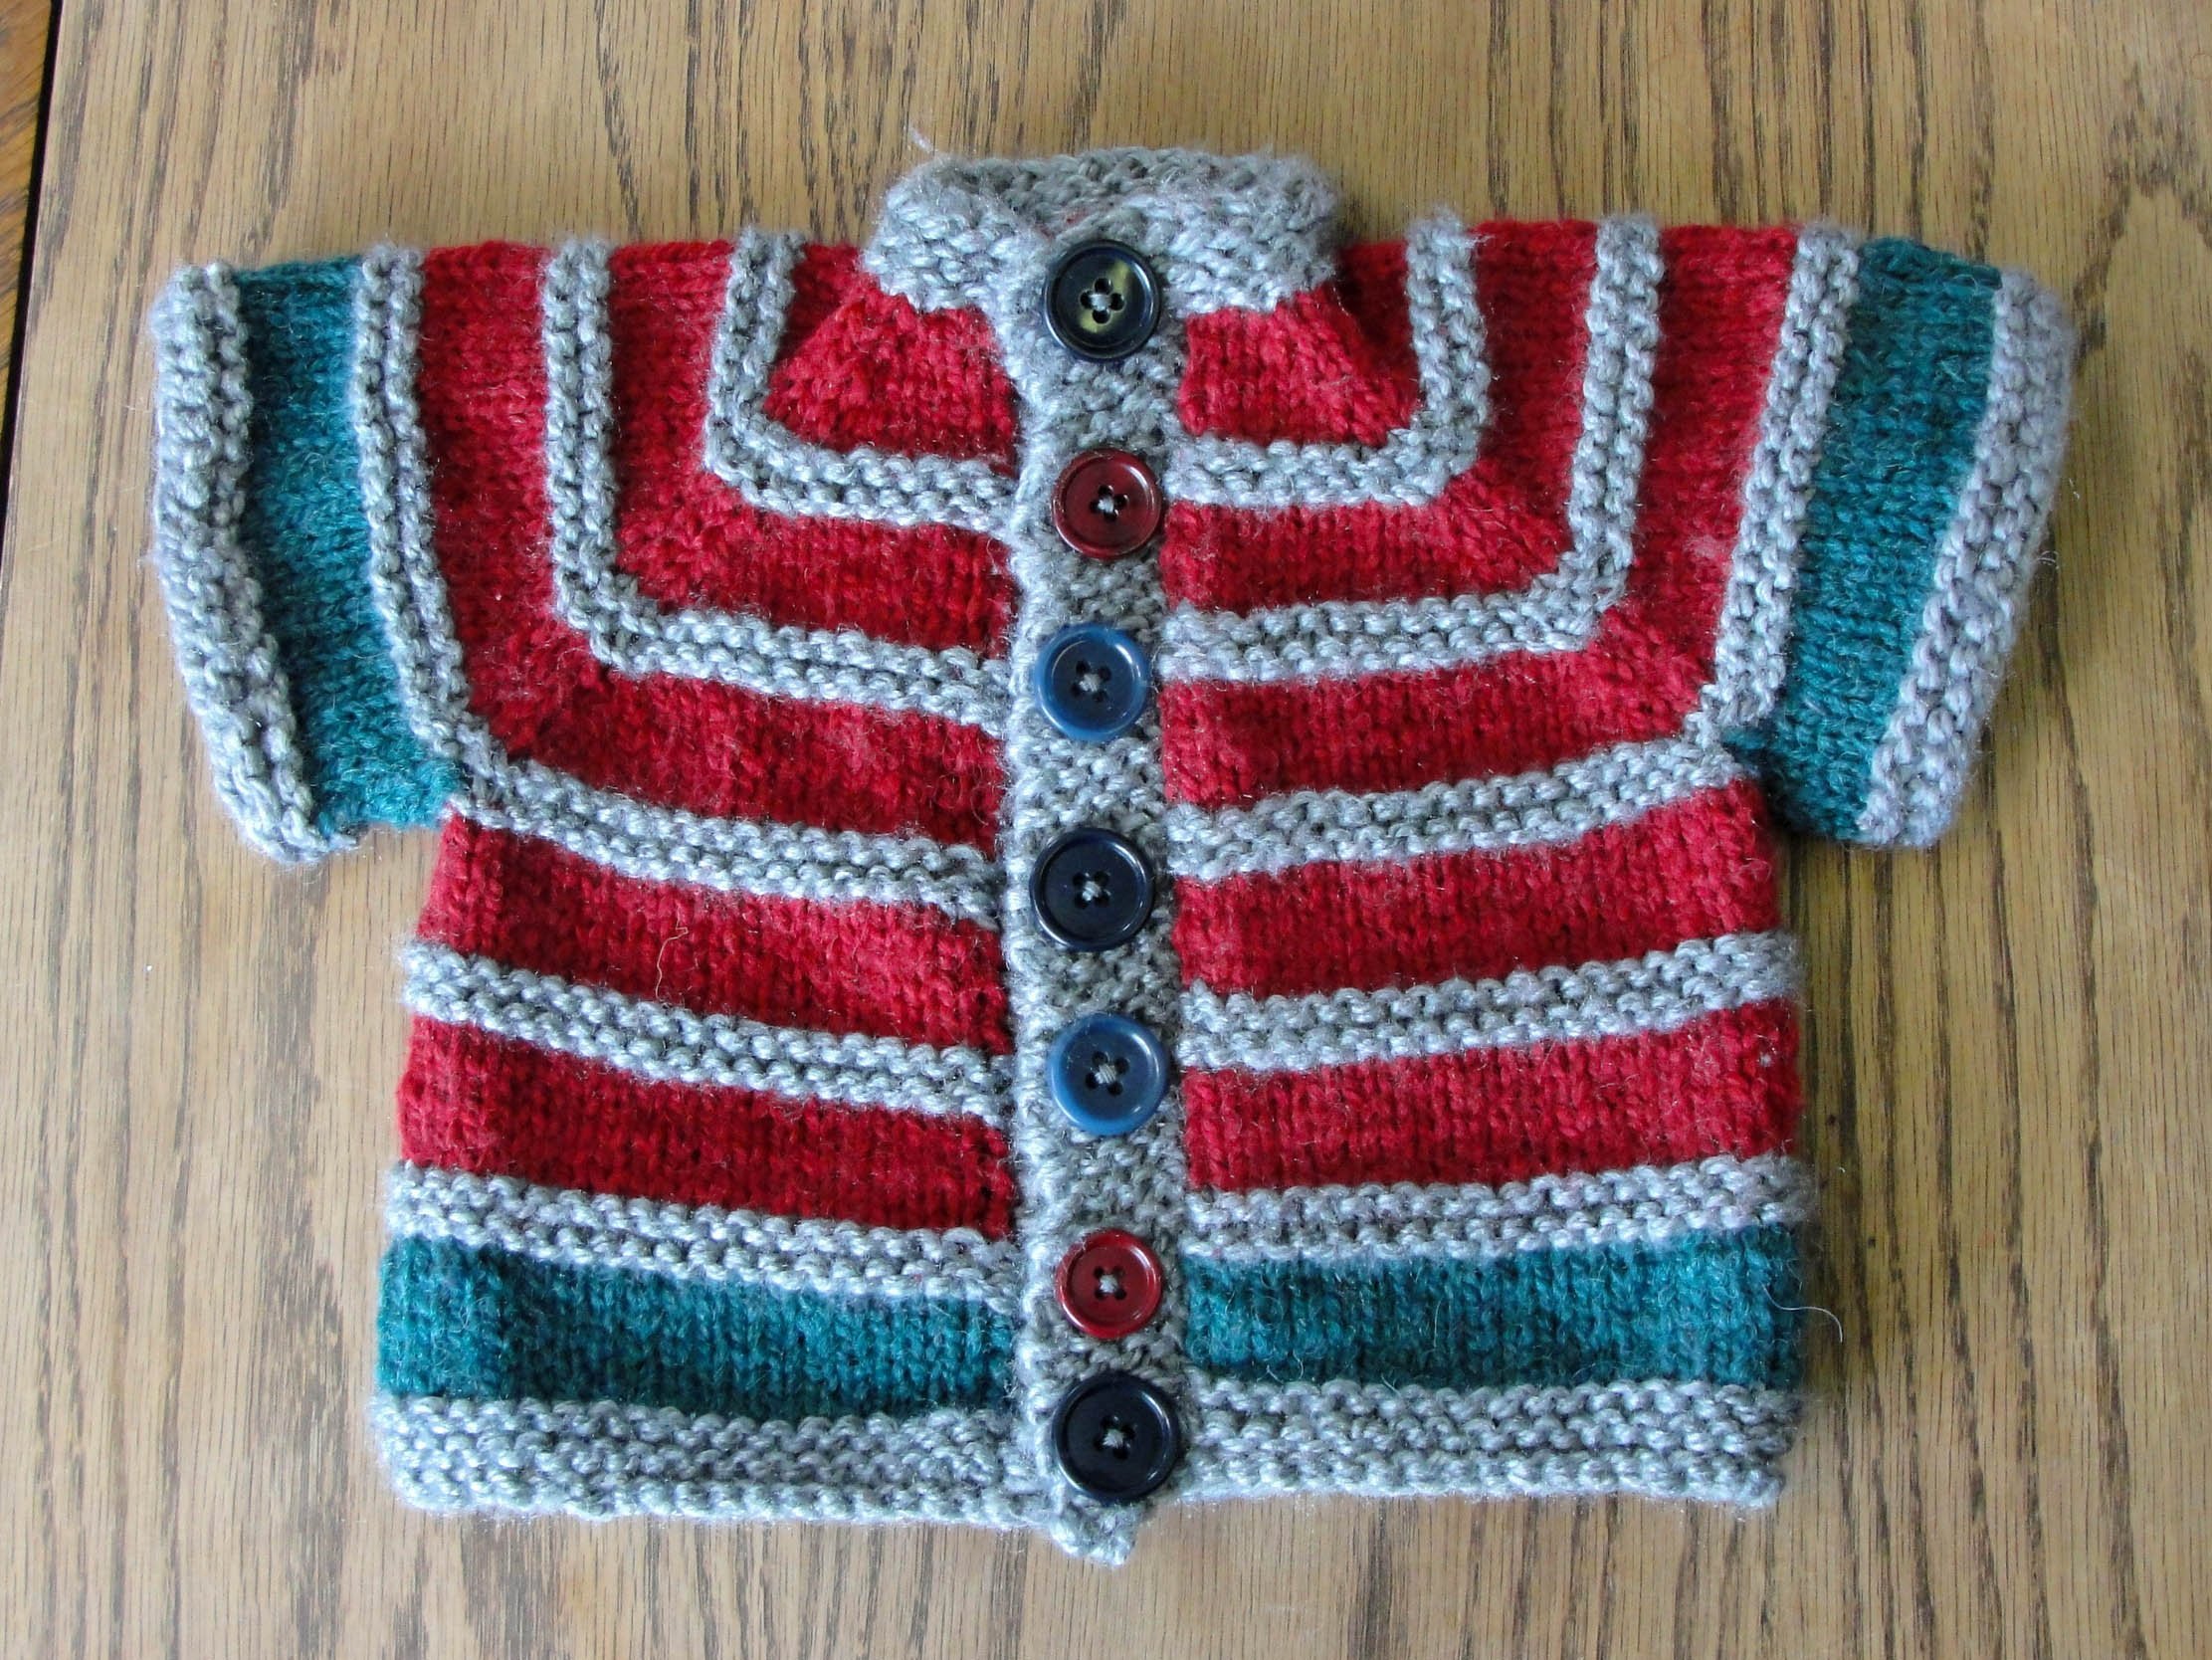
The pairs of increases at the shoulders in the top-down Baby Mandarin Jacket use mirrored left-leaning and right-leaning Make One increases.
And, since most patterns are designed with only right-handed knitters in mind, left-handed knitters will need to be aware of whether the directional stitch called for in the pattern needs to be flipped to create the intended effect, or whether they can create the stitch normally (meaning, as a mirror of a rightie’s technique) without any complications. This will usually only be a problem if the increase is part of a surface texture pattern, as well. If you’re ever unsure, talk to an experienced knitter or contact the designer to ask them about it.
It’s a lot, I know. Let’s break down the two main types of directional increases, and what you’ll likely want to use them for.
(Note that there can be some regional differences between the exact definitions of these terms, especially the Make Ones, so always consult your pattern glossary to ensure you’re using the technique the designer has in mind.)
Bar Increases (K1FB / KFB and its mirror)
Knitting into the front and back of the same stitch (abbreviated K1FB or KFB for “knit one front and back”) is called a Bar Increase, and it’s the first increase many people learn. It’s logical, right? You want another stitch, so just add one into the column of stitches you’re currently working.
(The two abbreviations K1FB and KFB are interchangeable, but mean the same thing. I’ll use KFB for the remainder of this post.)
This type of increase creates a little horizontal bar around the base of the new stitch above a tiny hole, which can create some textural interest in the fabric. It also pulls on the yarn less than the Make Ones below do, meaning the fabric remains at about the same gauge as everything around it. You can even work a whole bunch of these in a single stitch to create little bobbles and knobs for surface texture.
The bar increase is often used for non-directional situations, such as sweater yokes or hat crowns. That’s because the “default” version of the bar increase is the KFB, which creates a left-leaning stitch, with the bar anchored on the left side of the column of stitches on the right. It is pretty easy to create.
The right-leaning bar increase is more involved. In fact, many people don’t even know that this increase has a mirror, let alone how to make it. But if you prefer the look of the KFB increase and want the mirror, there is, indeed, a way to do it, which we’ll get to in a moment.
What KFBs are Used For:
Top-down sweater yokes
Scarves, shawls, and other designs where a flat increase without an eyelet is desired.
Waist shaping
To create textural interest by changing the angle stitches are travelling or to create bobbles
Anywhere you want an increase that doesn’t affect fabric gauge
How to Make It:
To create the Left-Leaning Bar Increase, or KFB, simply knit into the front and back of the same stitch before pulling it off the non-working needle.
The mirrored Right-Leaning Bar Increase is a little more complicated. And if you want to achieve the effect of the KFB from the “wrong” side of the fabric, you need to use another technique.
Fortunately, I have tutorials for all three of these. You can see them here:
The unusual curved surface texture of the Beanstalk Socks use mirrored Bar Increases to make both socks match.
Make One Increases (M1, M1L, and M1R)
Make One Increases pick up the bar between stitches and twist it in a loop while knitting into it. Which direction you twist the bar determines whether the new column will lean away from the stitches on the left or the right of the increase. This increase is fairly easy to make and remember, no matter which direction you want it to lean.
Twisting the bar pulls the columns next to the increase together slightly for a nice, firm fabric without any holes, making this the preferred option for thumb and heel gussets and many other places where you need to shape garments to fit the body and keep the fabric firm.
Using pairs of left-leaning and right-leaning Make Ones (M1L and M1R) will create a straight-line effect at an angle from the “straight” columns that appear to grow from the increases, such as raglan shoulder shaping on top-down sweaters.
For most directional increases, Make Ones (M1) will be your go-to, though some designers use M1 for non-directional cases instead of KFB. (If a designer ever calls for M1 without specifying left or right, use the M1L.)
What M1s are Used For:
Raglan shaping (mirrored pairs of increases for straight lines)
Gusset shaping
Garment edges (waists, arms, etc.)
Toe shaping
Anywhere you want mirrored increases with no holes
How to Make It:
M1L (Make One Left-Leaning Stitch): Make one stitch leaning away from your dominant hand by picking up the bar between stitches and placing on non-working needle with leading leg in front, then knitting into the back loop, which creates a twist as it drops from needle. (Note that if you’re knitting left-handed, this will actually lean right.)
M1R (Make One Right-Leaning Stitch): Make one stitch leaning toward your dominant hand by picking up the bar between stitches and placing on non-working needle with trailing leg in front, then knitting into the front loop, which creates a twist as it drops from needle. (Note that if you’re knitting left-handed, this will actually lean left.)
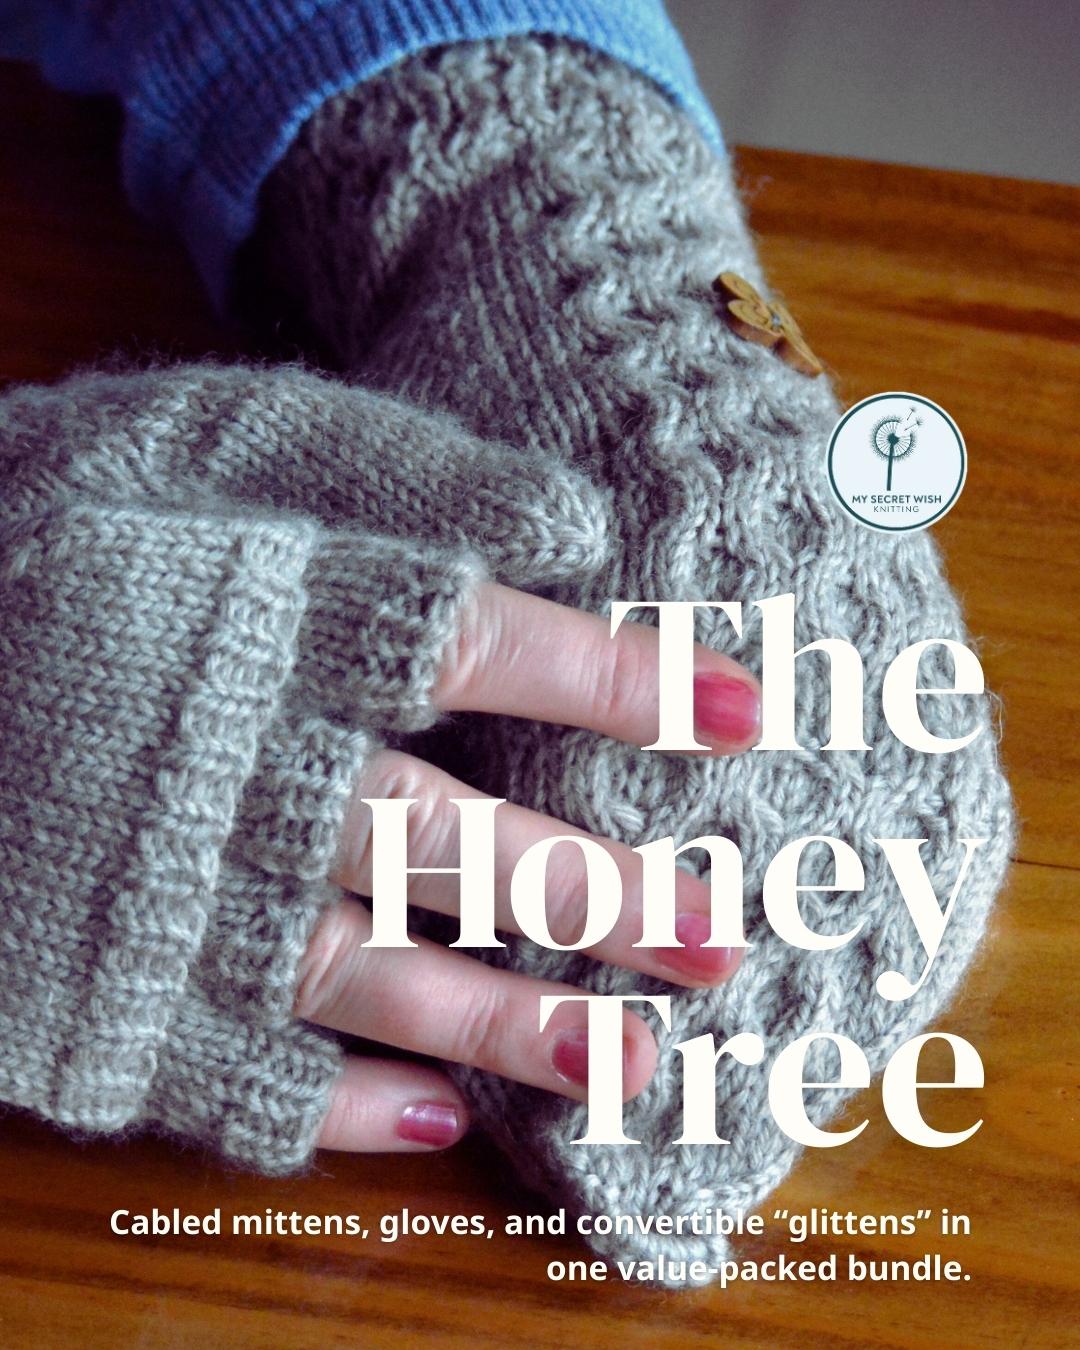
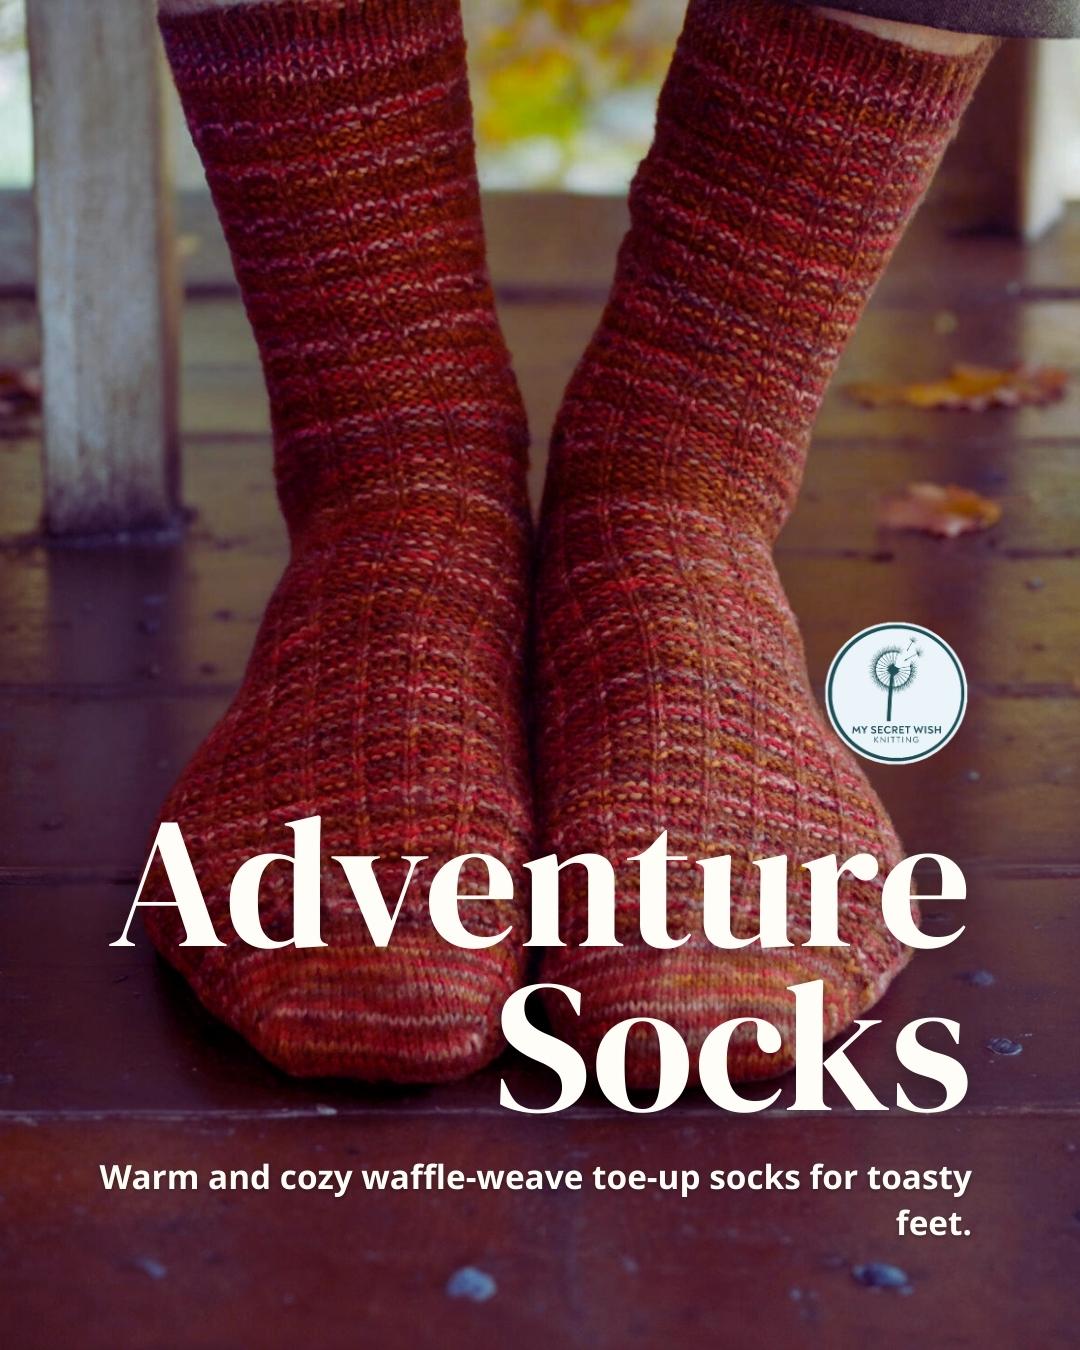
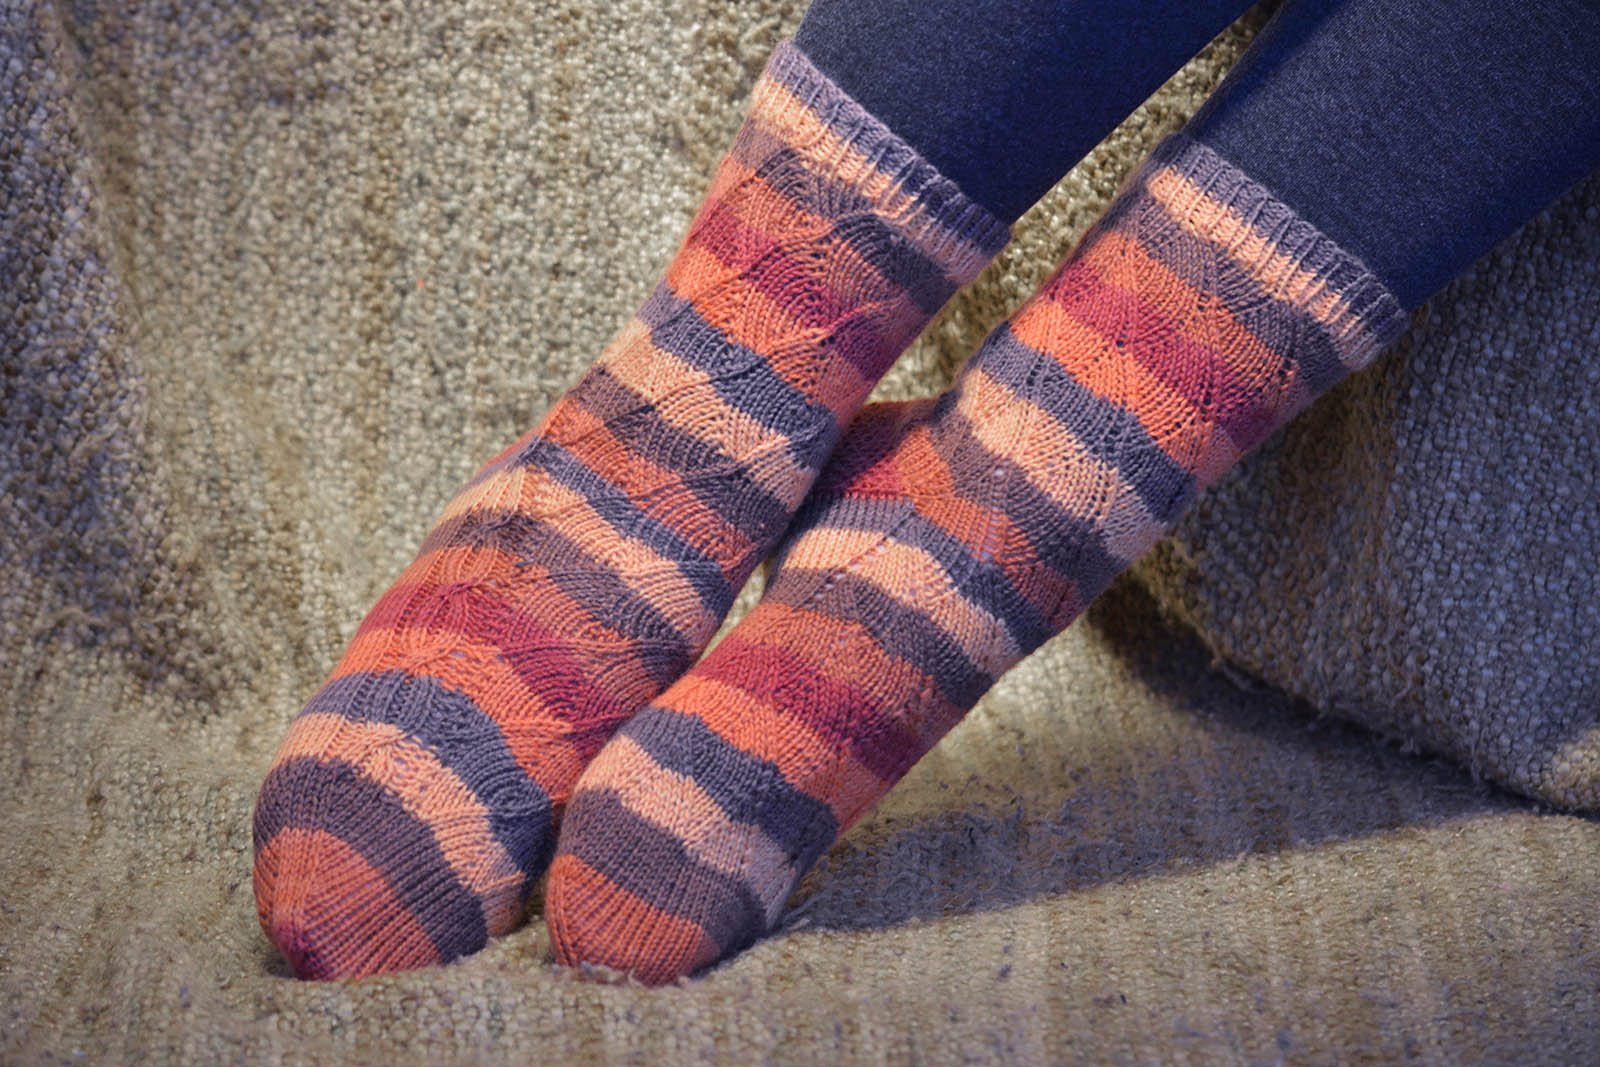
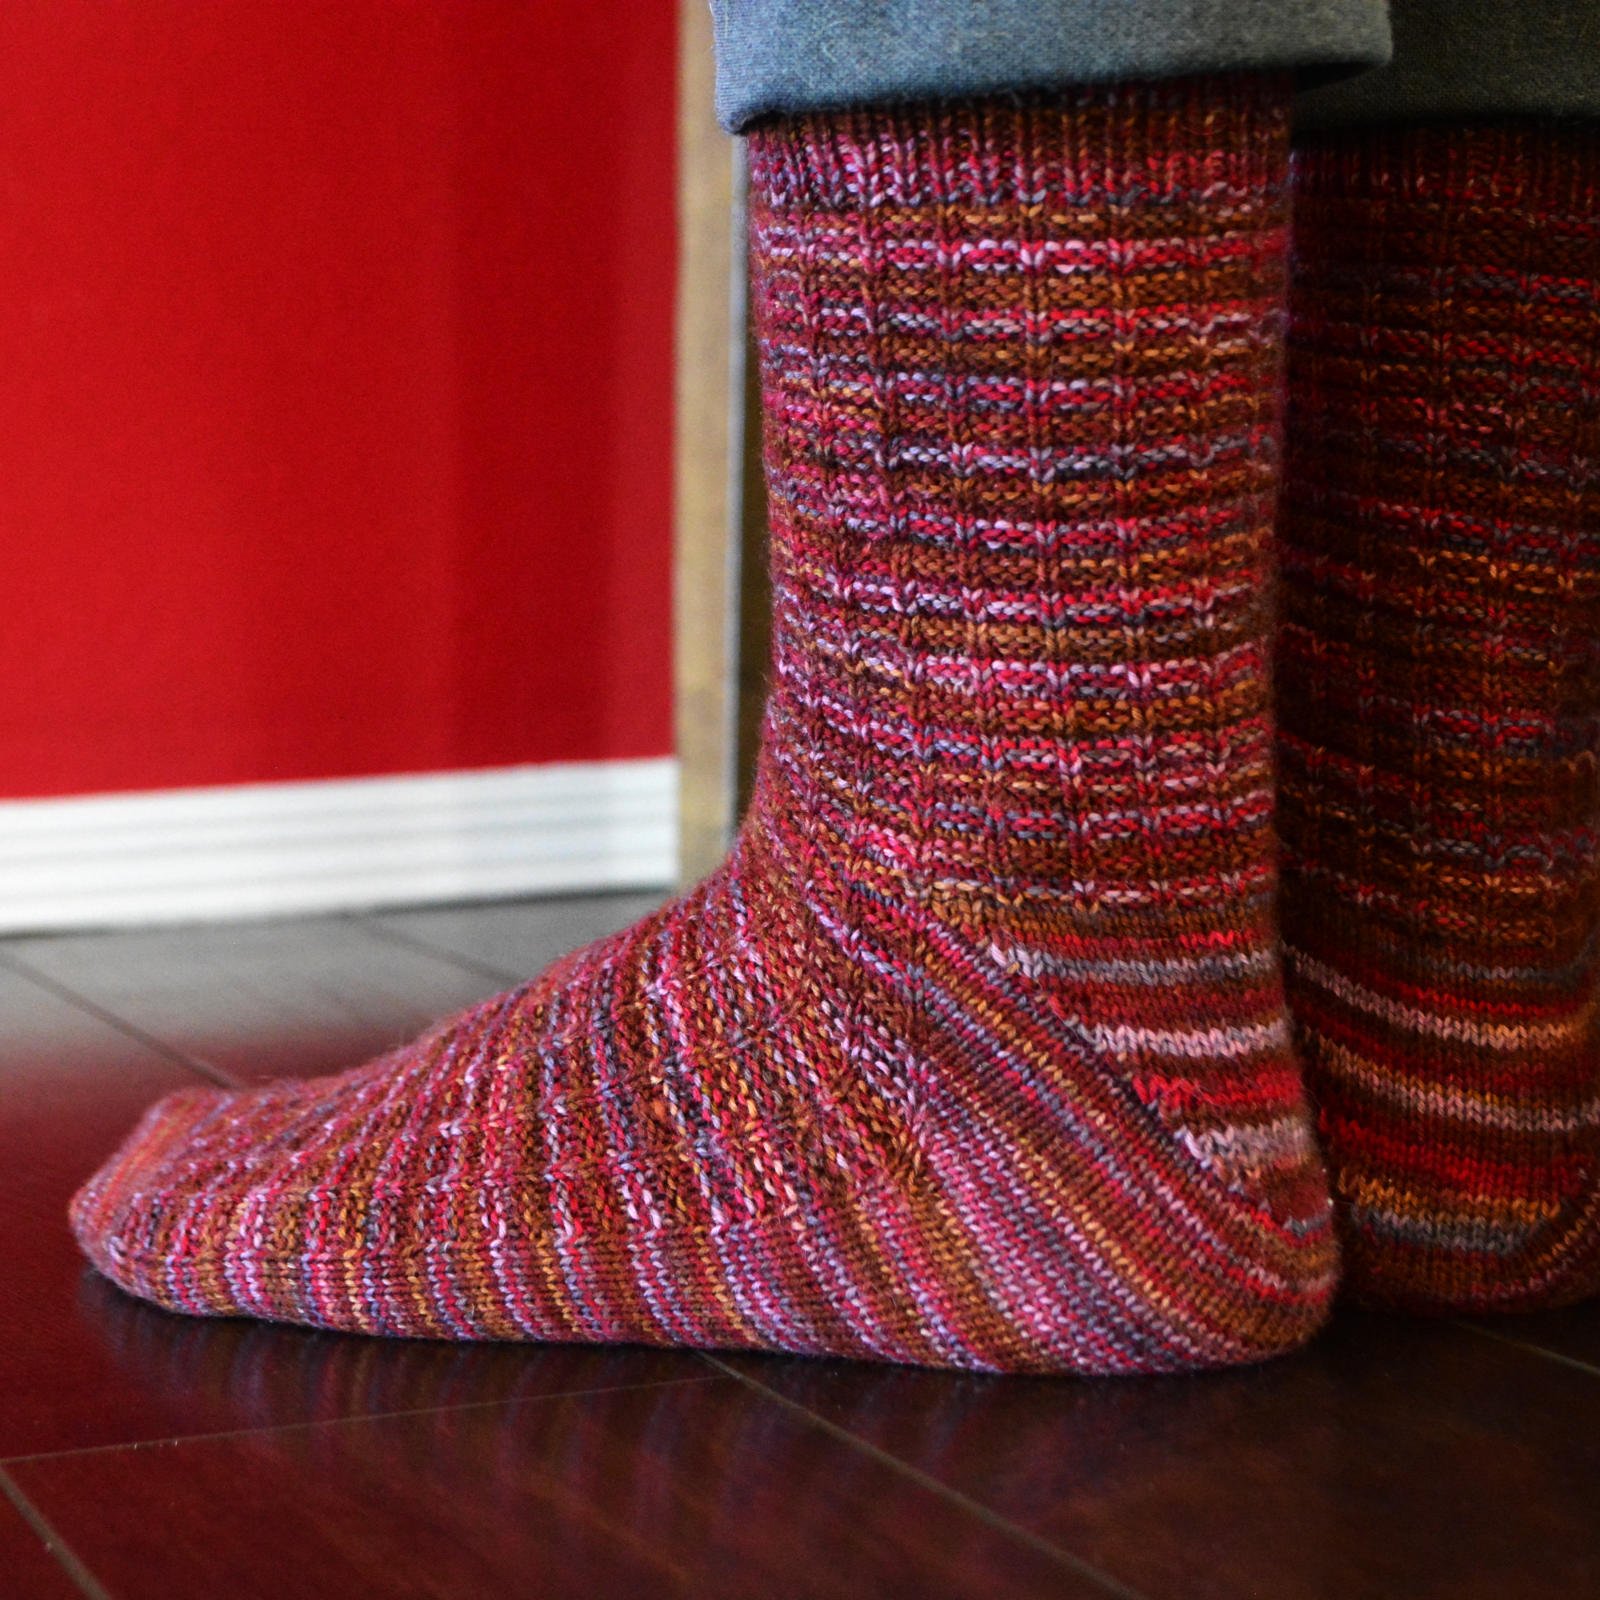
The raglan shaping on either edge of the foot on the toe-up Adventure Socks were created using pairs of Make One increases. Work the increase one stitch in from the edges of the top and bottom of the sock. Use M1L on the leading edge of the top or bottom of the sock and M1R on the mirror edge (either at mid-round or the end of the round) to created the double straight line of stitches along the sides.On either side of a thumb gusset, such as on these Honey Tree Gloves, is another excellent place for pairs of Make One increases. Use M1L on your leading edge and M1R on the trailing edge.
Keeping Track
When you’re working with increases, they often repeat at regular intervals, either in your row or every certain number of rows. You could also use tricks like row counters, stitch markers, or making tally marks on your pattern to help you remember where you are.
However, it’s important you learn to recognize which row or column an increase belongs to so you can keep your stitch count accurate. If you want help “reading” your increases, please check out my tutorial for Reading Increases and Decreases.
And if you’re interested in any of the patterns mentioned in this post, please click through the links on the images to check them out, or see all my patterns in my shop here:
It’s been a minute. But I’m thrilled to pop in here to say there’s a new pattern in the store for something warm, toasty, perfect for winter…
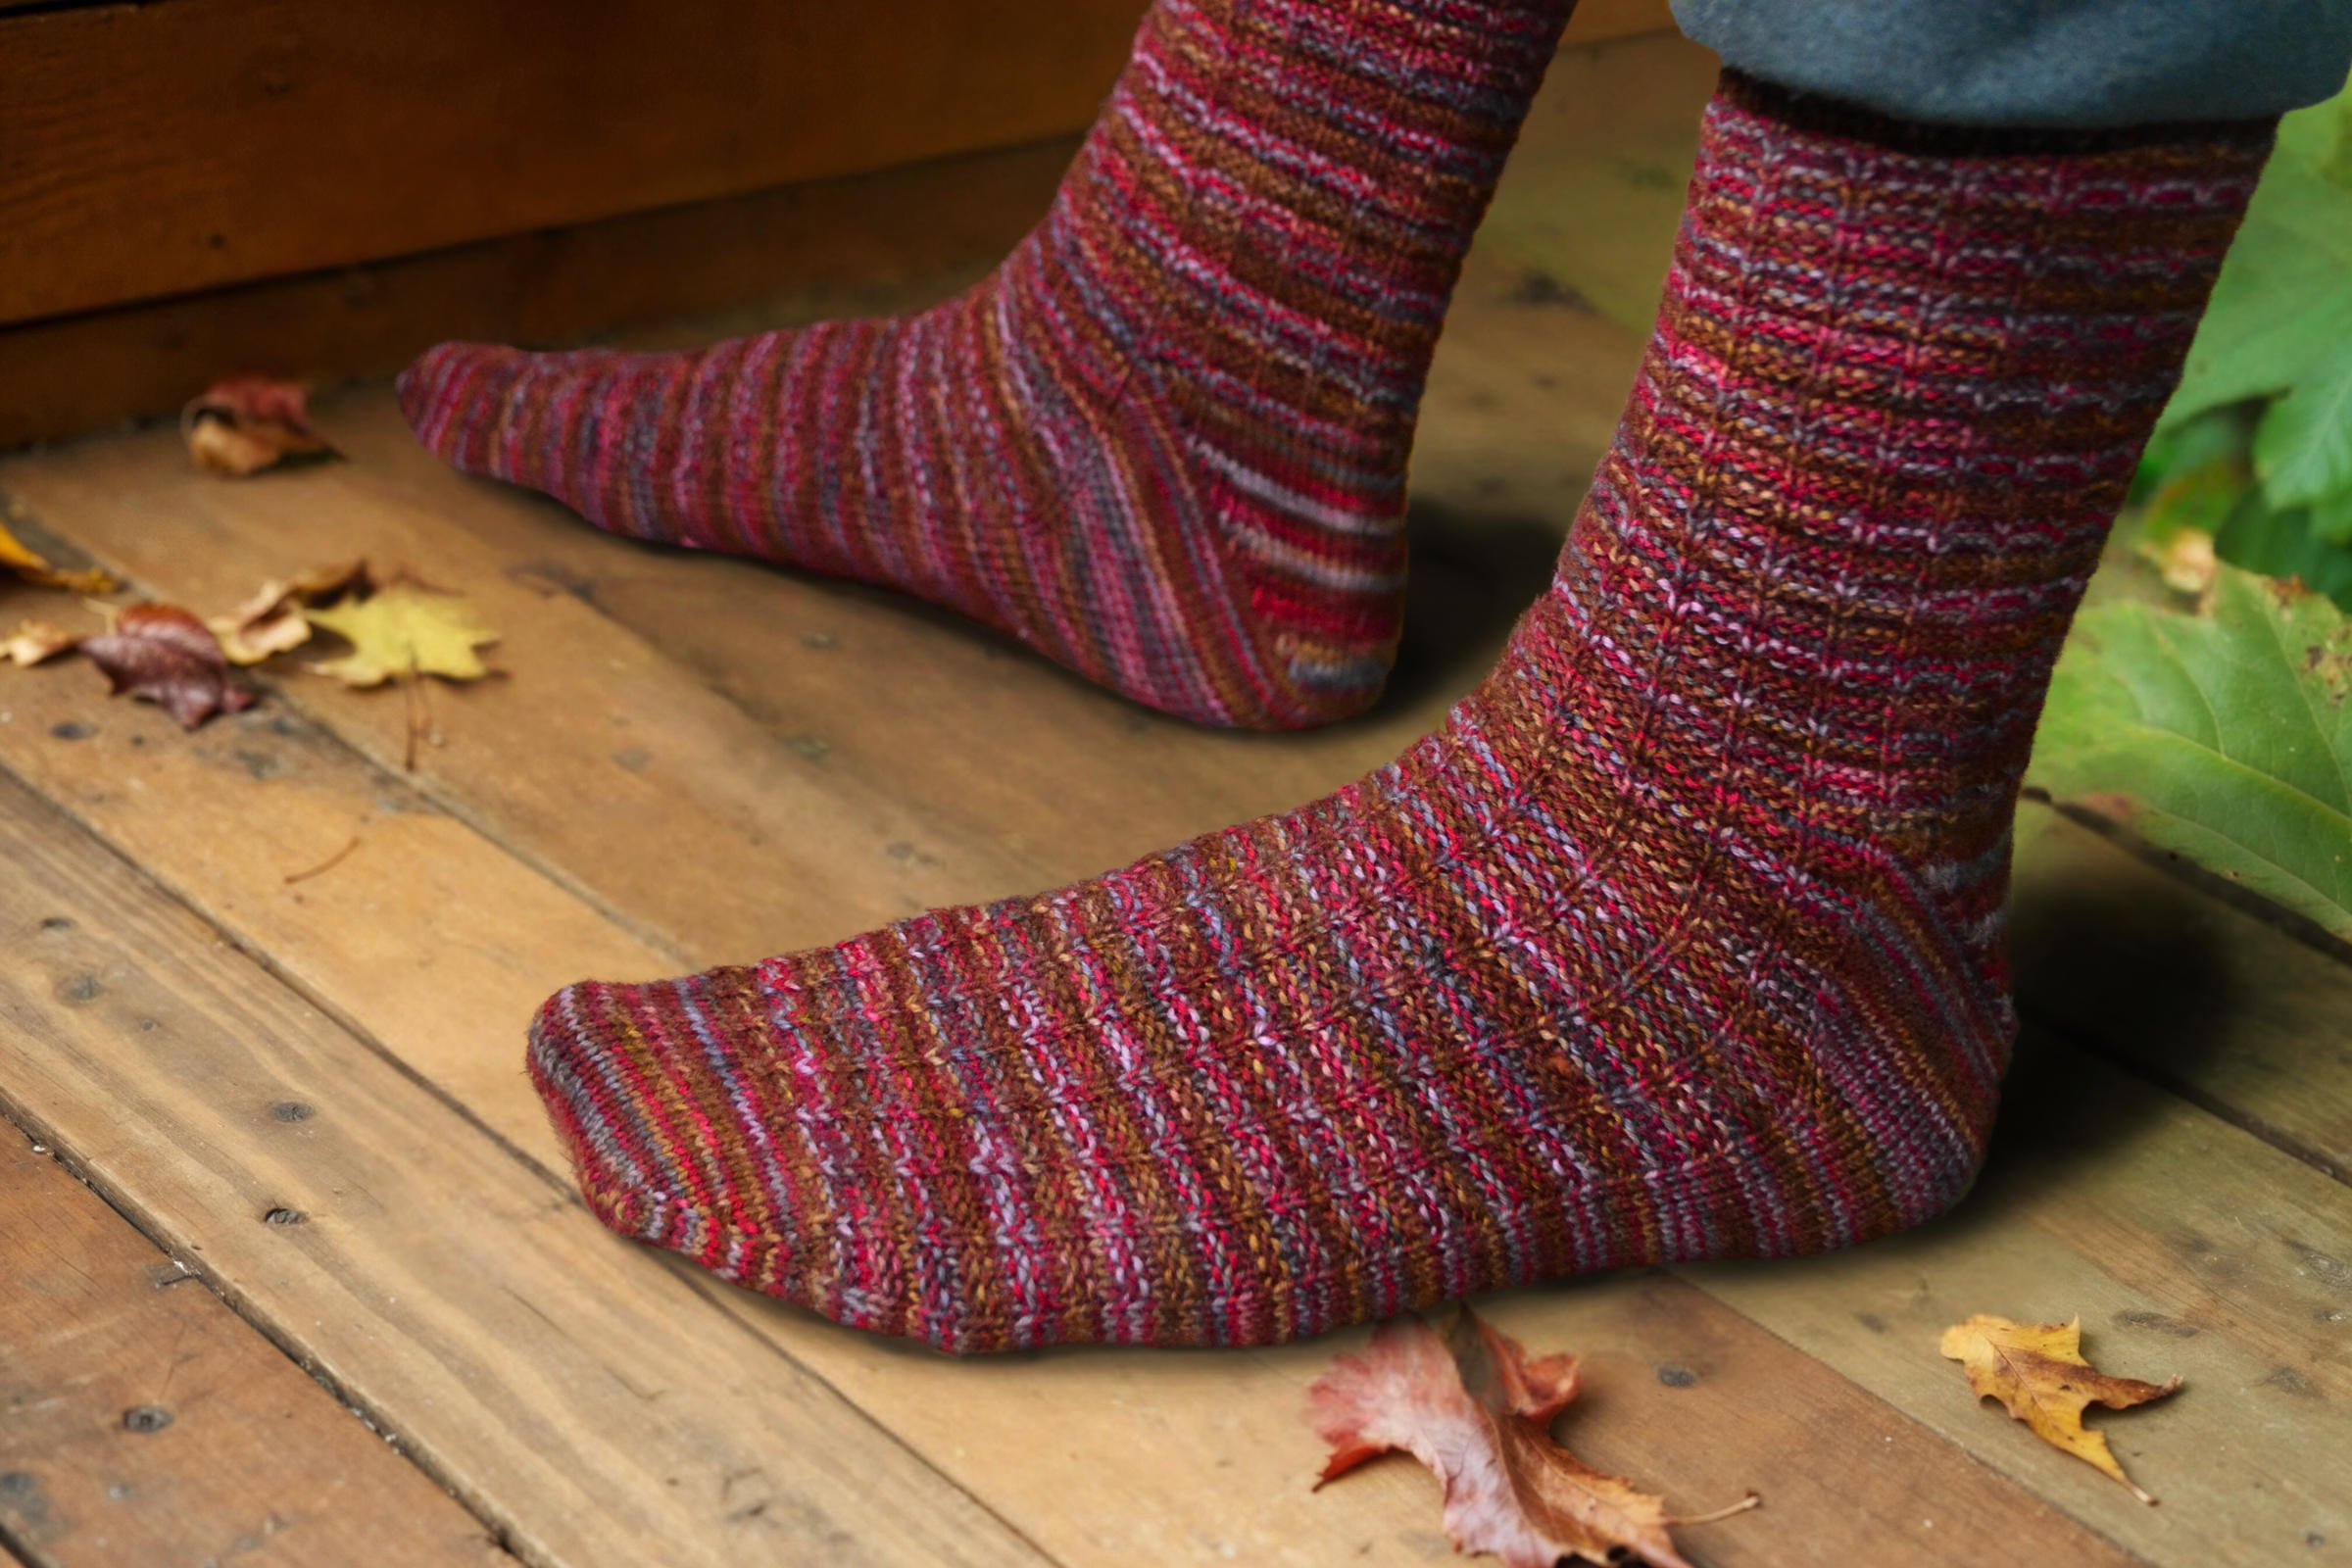
Okay, they’re socks. Toe-up socks. With waffle texture and gusset heels and just enough pattern interest to keep you paying attention but not so much you can’t knit while watching Castle. (Or your own favourite show. You do you.)
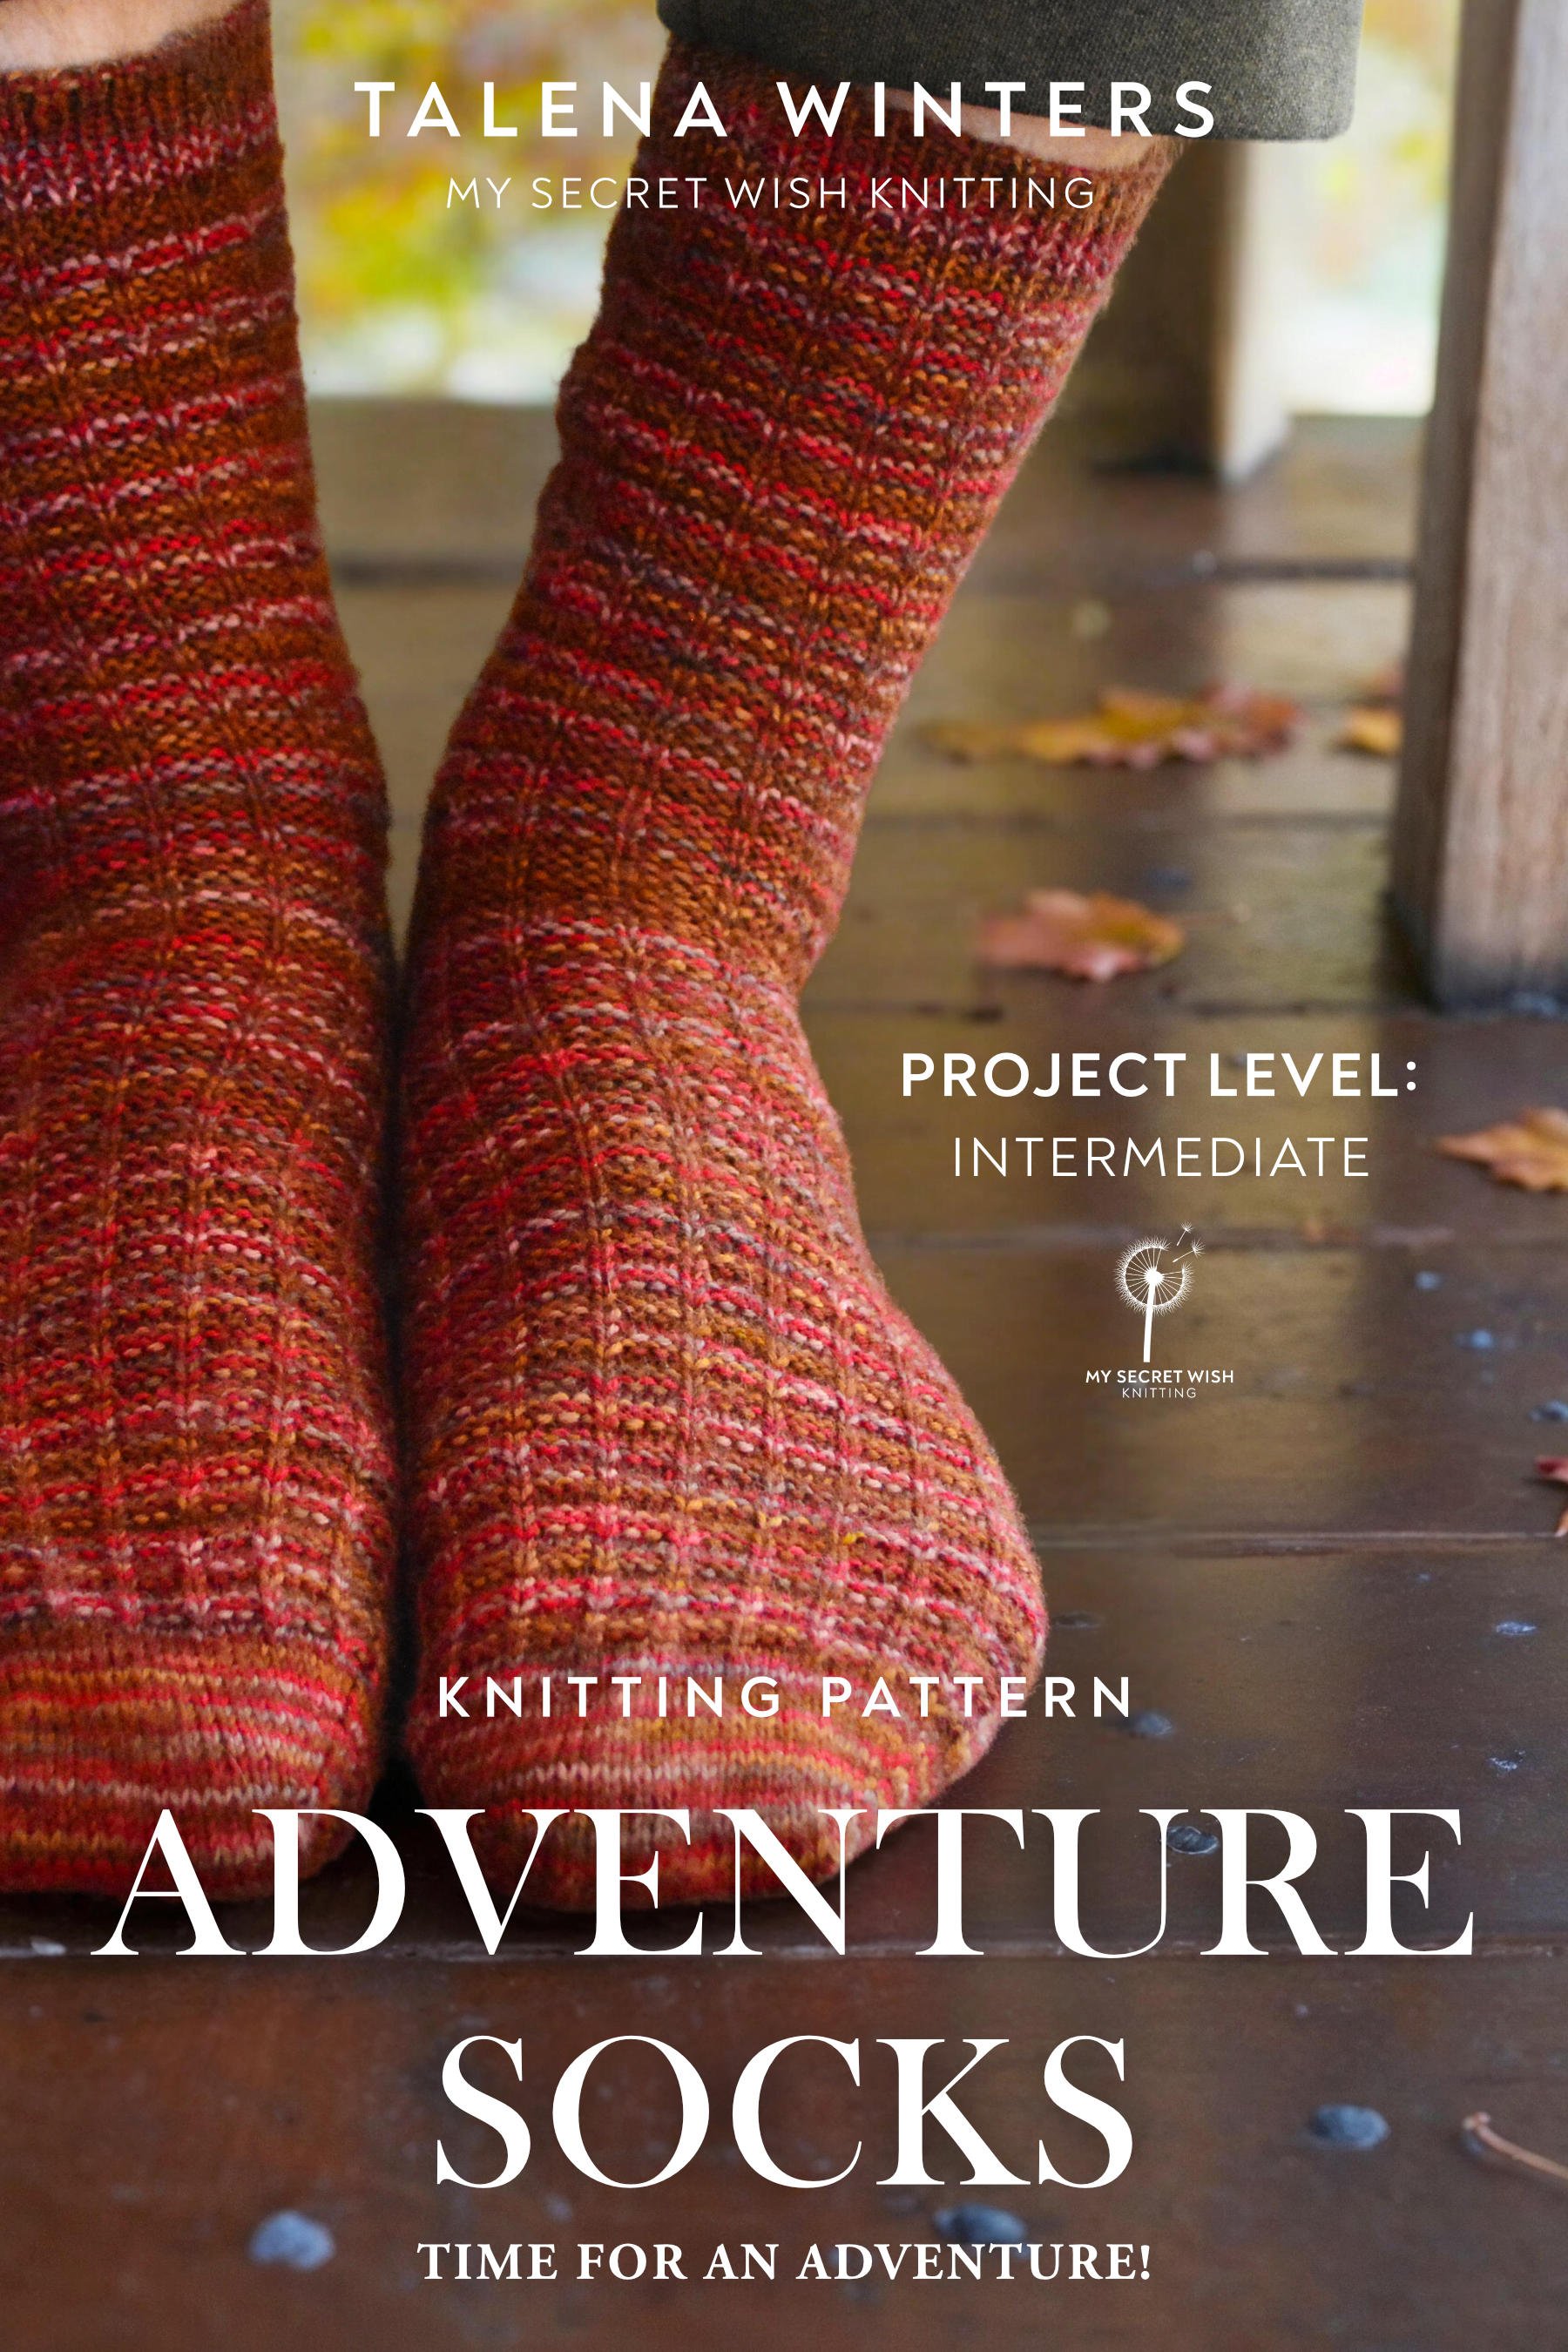
Cover for the Adventure Socks knitting pattern by Talena Winters, a waffle-texture toe-up sock. Project Level: Intermediate.
This pattern is perfect for tucking into hiking boots and hitting the trail, or keeping your feet toasty while you dive into your latest read.
AND!
It’s got low vision accessible formats! Get it in large print screen reader accessible PDF, ePUB, or standard PDF formats, all from a single purchase!
Feast your eyes on these details:
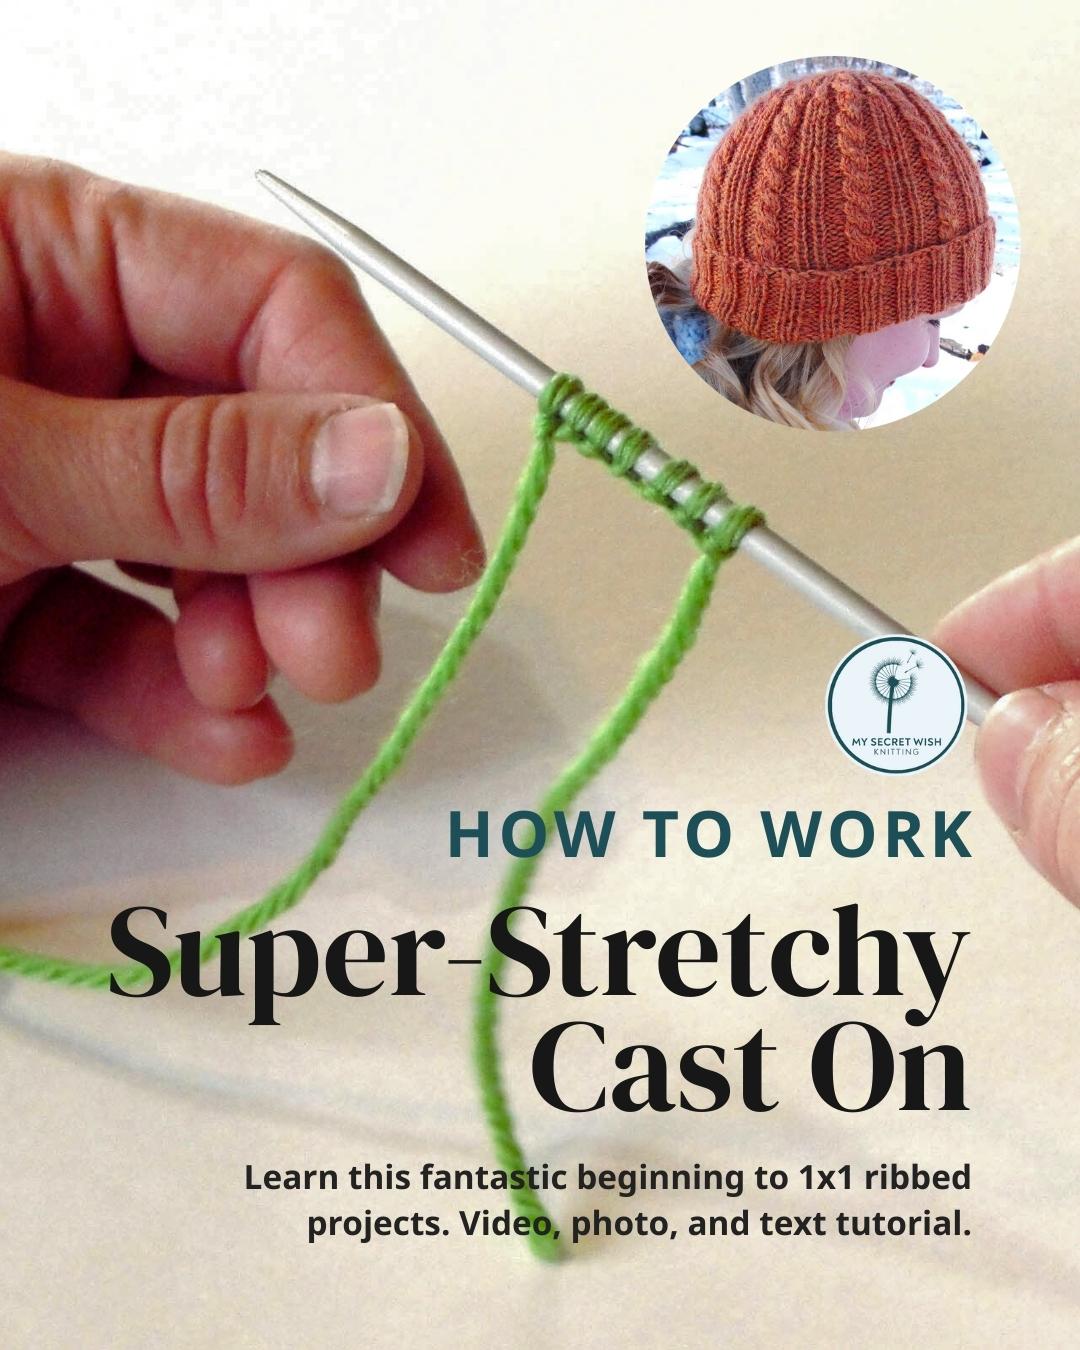
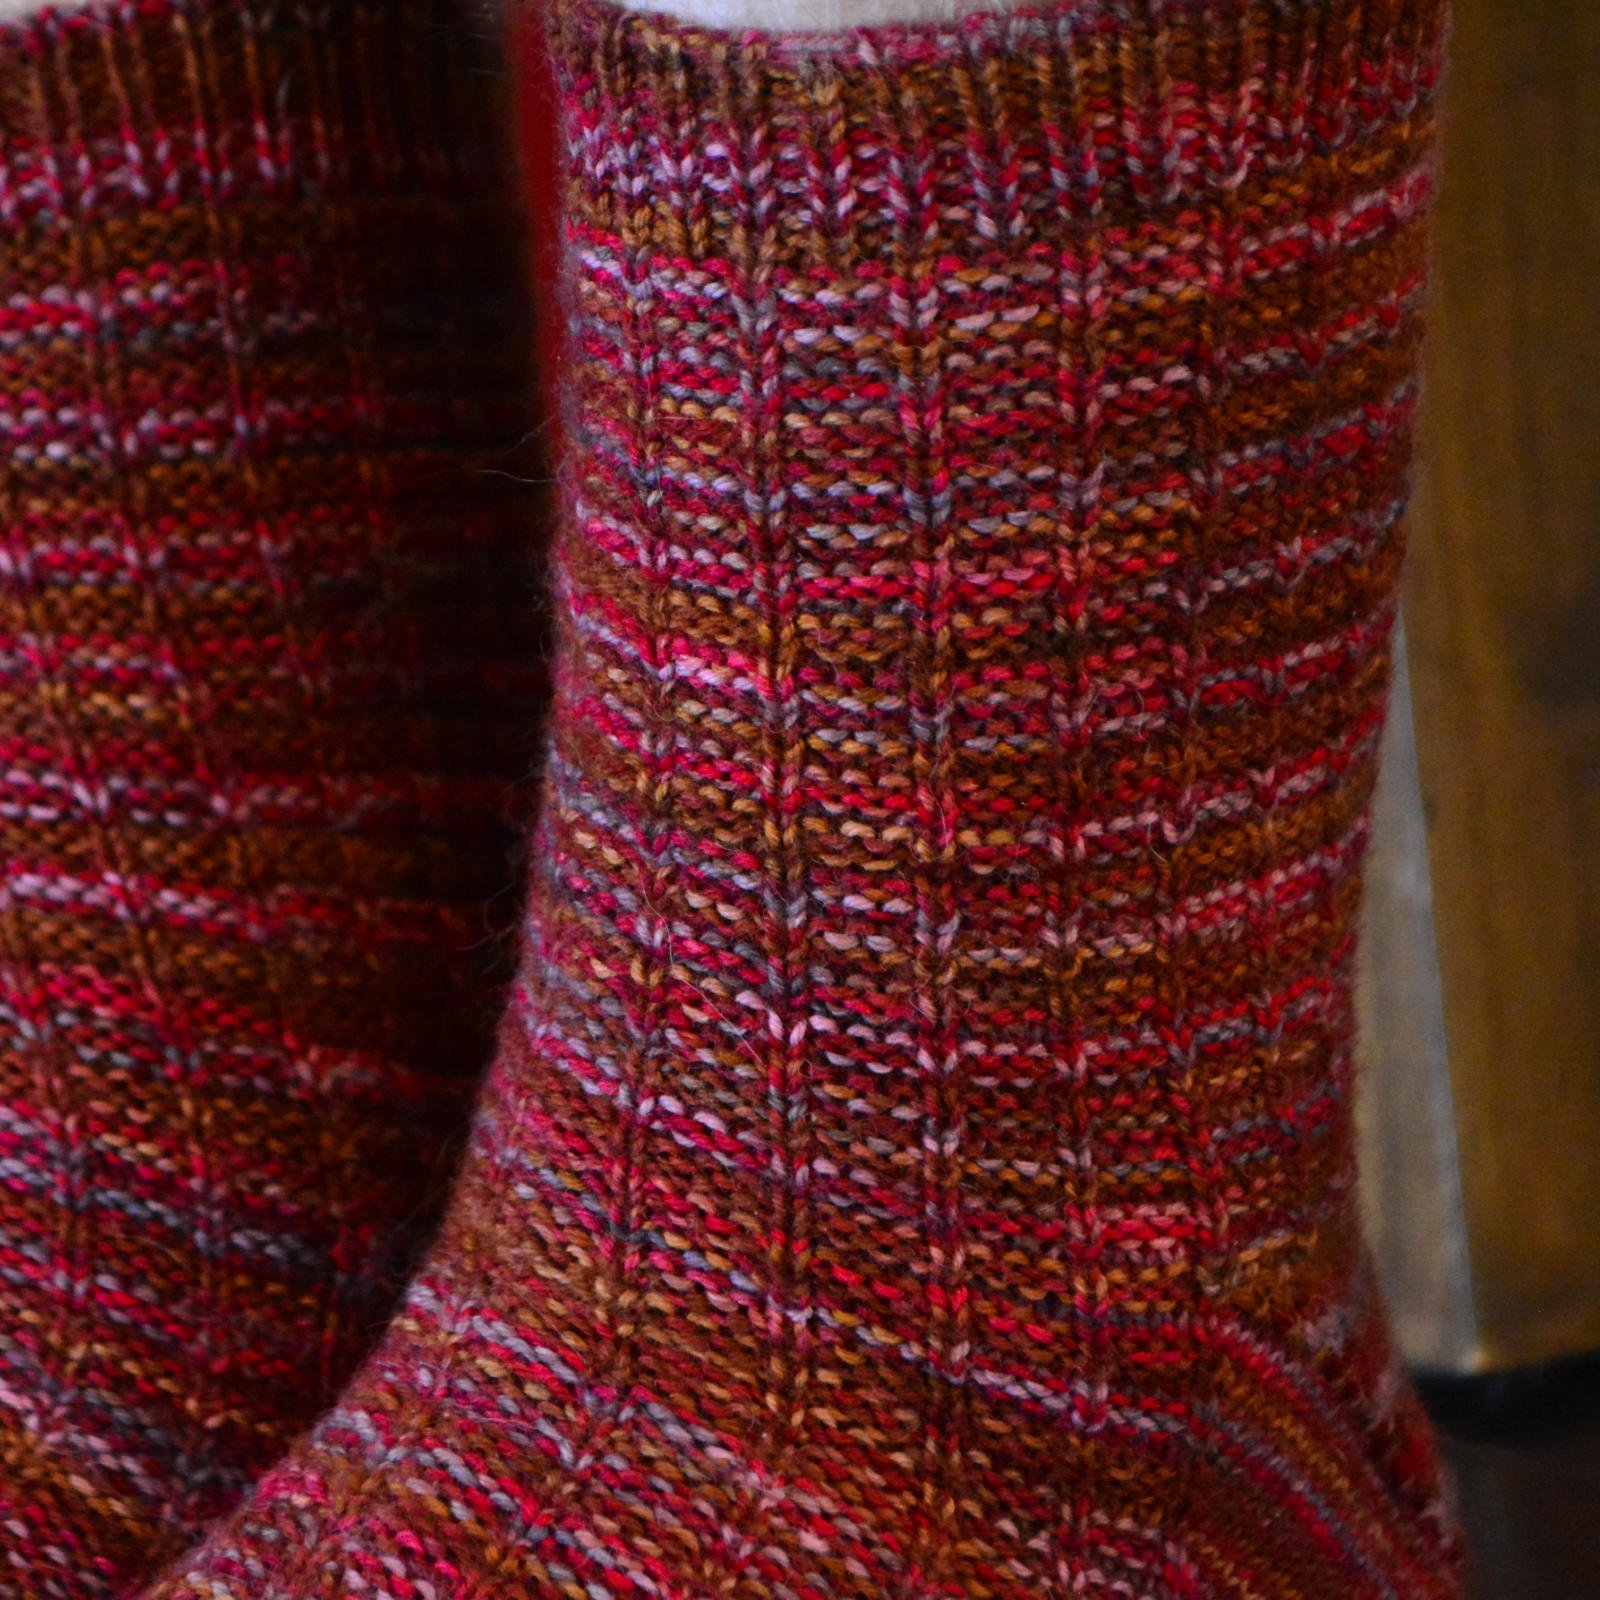
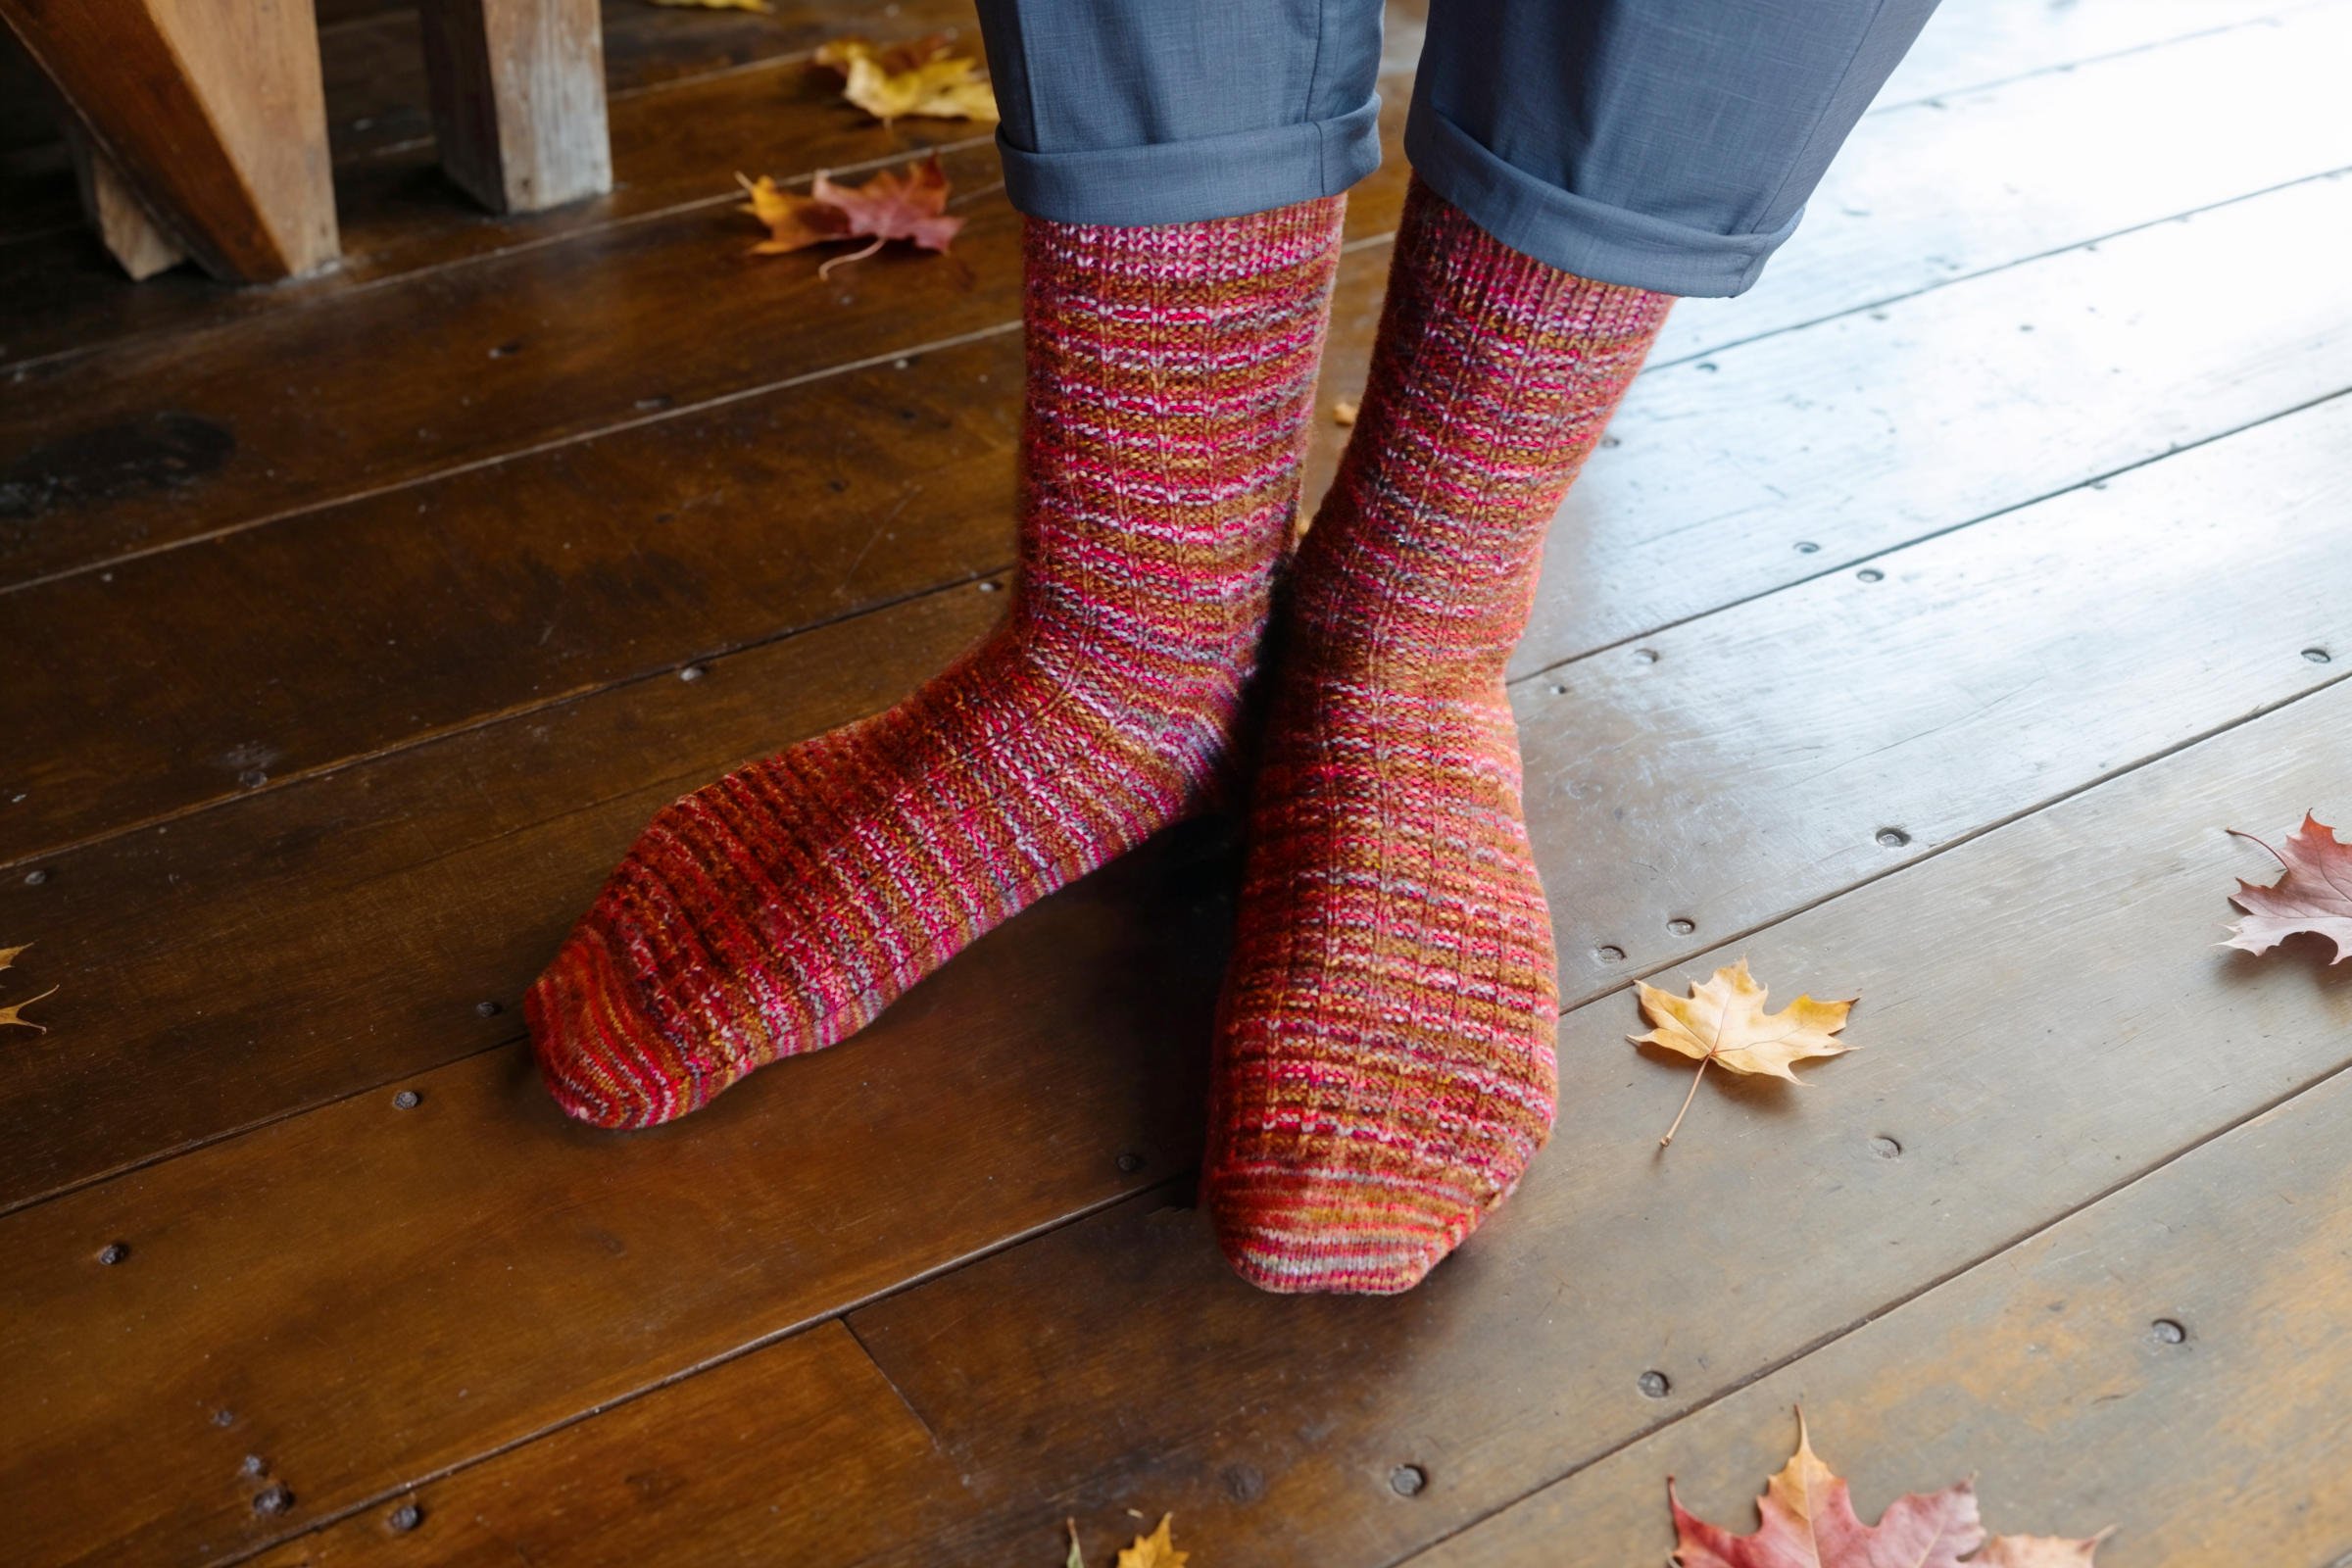
Using a provisional cast on like Magic Cast On or Turkish Cast On at the toe means no grafting later! Easily shape the toes using raglan-style increases on the edges while knitting in the round.Use short row shaping to produce a gusset heel at just the right foot length for a perfect fit.The waffle texture is an easy four-stitch, four-row repeat that captures a little extra warmth while providing textural interest—as well as a little more interest for the knitter.Finish with an inch (or more) of one-by-one ribbing for a stretchy cuff that won’t fall down, then bind off with either Sewn Rib Bind Off or Super-Stretchy Bind Off for a smooth, professional edge.Put it all together for a pair of snug-as-bug feet on yourself or some lucky person you love!
While I made my sample in a variegated yarn, this would also be a great pattern for solids to really show off that waffle texture.
The pattern is available in three sizes, from Youth / Adult Small (8.5-inch or 21.5-cm instep circumference) up to Adult Large (11-inch or 28-cm instep circumference.)
What are you waiting for? Go get yours and cast on your next knitting adventure today!
A month ago, I posted the announcement that I was done. My Secret Wish Knitting was closing down, and for good reasons—mainly, that I didn’t feel capable of continuing to run this business, which took too much time and energy from my primary passions of writing and editing.
Over the last several weeks, I have gone about the process of following through on that. I took all my patterns down off of Etsy and Lovecrafts. I deactivated my pattern sales on Ravelry. I started making other changes to separate my knitting brand from other aspects of my online presence. I started backing up my extensive stitch tutorial pages elsewhere, in case I ever wanted to do anything else with that work.
And then, this week, I had meant to take the final steps of closing down this website and finally shutting the doors for good.
My previous concerns were valid. This knitting brand did take up a lot of my timeâbut that’s because I was spreading the brand too thin, and in places that didn’t serve me. Or, in retrospect, my customers.
Etsy, while an excellent search engine for new customers to find me, is the worst accounting nightmare I’ve ever experienced. And I’ve dealt with a lot of different platforms and retailers, so I have a really solid spectrum of platforms to compare it to. I’ve sold on Etsy for fourteen years, and that entire time, dealing with hundreds of hours of accounting annually for microtransactions that don’t even make sense to pay someone else to enter has been an ongoing drain on my time, energy, and financial resources.
(I have other issues with what Etsy has become, but this was my primary problem with selling there.)
Well, guess what? I’ve now closed my Etsy shop. (It technically still exists, but there are no active listings.) That headache is blissfully, wonderfully gone.
But that doesn’t mean my knitting business has to be.
One of the reasons I built this website last year, besides allowing me to serve my customers in ways my previous setup wouldn’t allow, was exactly because I could automate so many of the processes—the follow-up emails, for one, but mostly, the accounting. But because I thought I still needed to stay open on Etsy to make this profitable, this new website didn’t actually free up any of my time.
And because of that, I also wasn’t able to expend any energy on the things I really want to do to serve my knitting clients better, such as continuing to revise my older patterns to be more accessible, or to publish any new designs that have been languishing in just-need-to-be-written-up limbo for years. I was so drained from simply trying to stay on top of the admin that it left no room for growth or creativity.
If I hadn’t reached a breaking point this year and decided to close everything down, I wouldn’t have realized where the real problem lay.
But now I have. And in taking these steps,I’ve discovered that I can have the best of both worlds—keeping my side hustle hobby business alive, while continuing to fill what I feel is an important niche in the knitting community by working to provide low-vision-accessible, hand-ambiguous patterns and tutorials.
Same photographer, same cutie (I think).
A Mindset Revolution
As I’ve considered what led me to my dramatic conclusions last month (to make sure reversing my decision wasn’t a bad idea), I’ve had another epiphany.
I always want to do everything the very best I can. I’d rather do something correctly, to the best of my ability, and serve my customers in a way that satisfies me as well as you, than take shortcuts to do it fast and sloppy.
Like the slow fashion we create, my entire career has been built on slow growth.
I also have enough business knowledge and savvy to dream up what the best version of any endeavour I undertake might look like… in a perfect world.
The gap between those two things—wanting to create things well, even if it’s slow, and building a product or project into the best version of itself, which requires a lot of development—has been a constant source of frustration and character growth for me over the years.
This week, I realized that part of my frustration with this brand stemmed from not having the time nor energy to devote to bringing about that “perfect version” of it right away. And I kind of went, Well, yeah, Talena. What else did you expect?
To be honest, for me to do all the things I can envision for my knitting clients would require a lot of growth in all of my businesses. The kind of growth that would allow me to have a team and free up my time to focus only on the creative and community-building aspects of my brands.
But I’m not there yet.
Over time, I believe those dreams will be achievable. Eventually, I may be able to host the community events, publish new patterns on a consistent and frequent basis, and become more involved in the knitting community. I just can’t do those things right now.
And, as long as I can be okay with that, and stop trying to pressure myself into being in a place I’m not, then this business could continue to grow slowly, as it always has. I can keep this side business that’s always held a dear place in my heart alive. And my tutorials and knitting designs will remain available for those who want them.
So, that’s my big news. I’m not closing down completely. This website will continue to stay open for as long as it continues to pay for itself.
Back in Action
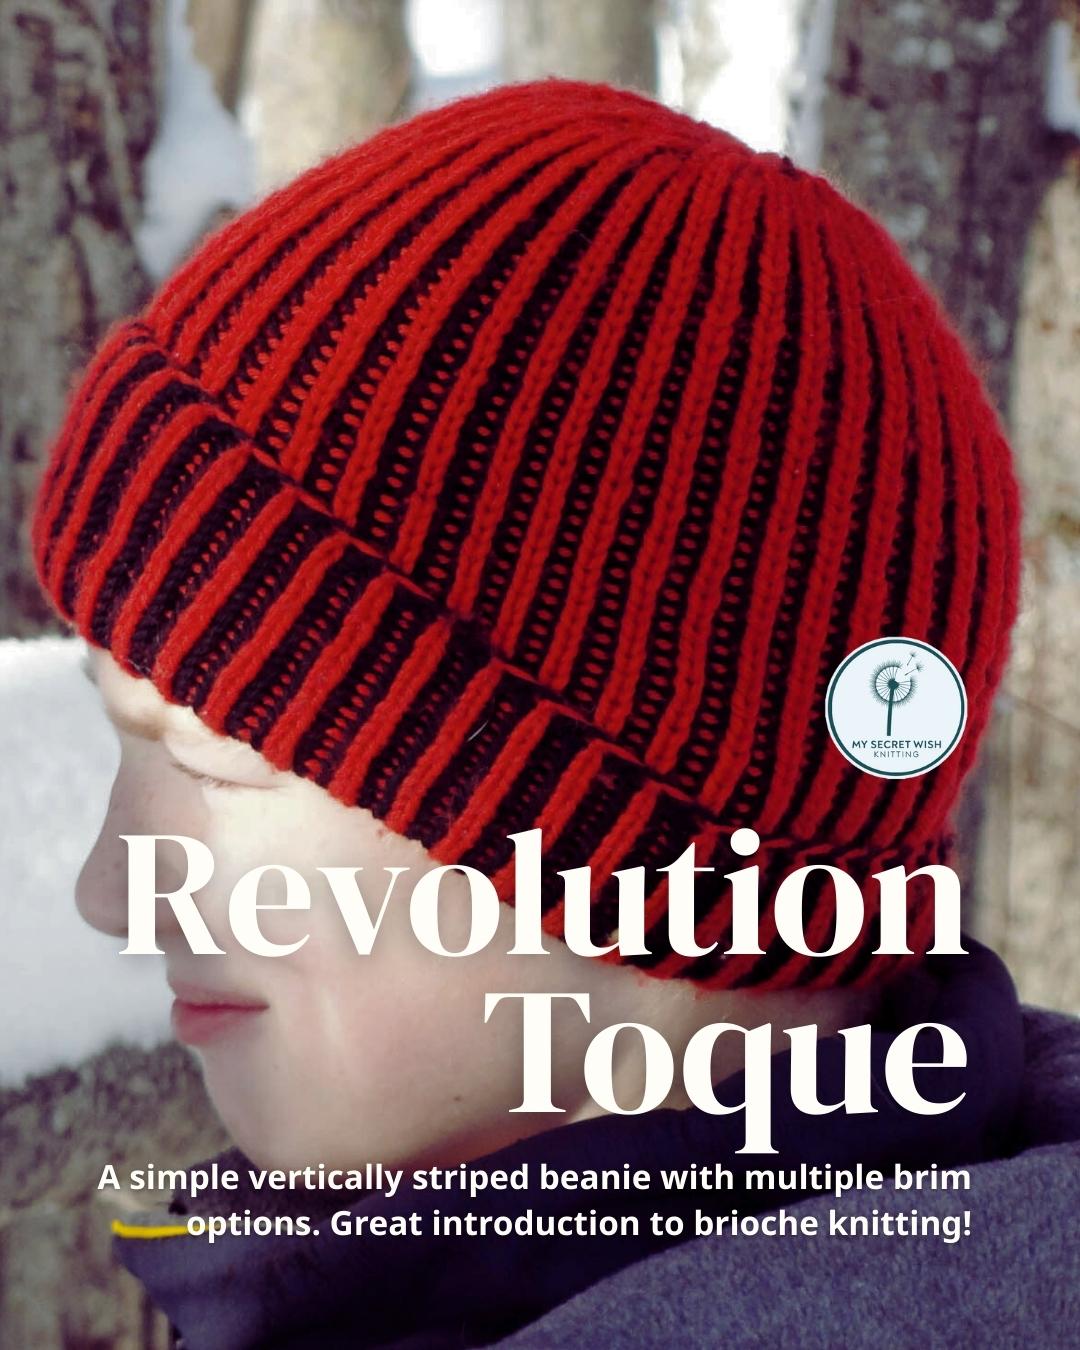
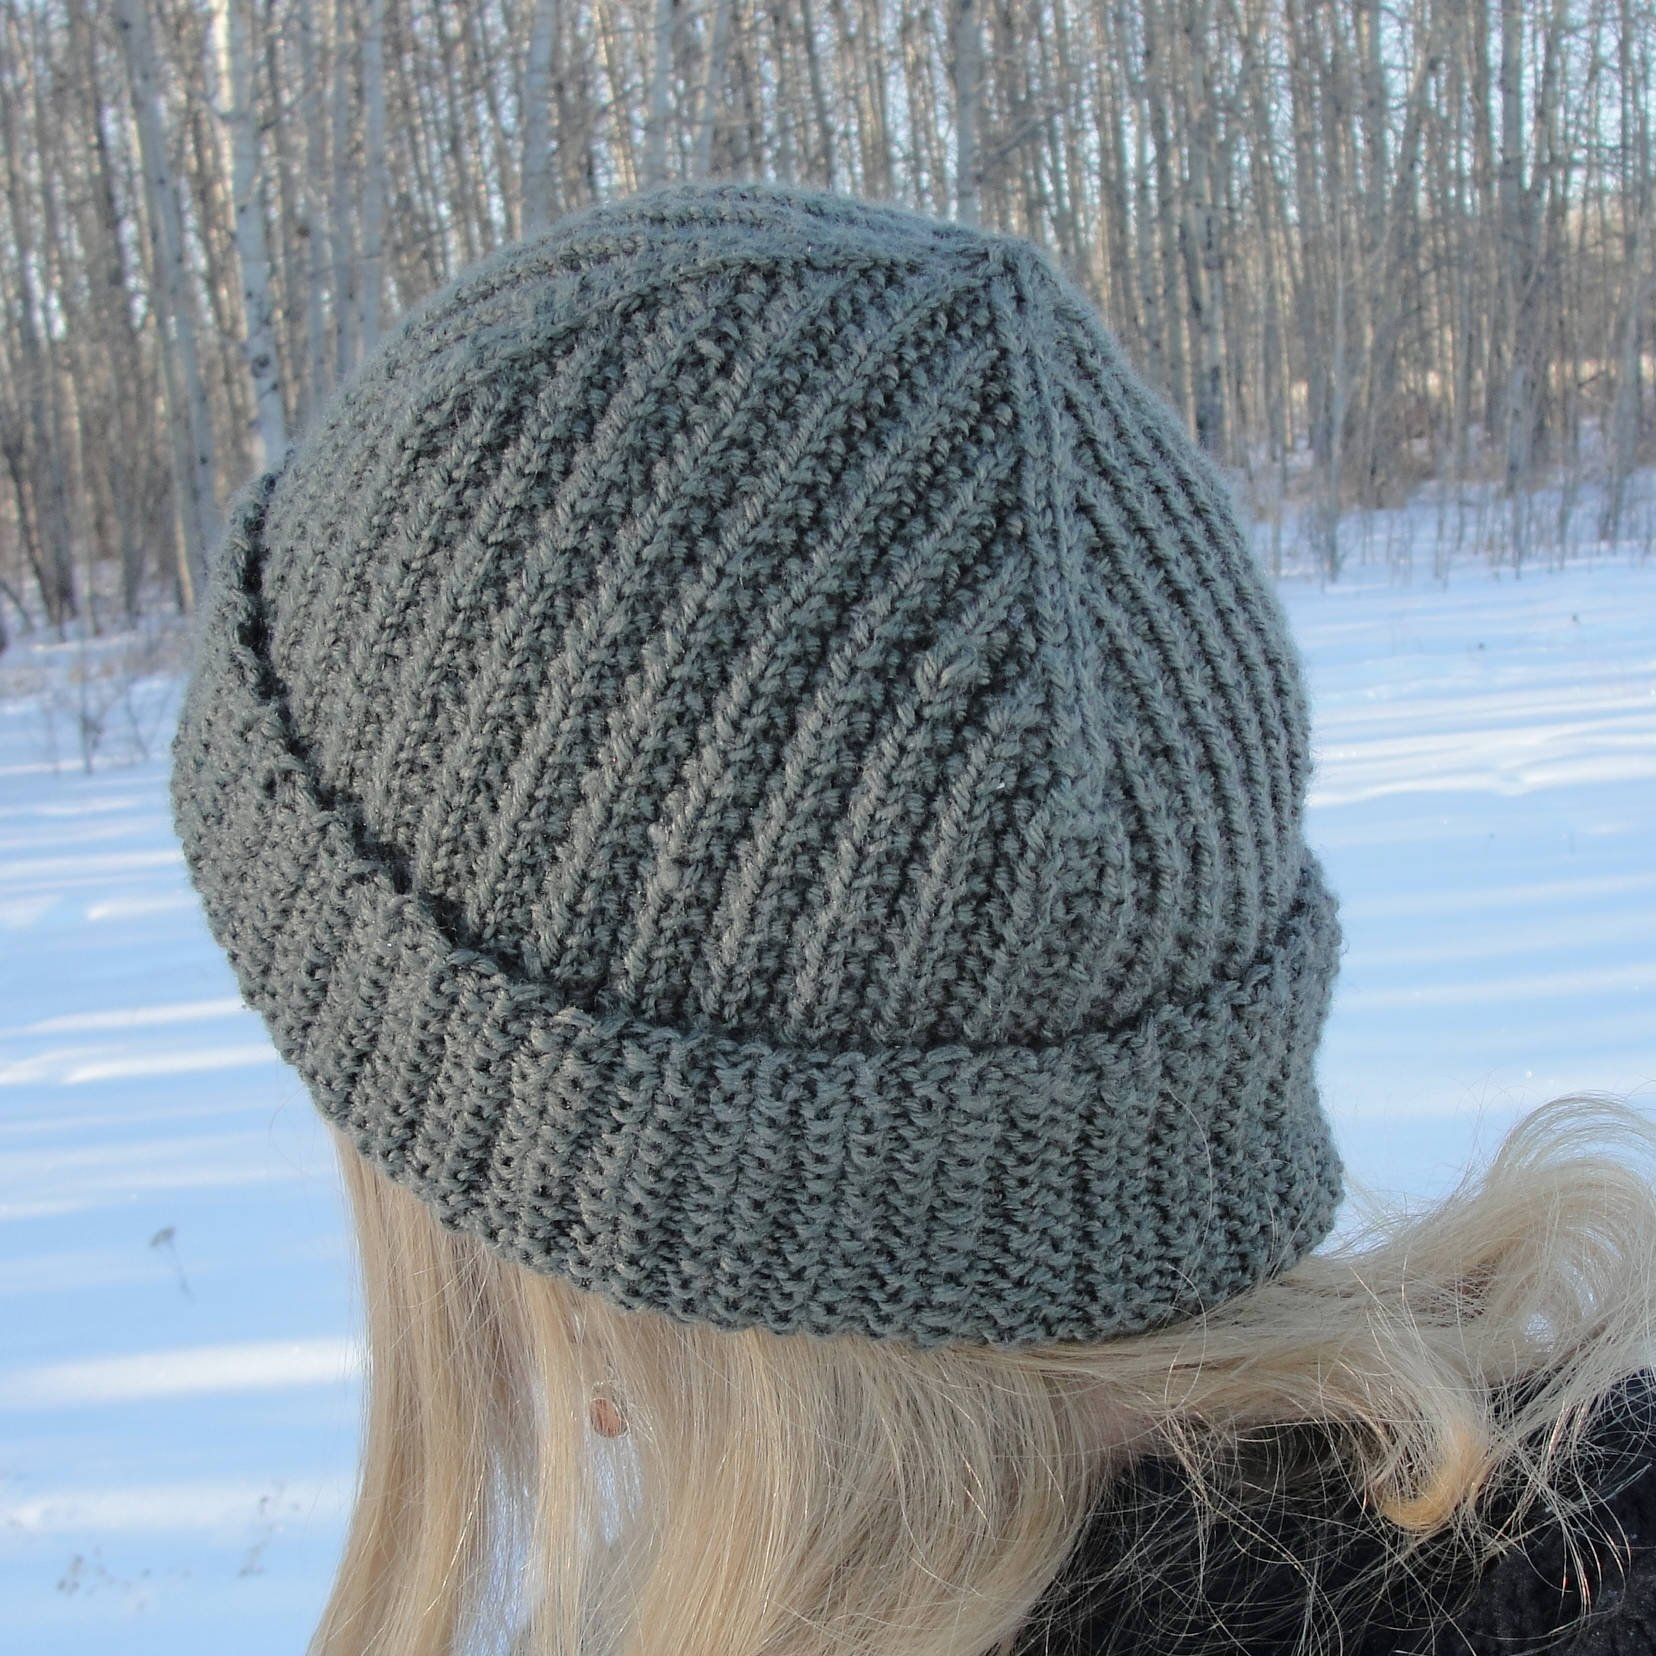
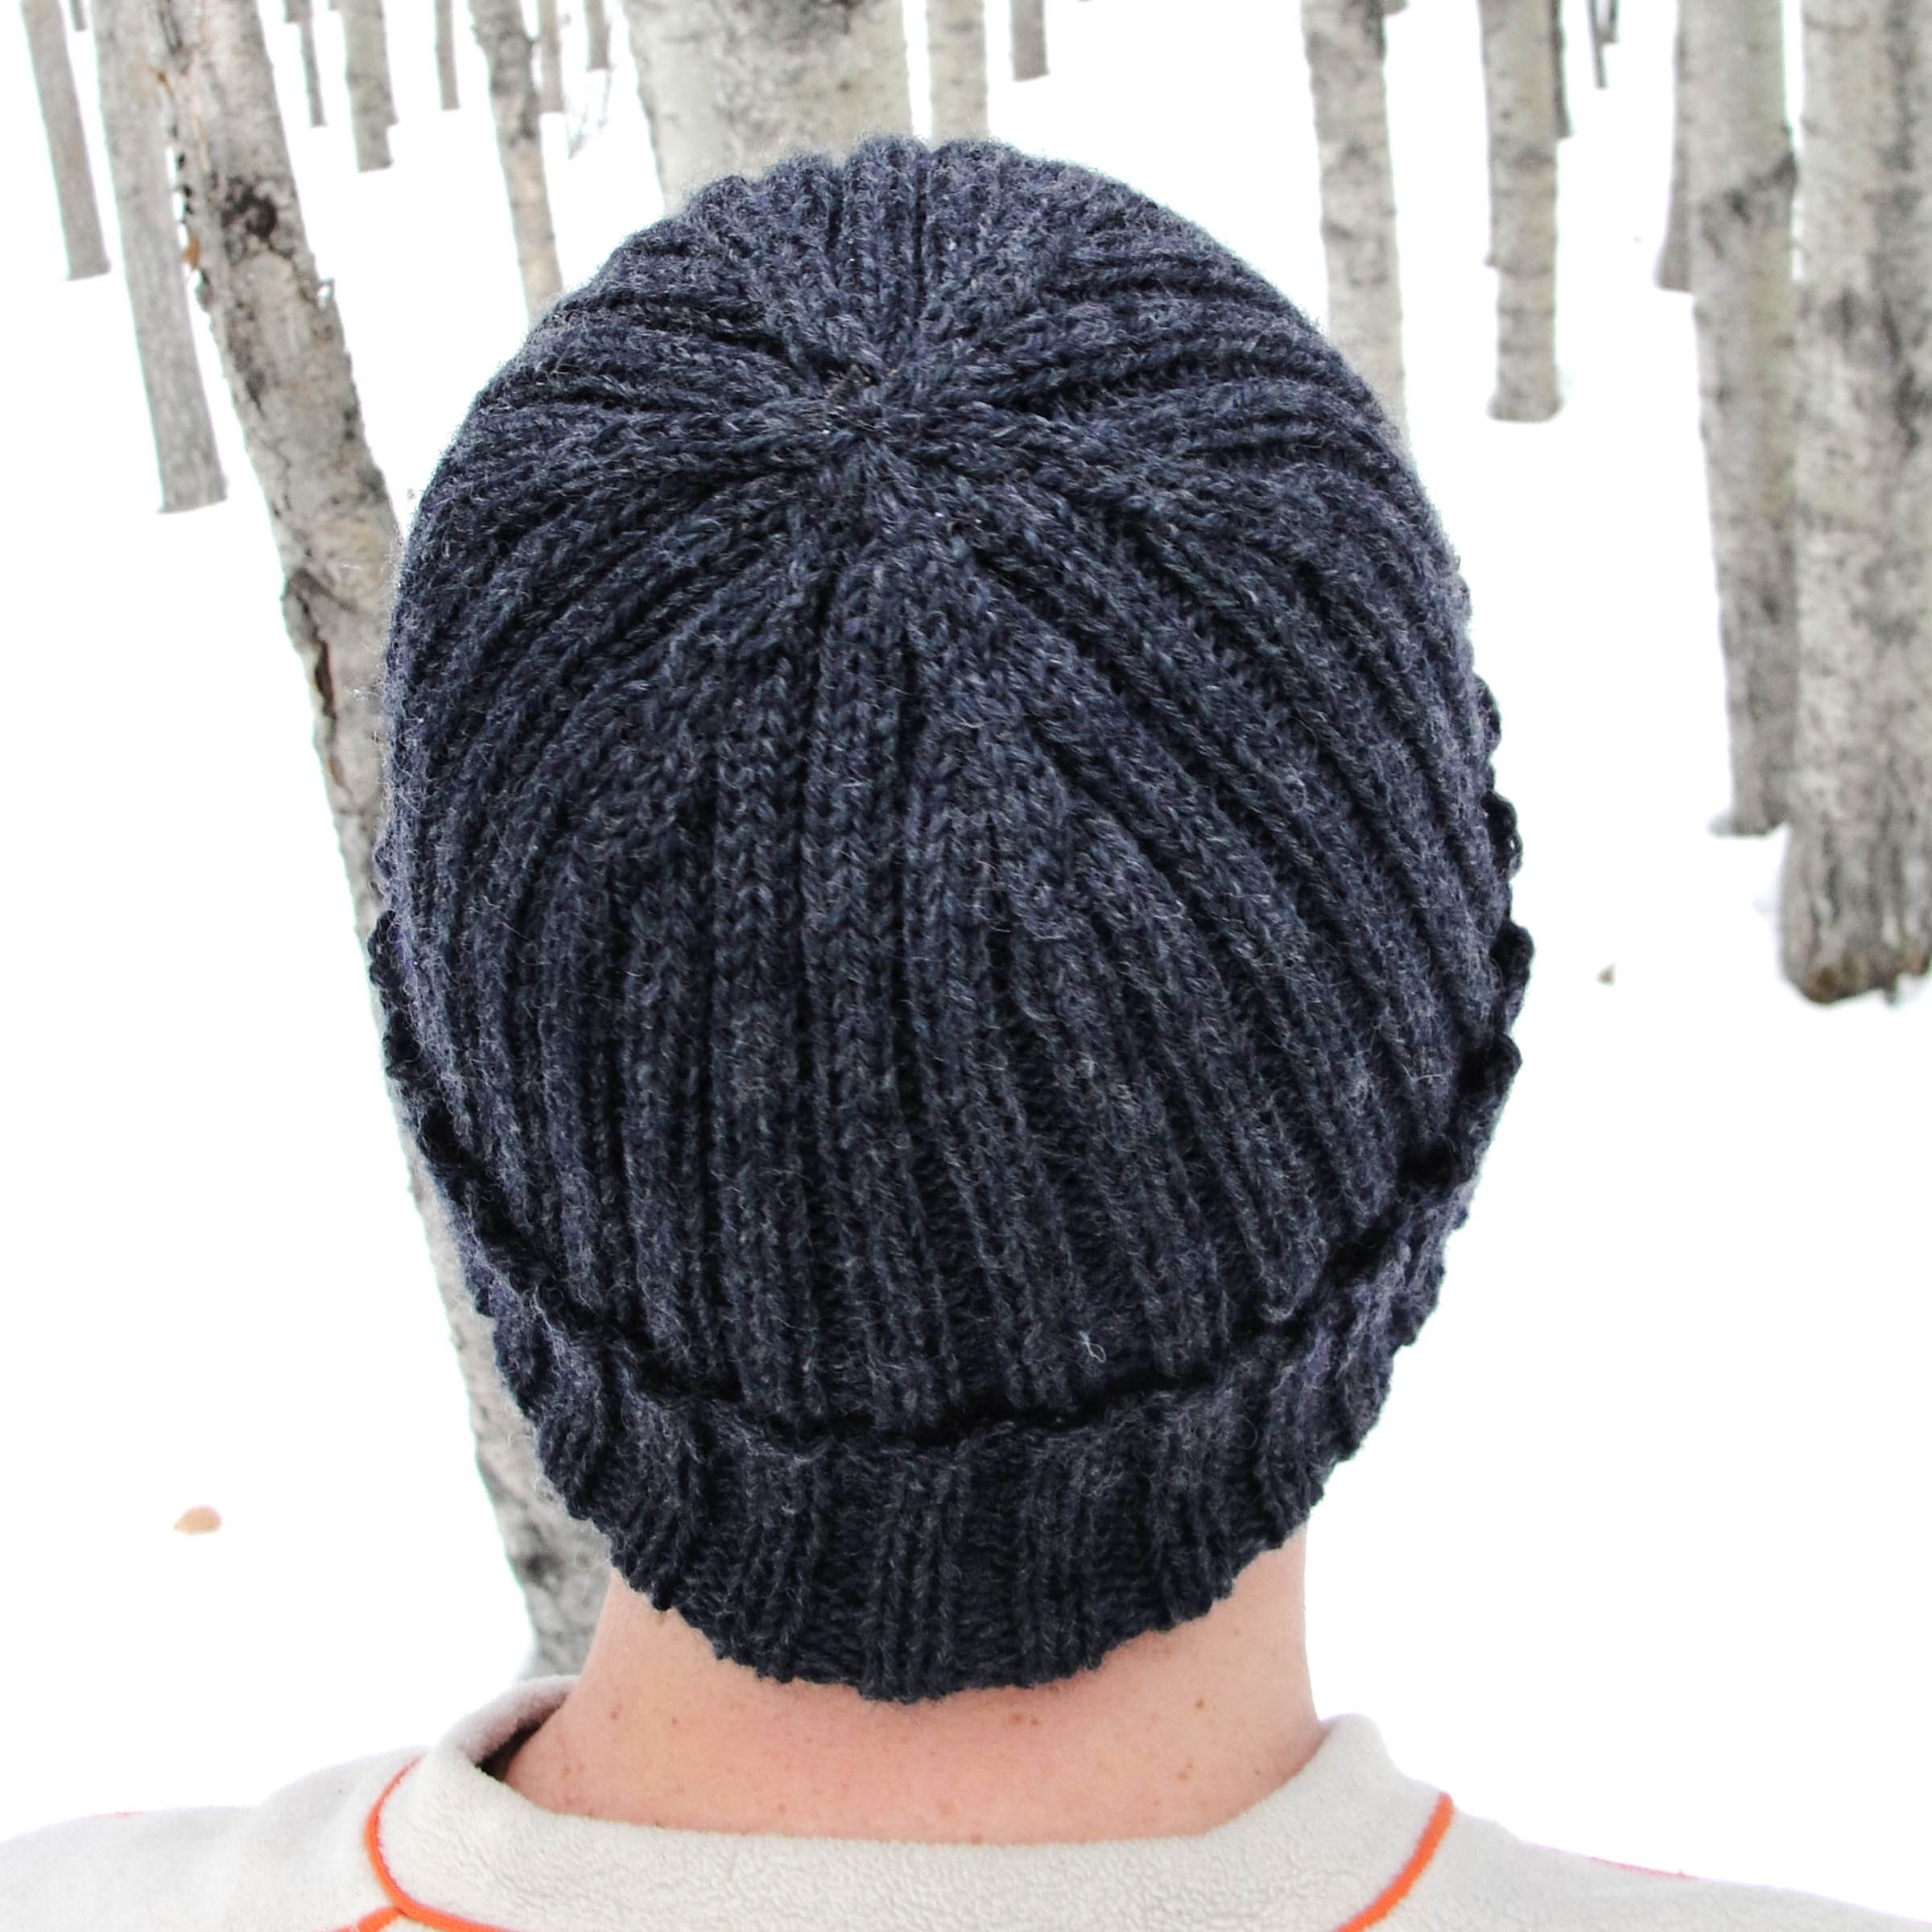
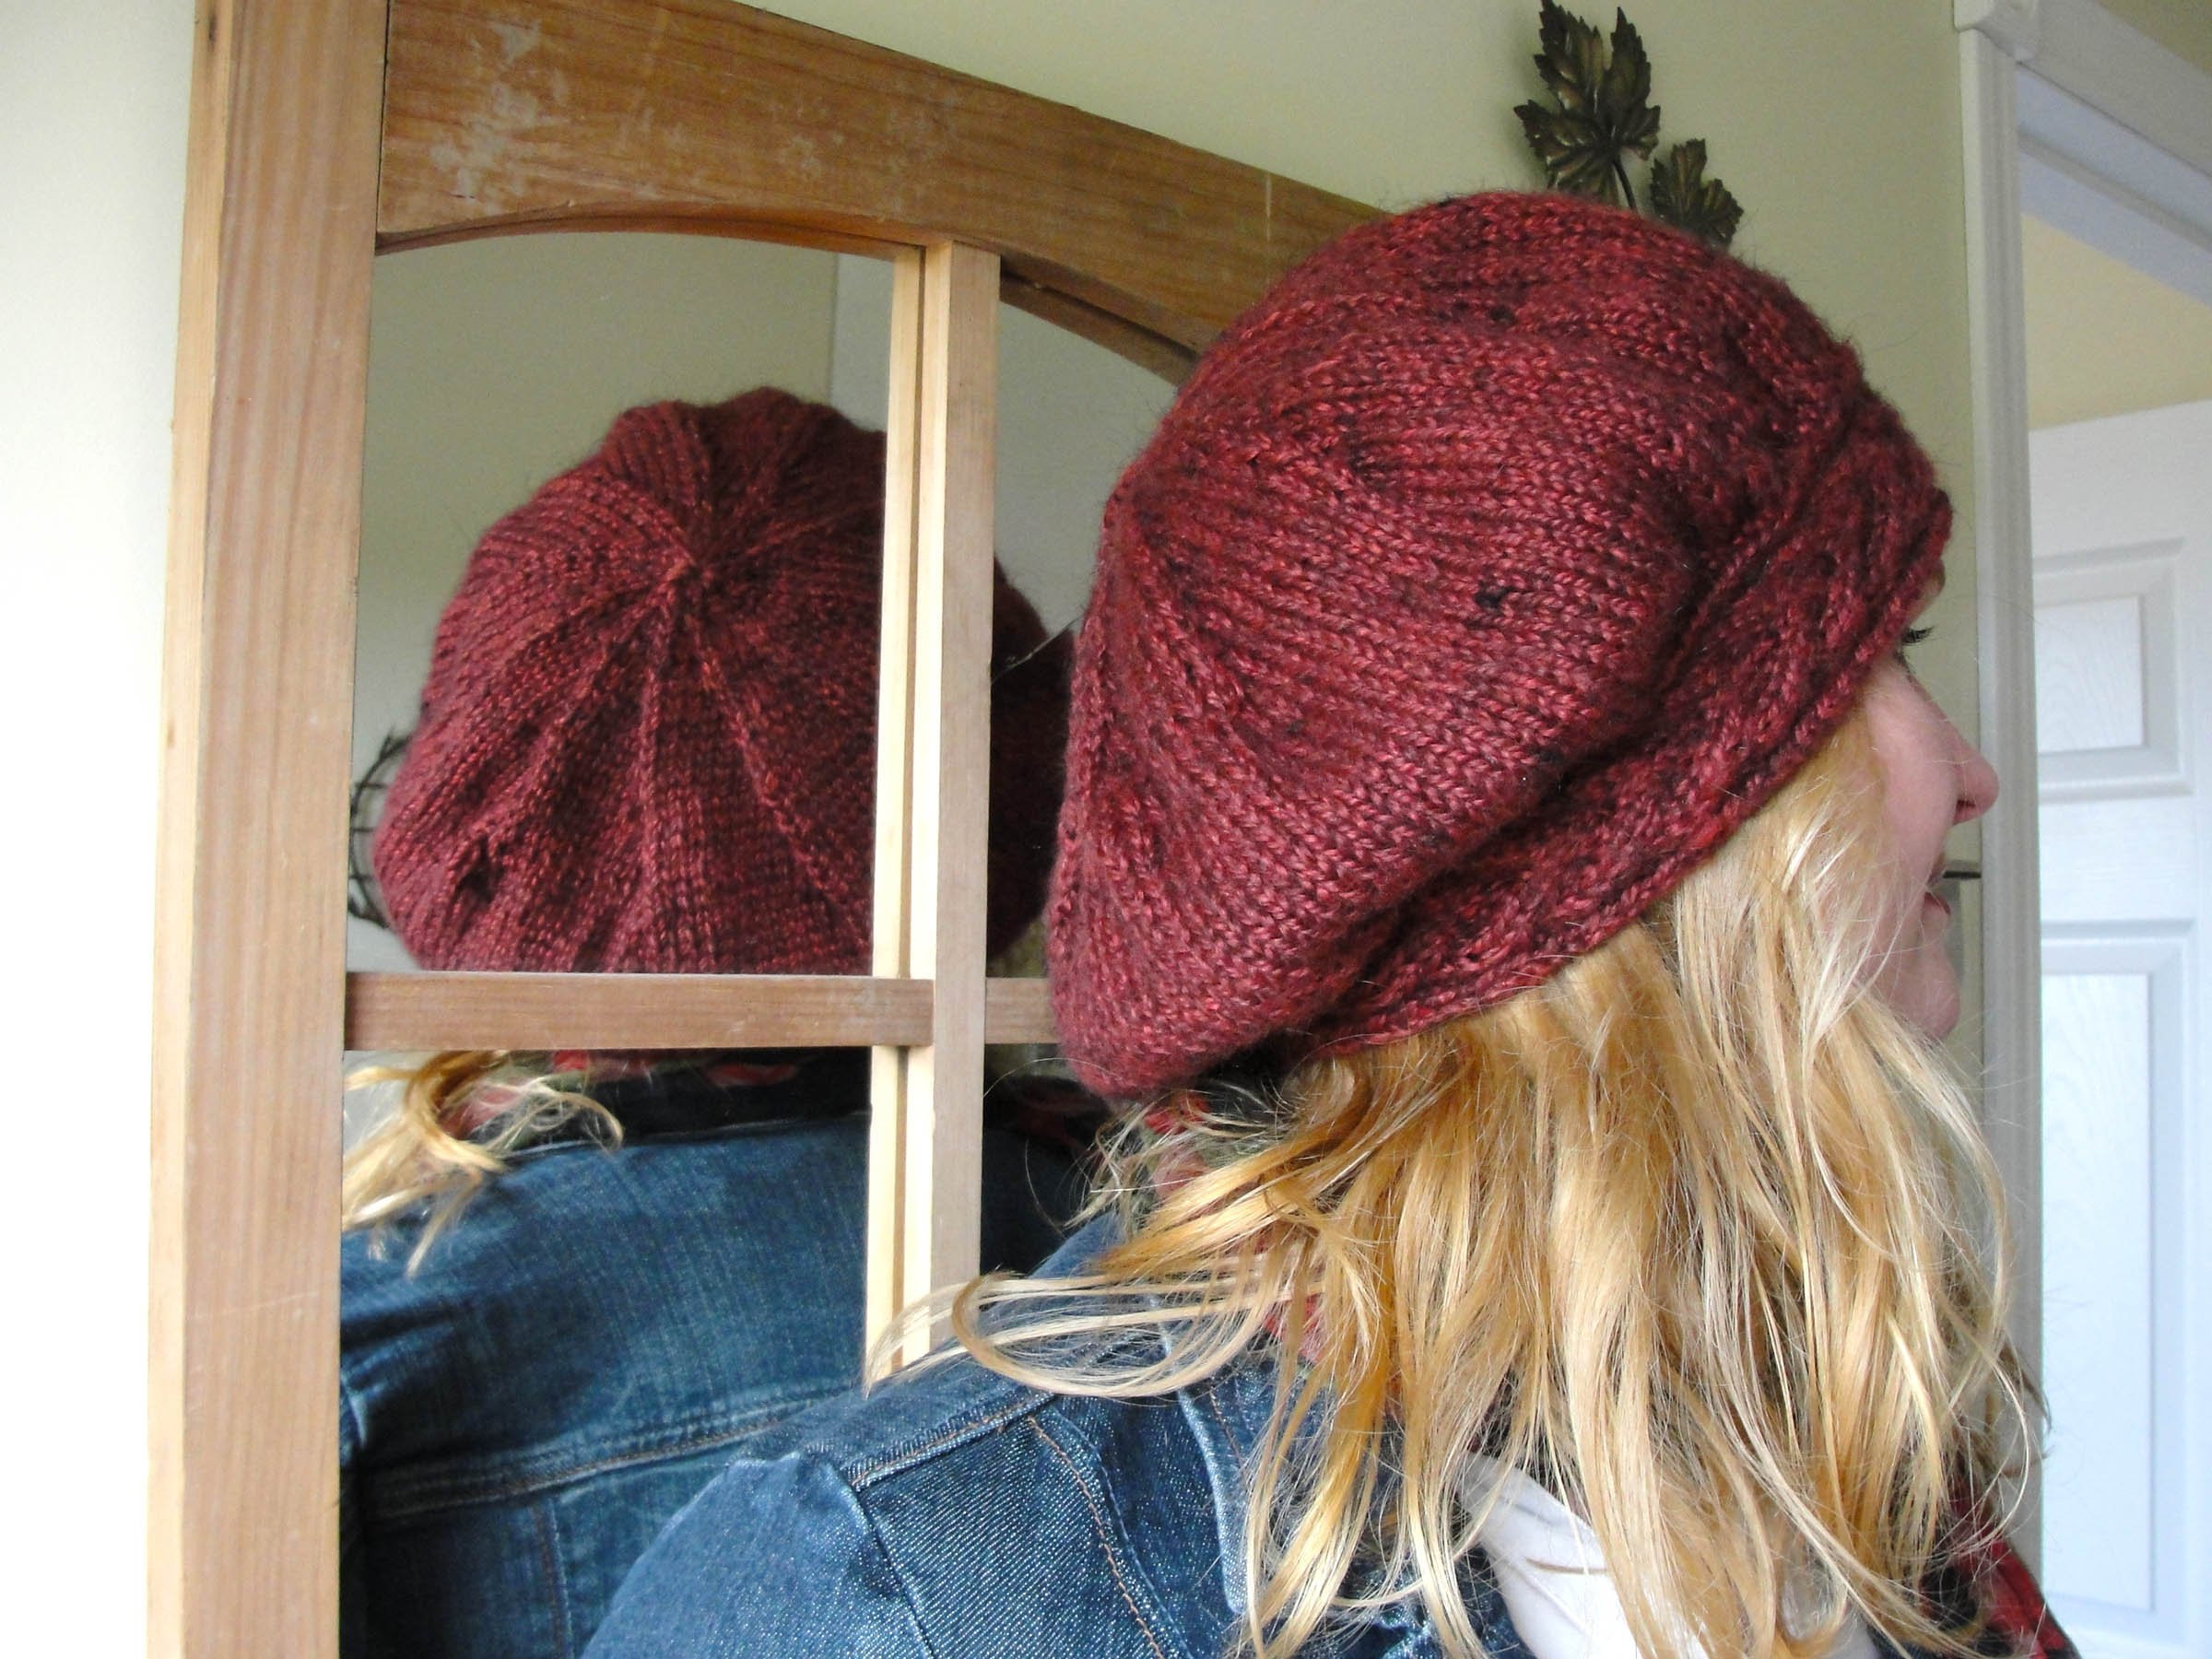
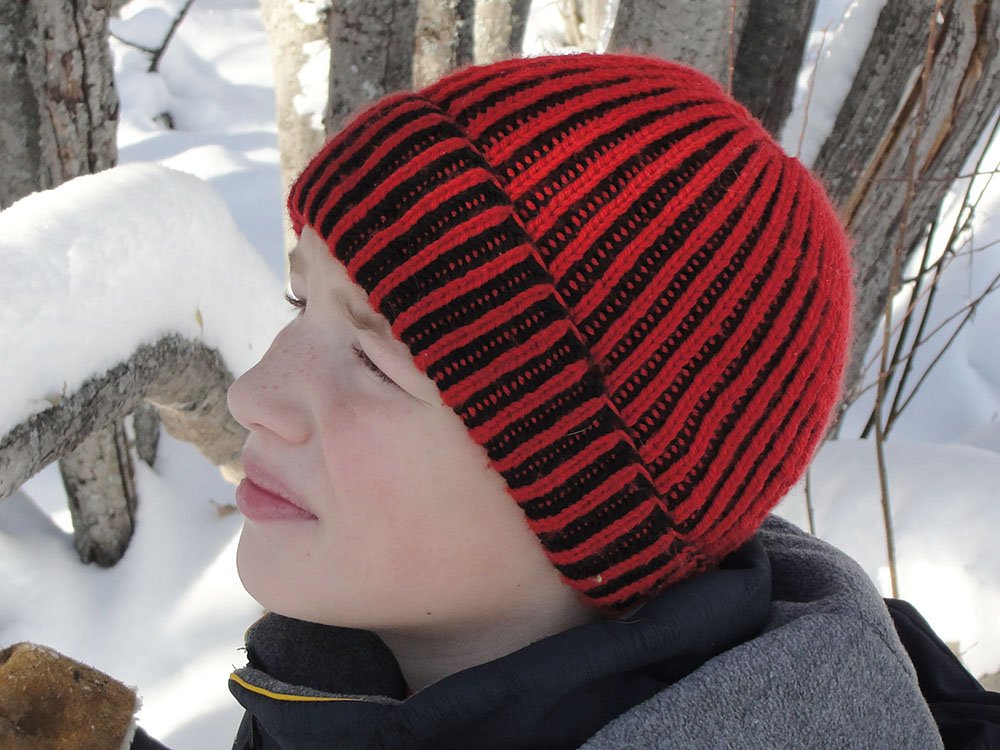
So, inspired by that burst of enthusiasm, this week I finished revising and republishing one of my most popular designs that had been sitting on the back burner: the Revolution Toque.
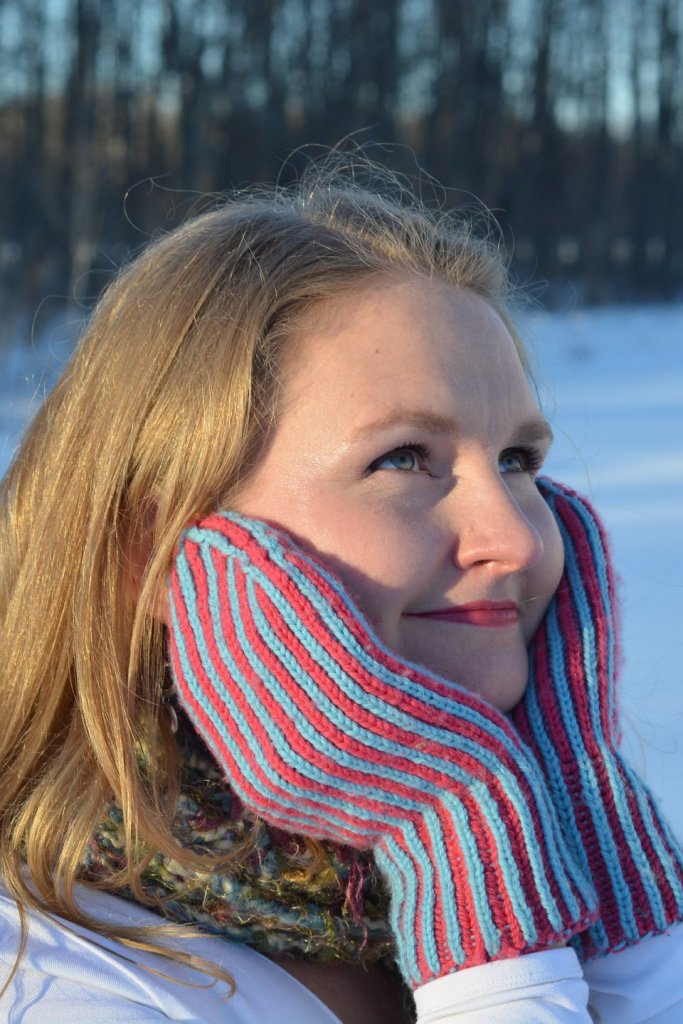
And if you add both the hat and the mittens to your cart, you’ll get an automatic bundle discount (about 25% off).
Thank you for your continued support, friend. By God’s grace, I think I’ve found a path that will allow me to continue to serve you for years to come.
If you’re in the market for a new project, please take a moment to browse my patterns, and be sure to subscribe to my newsletter so you can be notified when I have news to share.
It is with heavy heart I’m writing this, as I’m not good at goodbyes. I’m especially not good at saying goodbye to pet projects and hobbies that I’ve invested a lot of time, effort, and love into.
But the time has come. Unfortunately, after valiant efforts to reshape this business into something I could manage profitably as a hobby side hustle, I’ve had to admit that I can’t.
I can’t give it the time and effort it needs to serve you, my customers, the way I really want to serve you. And that is a constant source of stress for me.
So, with regret, I will be closing down My Secret Wish Knitting over the next few weeks.
Some resources will remain available, such as my YouTube channel and the videos there. However, my online tutorials will no longer be available, and I’ll be closing my patterns shops.
I want to thank you for supporting my business. I hope my tutorials and/or patterns have given you joy and warmed the hearts and bodies of people you love.
If you would like to pick up any of my designs before they become unavailable, be sure to purchase them this weekend, as I’ll be working on shutting down my shops starting next week.
God bless, my friend. And happy knitting.
Talena The Yarn Mermaid
P.S. If you want to see where all my attention will be going, I’ll be focusing exclusively on my author and editor businesses over at www.talenawinters.com. I’d love for you to check out my work.
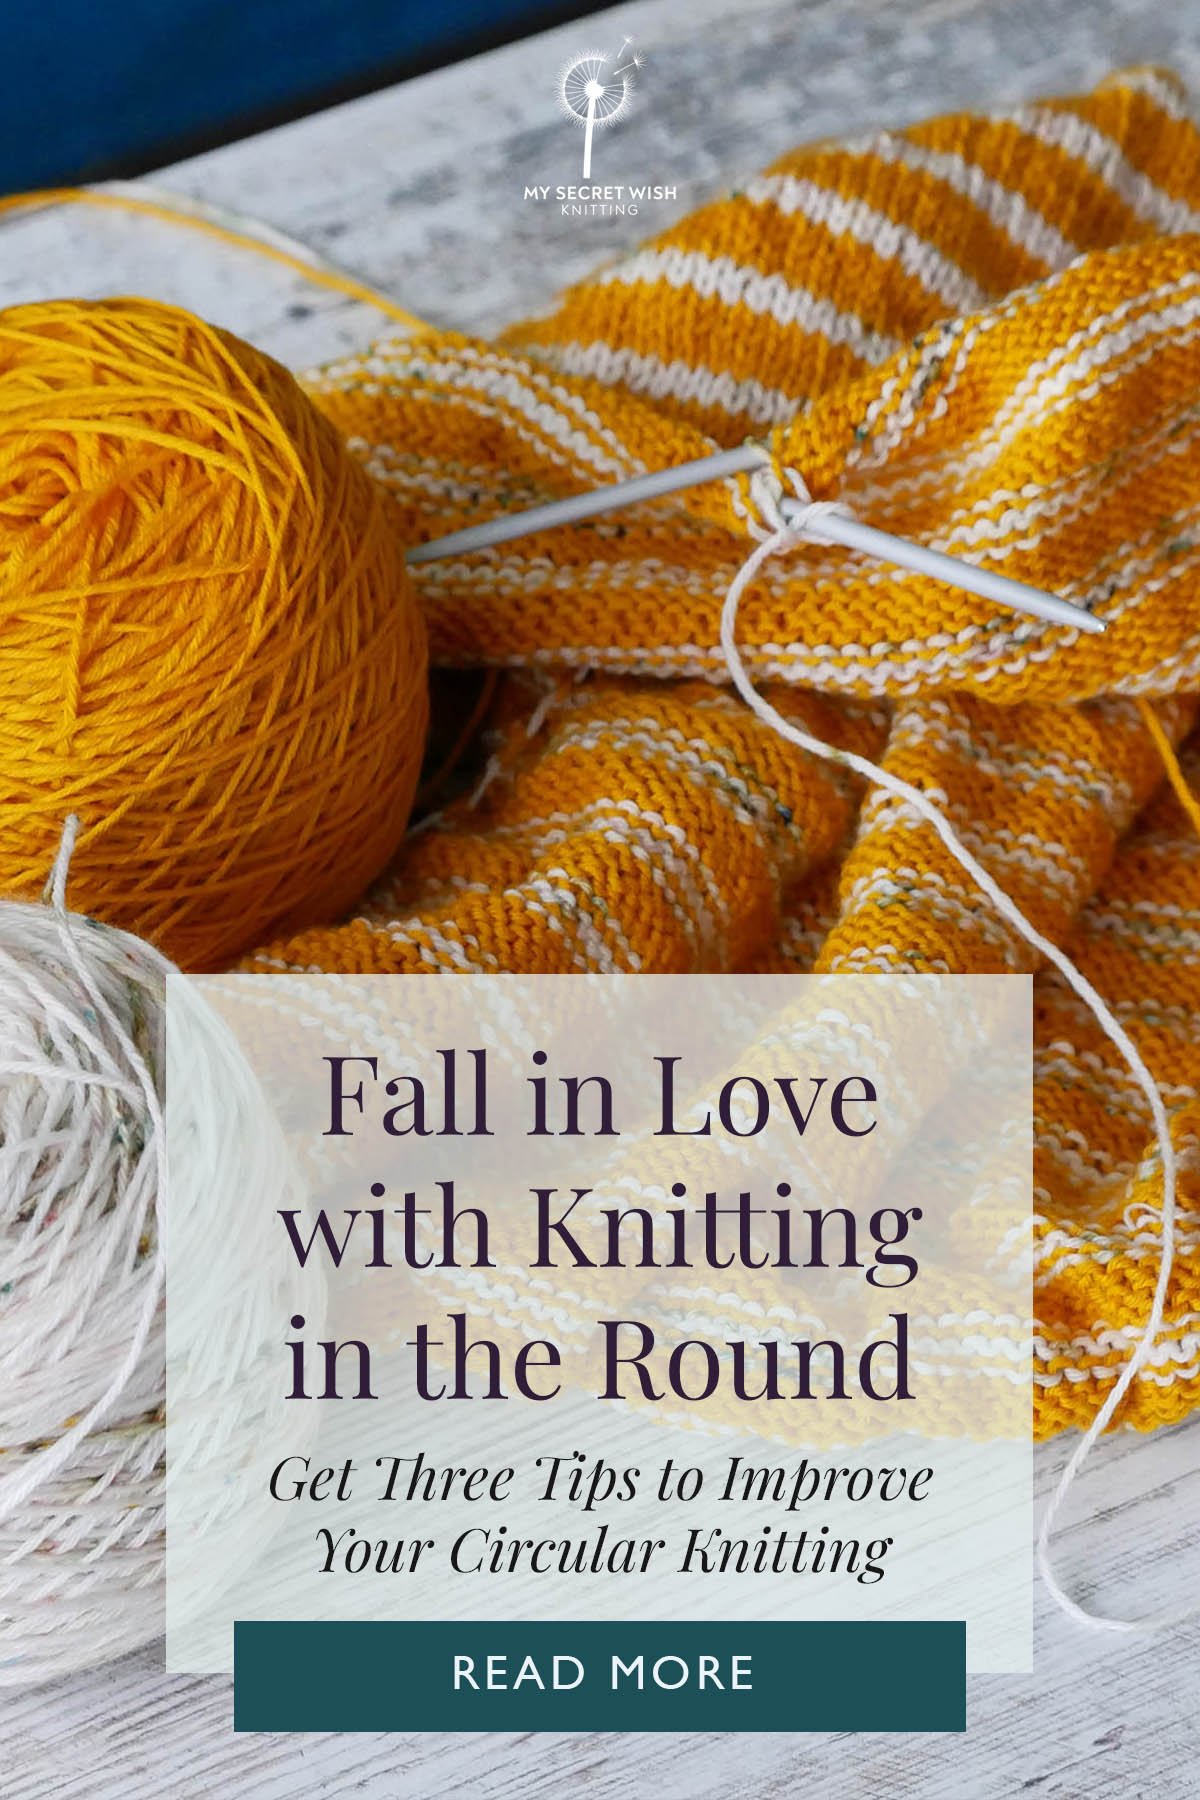
Knitting in the round, or circular knitting, is one of my all-time favourite styles of knitting. What’s better than casting on and then going round and round until you’re done?
However, there are a few challenges with circular knitting, such as difficulties with tension, the dreaded “laddering” effect where your needles meet when using double-pointed needles, or simply knowing how to accomplish the feat in the first place. (And the purl haters are saying “don’t forget the purl stitch!” I happen to enjoy purling, but we’ll tackle ways to increase your purl love in another post.)
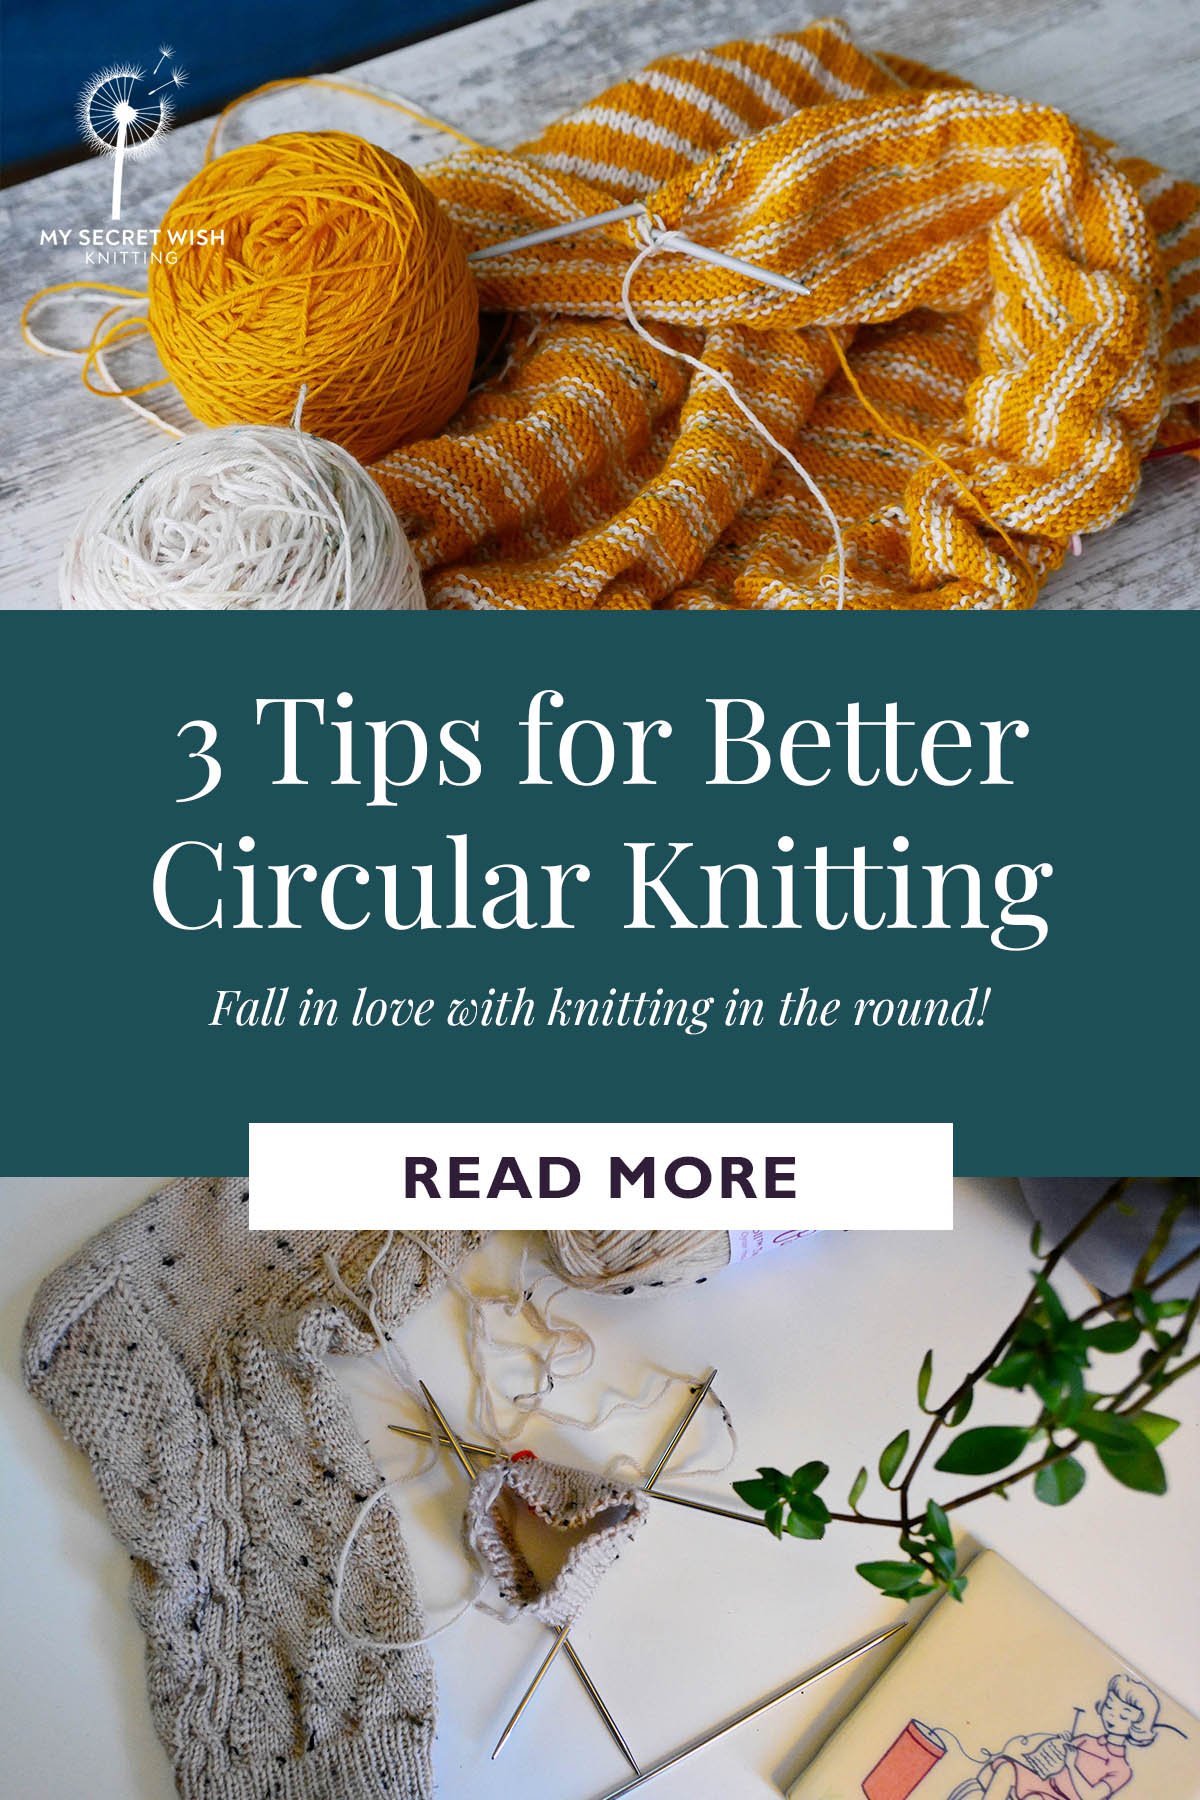
In this post, I’m going to give you my top five tips for creating beautiful circular projects, so you can fall in love with circular knitting too!
Onward.
Tip #1: Use the right needles for the job
Circular projects come in all shapes and sizes, from sweaters in the round to sleeves to hats to socks and mittens. And let’s not forget fingers on gloves or even I-cord. Each of these projects has a different circumference, and circumferences can even change throughout the project.
To create a pleasant knitting experience, it’s helpful to know which needles to use when.
When it comes to knitting in the round, you have two options:
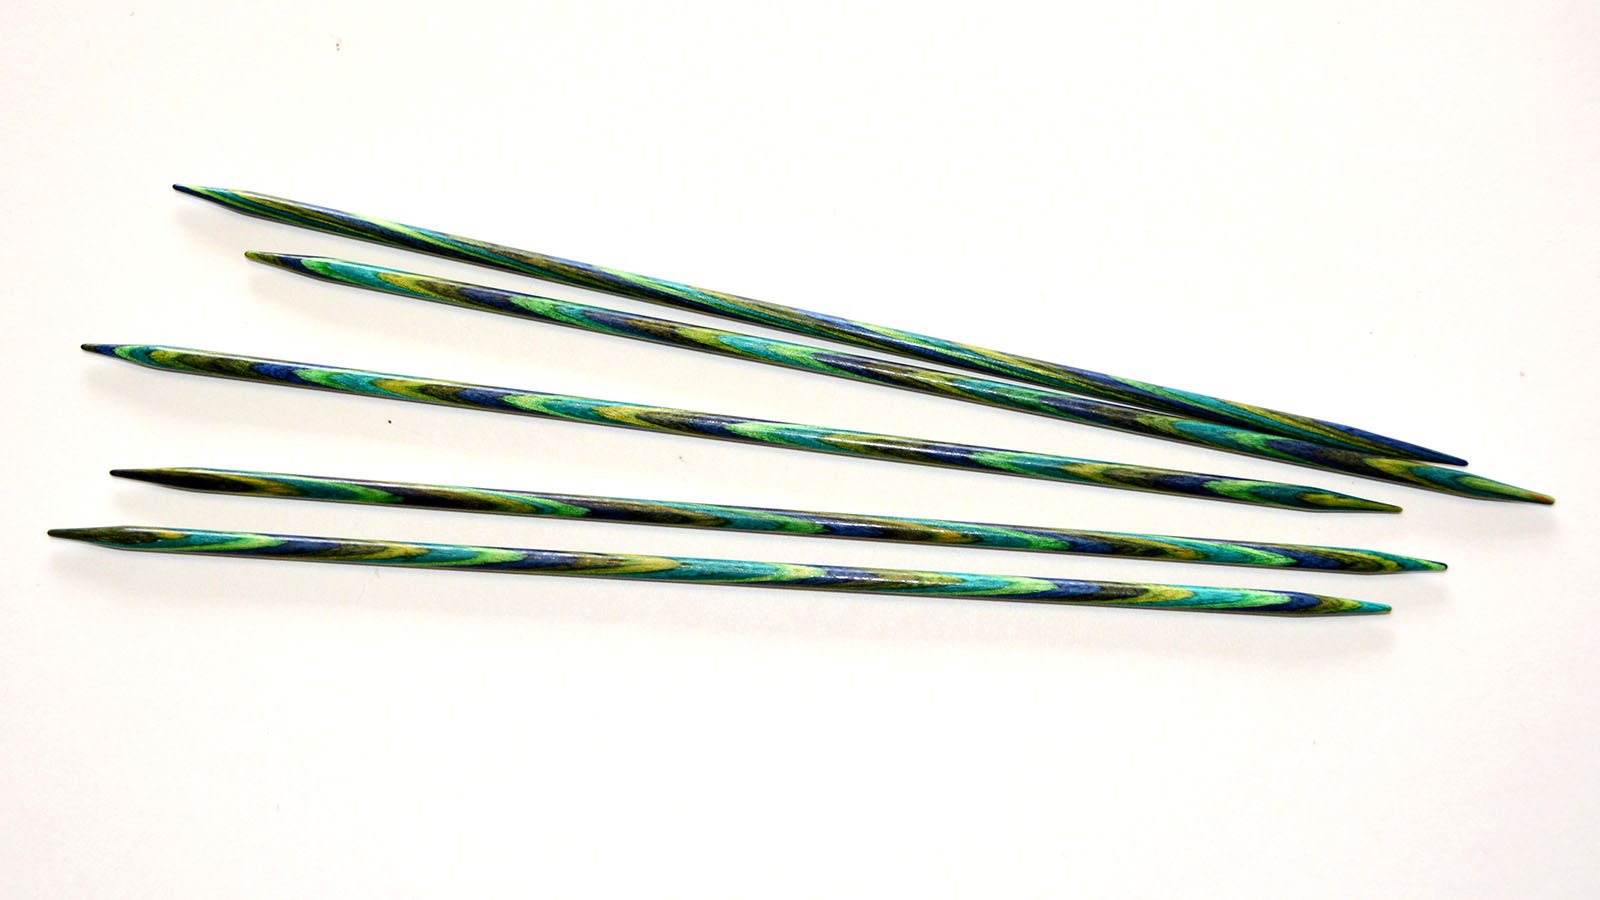
Double-pointed Needles
As the name suggest, double-pointed needles (or DPNs) have points on both ends. They often come in sets of four or five, allowing you to hold stitches in the round (though they’ll look like a triangle or square shape on the needles) while having one free needle to use as your working needle at all times.
(Some DPNs come in sets of six, but the sixth is usually a spare in case one of the other ones breaks.)
Circular Needles
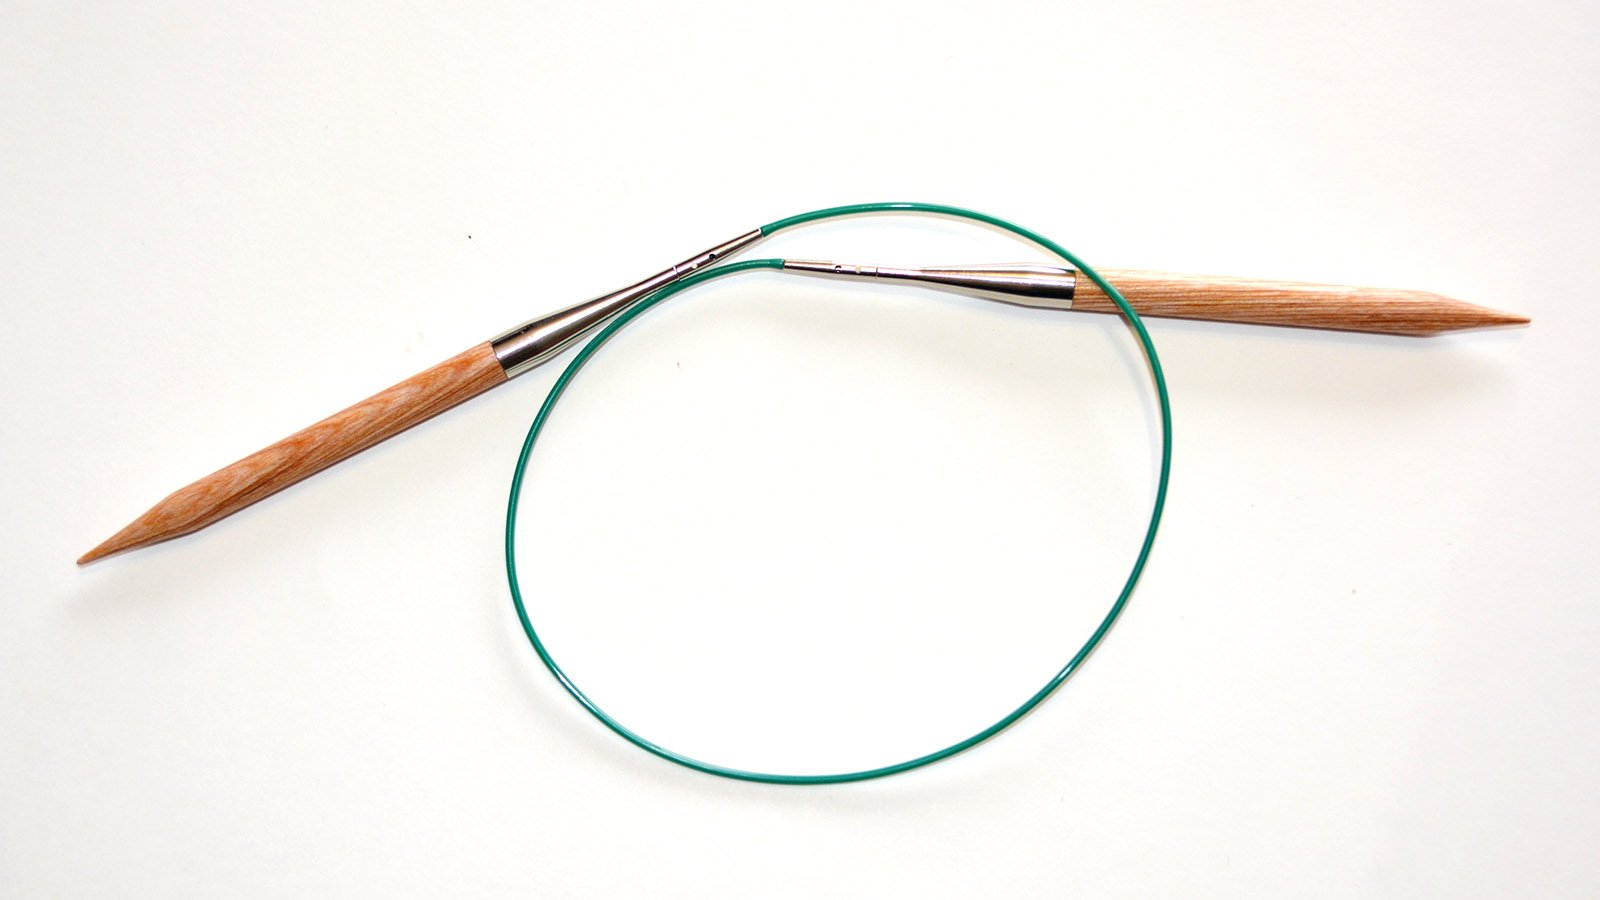
Circular needles have two rigid needle tips connected by a flexible cable. The tips can be fixed, meaning they can’t be removed from the cable, or interchangeable, such as these ones. Interchangeable needle tips can be swapped out to use many different sizes with one cable, or to use the same needle tips with cables of different lengths.
If you’re new to the different types of needles and how best to use them, I go into much more depth in my tutorial about How to Choose Needles, which you can see here:
While both types of needles come in a wide variety of lengths, you’ll be hard-pressed to find double-pointed needles longer than ten inches (or 25 cm), and the shortest circular needle cable is usually 16 inches (or 40 cm).
I have some vintage DPNs that are 14 inches (or 35 cm) long, but I’ve never seen any modern options this length. That’s because working with rigid double-pointed needles at longer lengths for projects like sweater bodies is awkward and ungainly. Once circular needles were invented, I suspect these longer DPN options fell out of fashion.
But manipulating the rigid ends of circular needles requires you to have enough cable to be able to turn the needle tips back toward themselves, so you can’t really have a cable shorter than 16 inches. However, you can use a cable as long as 42 inches (or 107 cm) for pretty much anything.
That’s why, traditionally, double-pointed needles have been used for small-circumference projects, and circular needles have been used for larger ones. Frankly, I prefer double-pointed needles, and will use them whenever a project circumference allows for it. Not everyone does, but if you’re starting out with circular knitting, I recommend you give double-pointed needles a try. (Find a tutorial about using them here.)
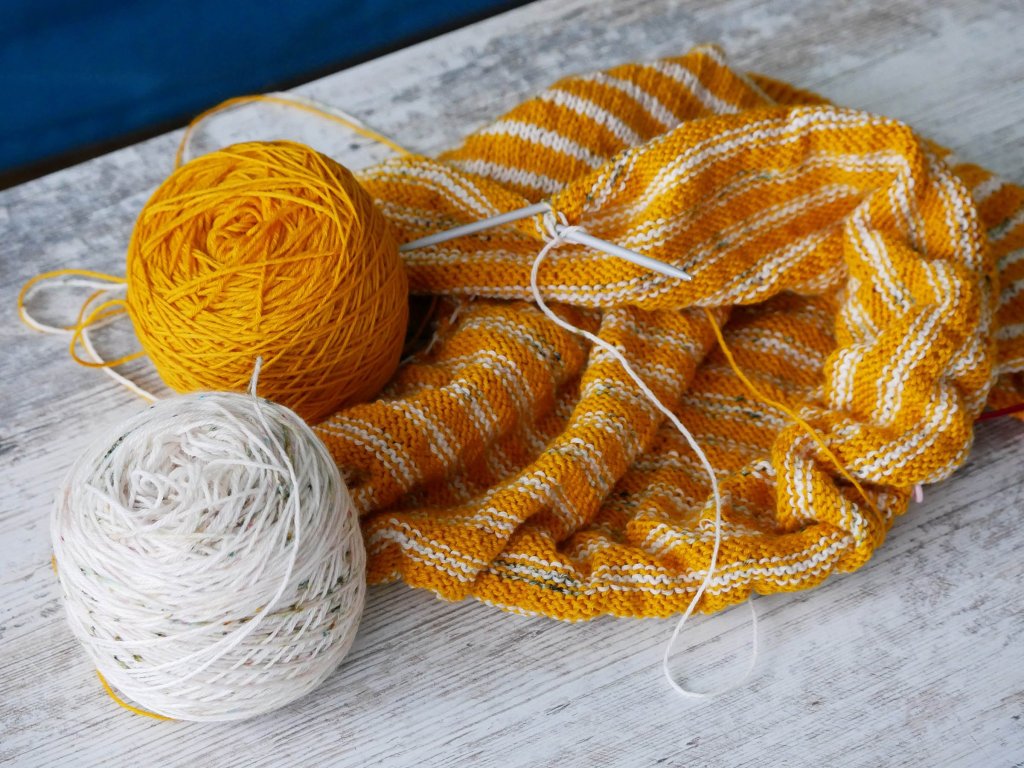
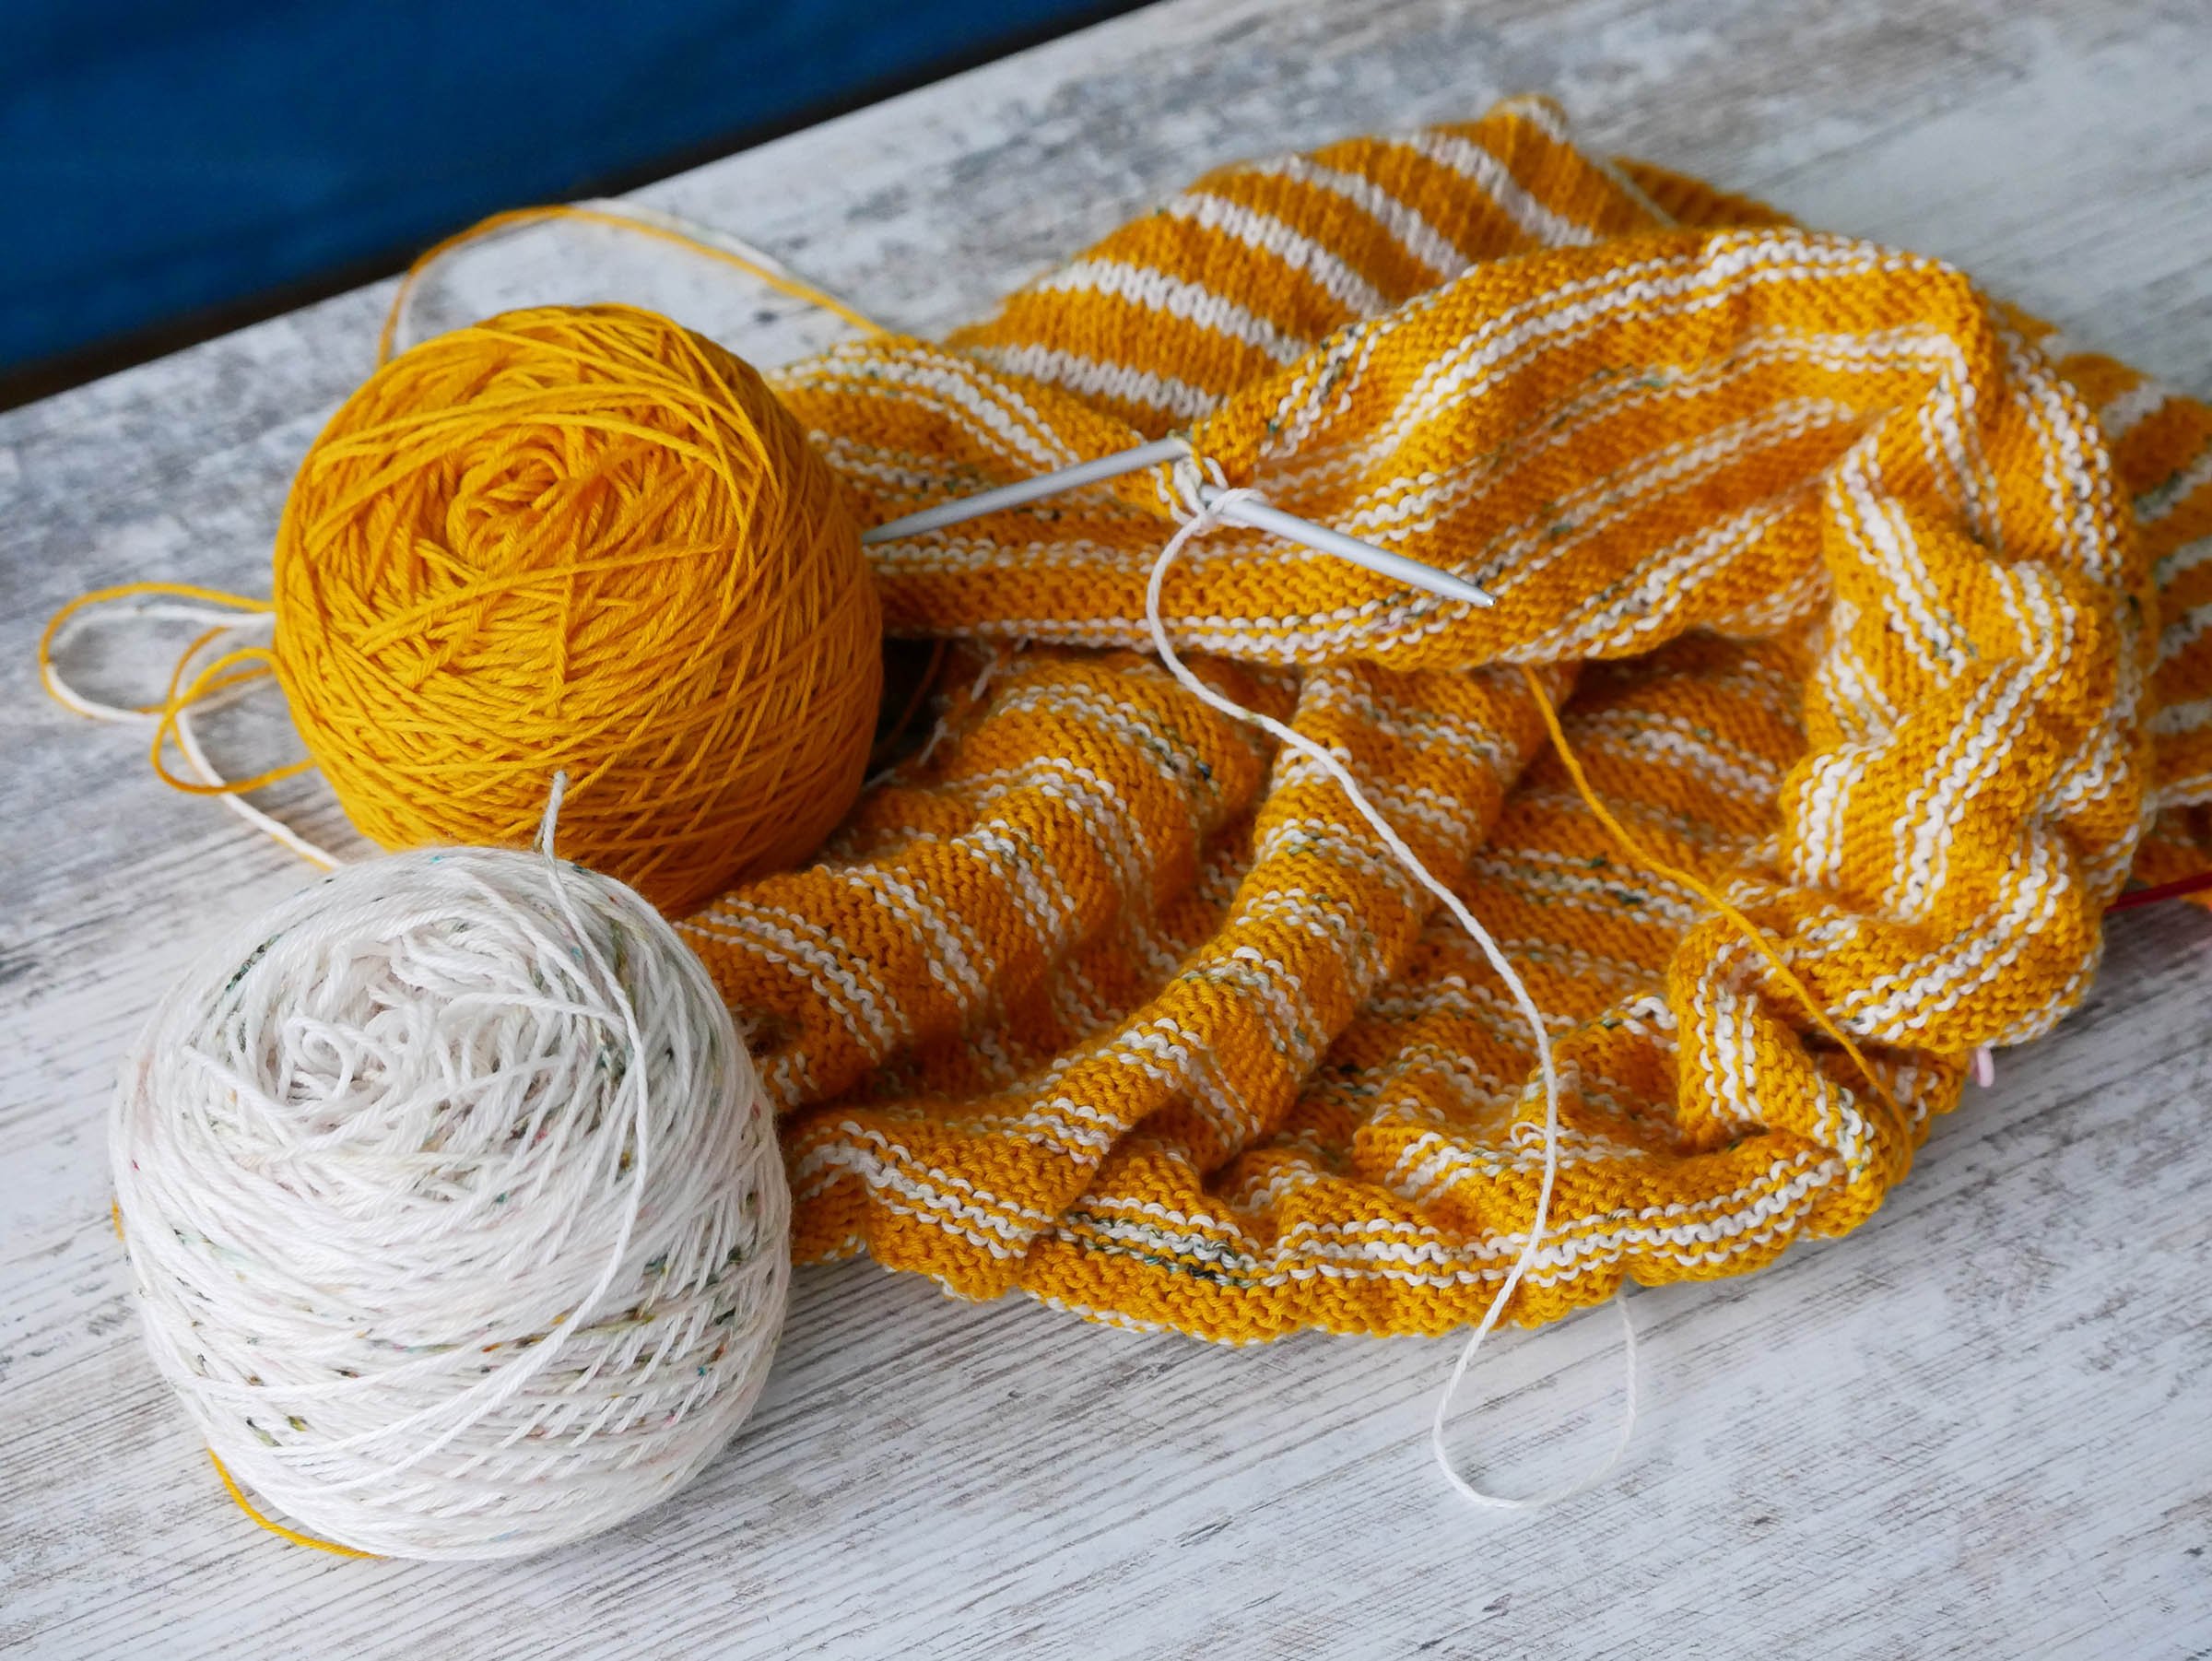
A striped orange-and-white project on a circular needle sits piled next to the balls of yarn on a rustic whitewashed wooden surface. The inside of the project is most plainly visible, showing the reverse stockinette side of the stripes.
However, there are also three ways to use circular needles: in a single loop (as one would suspect), using two shorter circular needles in place of four double-pointed needles, or using one long needle looped in the Magic Loop method. Since many people find circular needles easier to work with than double-pointed needles, you can usually use one of these three methods to suit your project needs. Not to mention the cash and space you’ll save with only having to buy needles of one type to cover the full range of circumferences.
(Click the links to go to my tutorials about how to knit in the round using each of these methods, or find them all in my Stitches and Techniques index.)
In the end, the type of needle you choose will often come down to personal preference. But keep this general guideline mind: double-pointed needles or Magic Loop method for small circumferences, and circular needles for large ones.
General Guideline: double-pointed needles or Magic Loop method for small circumferences, and circular needles for large ones.
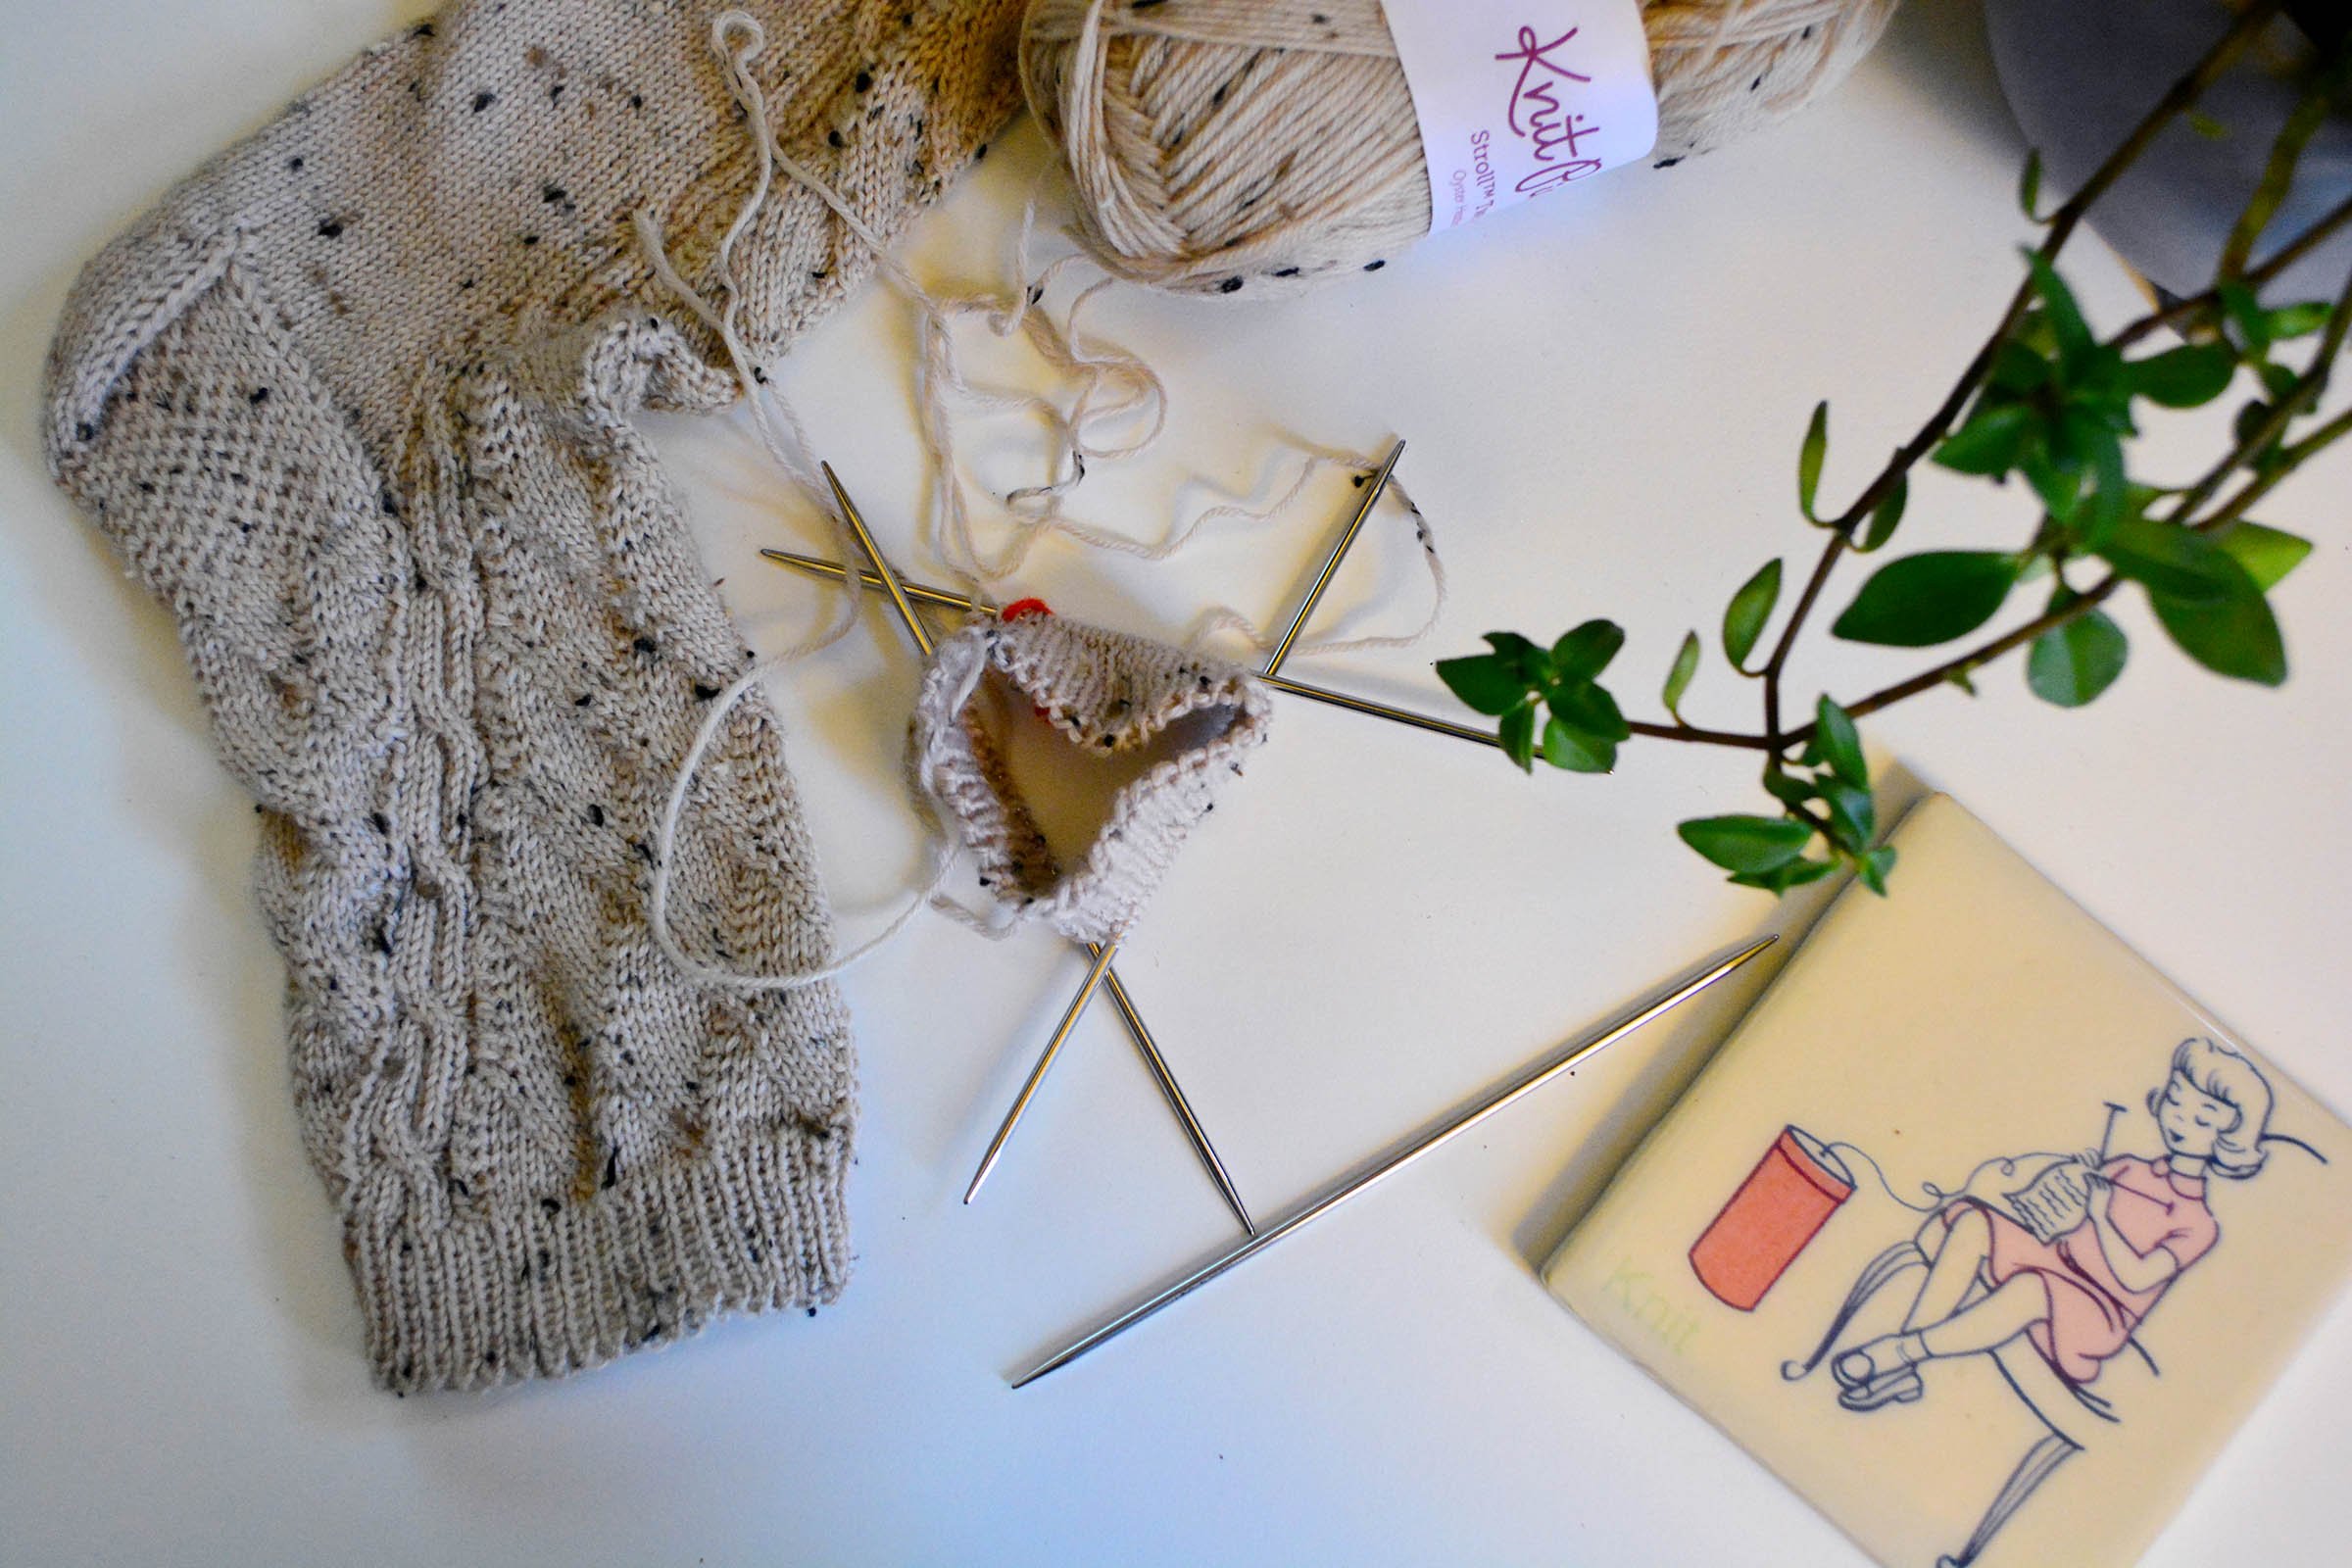
A sock started on a set of four six-inch (15-cm) nickel-plated double-pointed needles. Sock design shown is Beanstalk Socks.
Tip #2: Prevent ladders before they begin
The problem: after several rounds of your project, you notice what looks like a “run” in your knitting where your needles meet, with a long column of stitches with too much yarn between them. This can happen no matter which types of needles you choose, and it’s called “laddering”.
I’ve found three key ways to prevent this:
First, always begin your needle with a knit stitch, if possible. This allows for the least amount of distance between the new non-working needle and the one you just completed. If you must start with a purl stitch, make sure your working needle is below the non-working needle to simulate this effect.
Second, give your yarn a good tug after the first stitch of every needle. This reduces that gap even more, ensuring you don’t accidentally leave some extra yarn behind as you move past it.
Third, rotate your work around the needles as you go. Meaning, make sure the gap between needles isn’t always in the same place in your project by changing the location each round. This helps keep your tension more even and ensures your “stitches between the needles” don’t line up vertically, preventing the unsightly ladders you might otherwise see.
While I usually find the first two prevention measures to be enough, you might need to employ this last one, too, especially when using the Magic Loop Method with a single circular. Since Magic Loop requires pulling the extra cable length out between your stitches, rotating the location of this loop around the project can keep it from stretching out in a single spot.
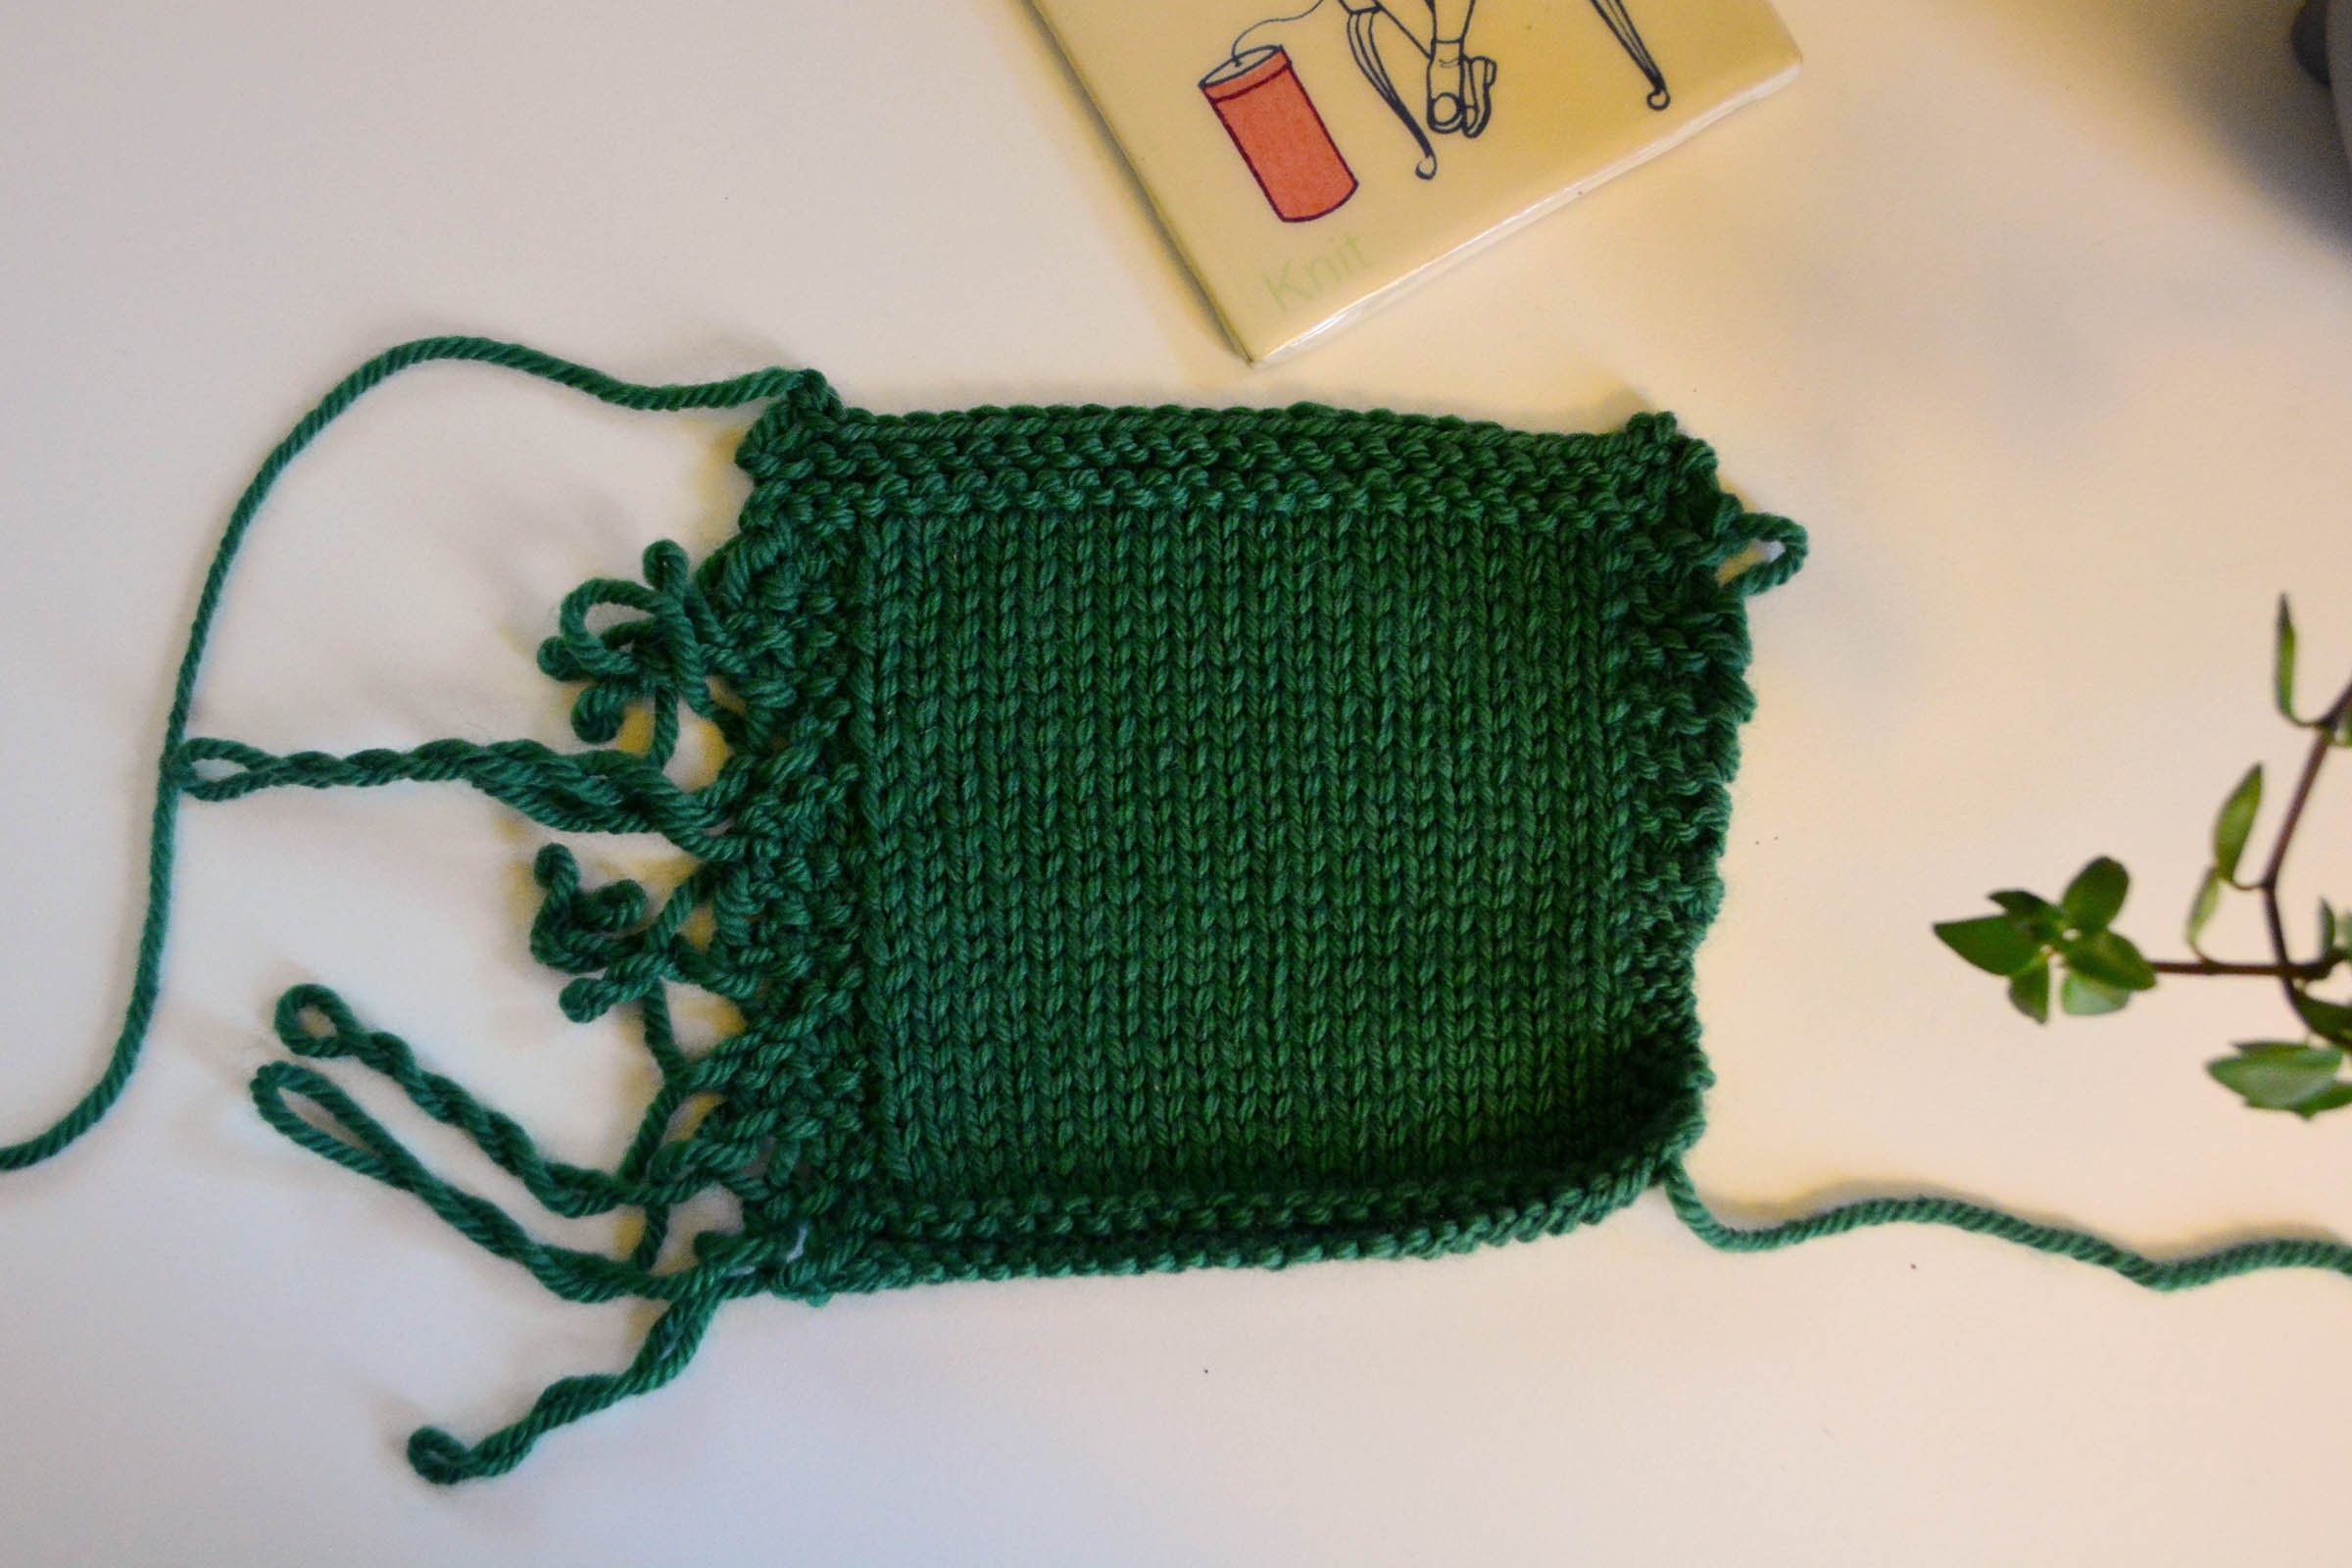
Tip #3: Swatch in the round for circular projects
When knitting in the round, your tension will be different than if you knit back and forth—yes, even if you’re incorporating purl stitches in your design. (Or maybe especially then.)
If you’re knitting in the round, it’s imperative that you also do your gauge swatch in the round to match tension. The gauge given in circular knitting project patterns should be given in the round, and you may have a difficult time matching it with a flat swatch (and if you do, you’re resulting garment likely won’t fit and you’ll wonder why).
This doesn’t mean you need to make a knitted tube for your swatch, though you can. Doing so will take a lot more time and yarn than you need, however. Whereas swatching in the round means you create a swatch where you only ever knit from your leading edge, duplicating the tension you’ll have in your actual project. You do this by only knitting the area you’ll need for you swatch while carrying the yarn straight across behind the swatch in a float, like so:
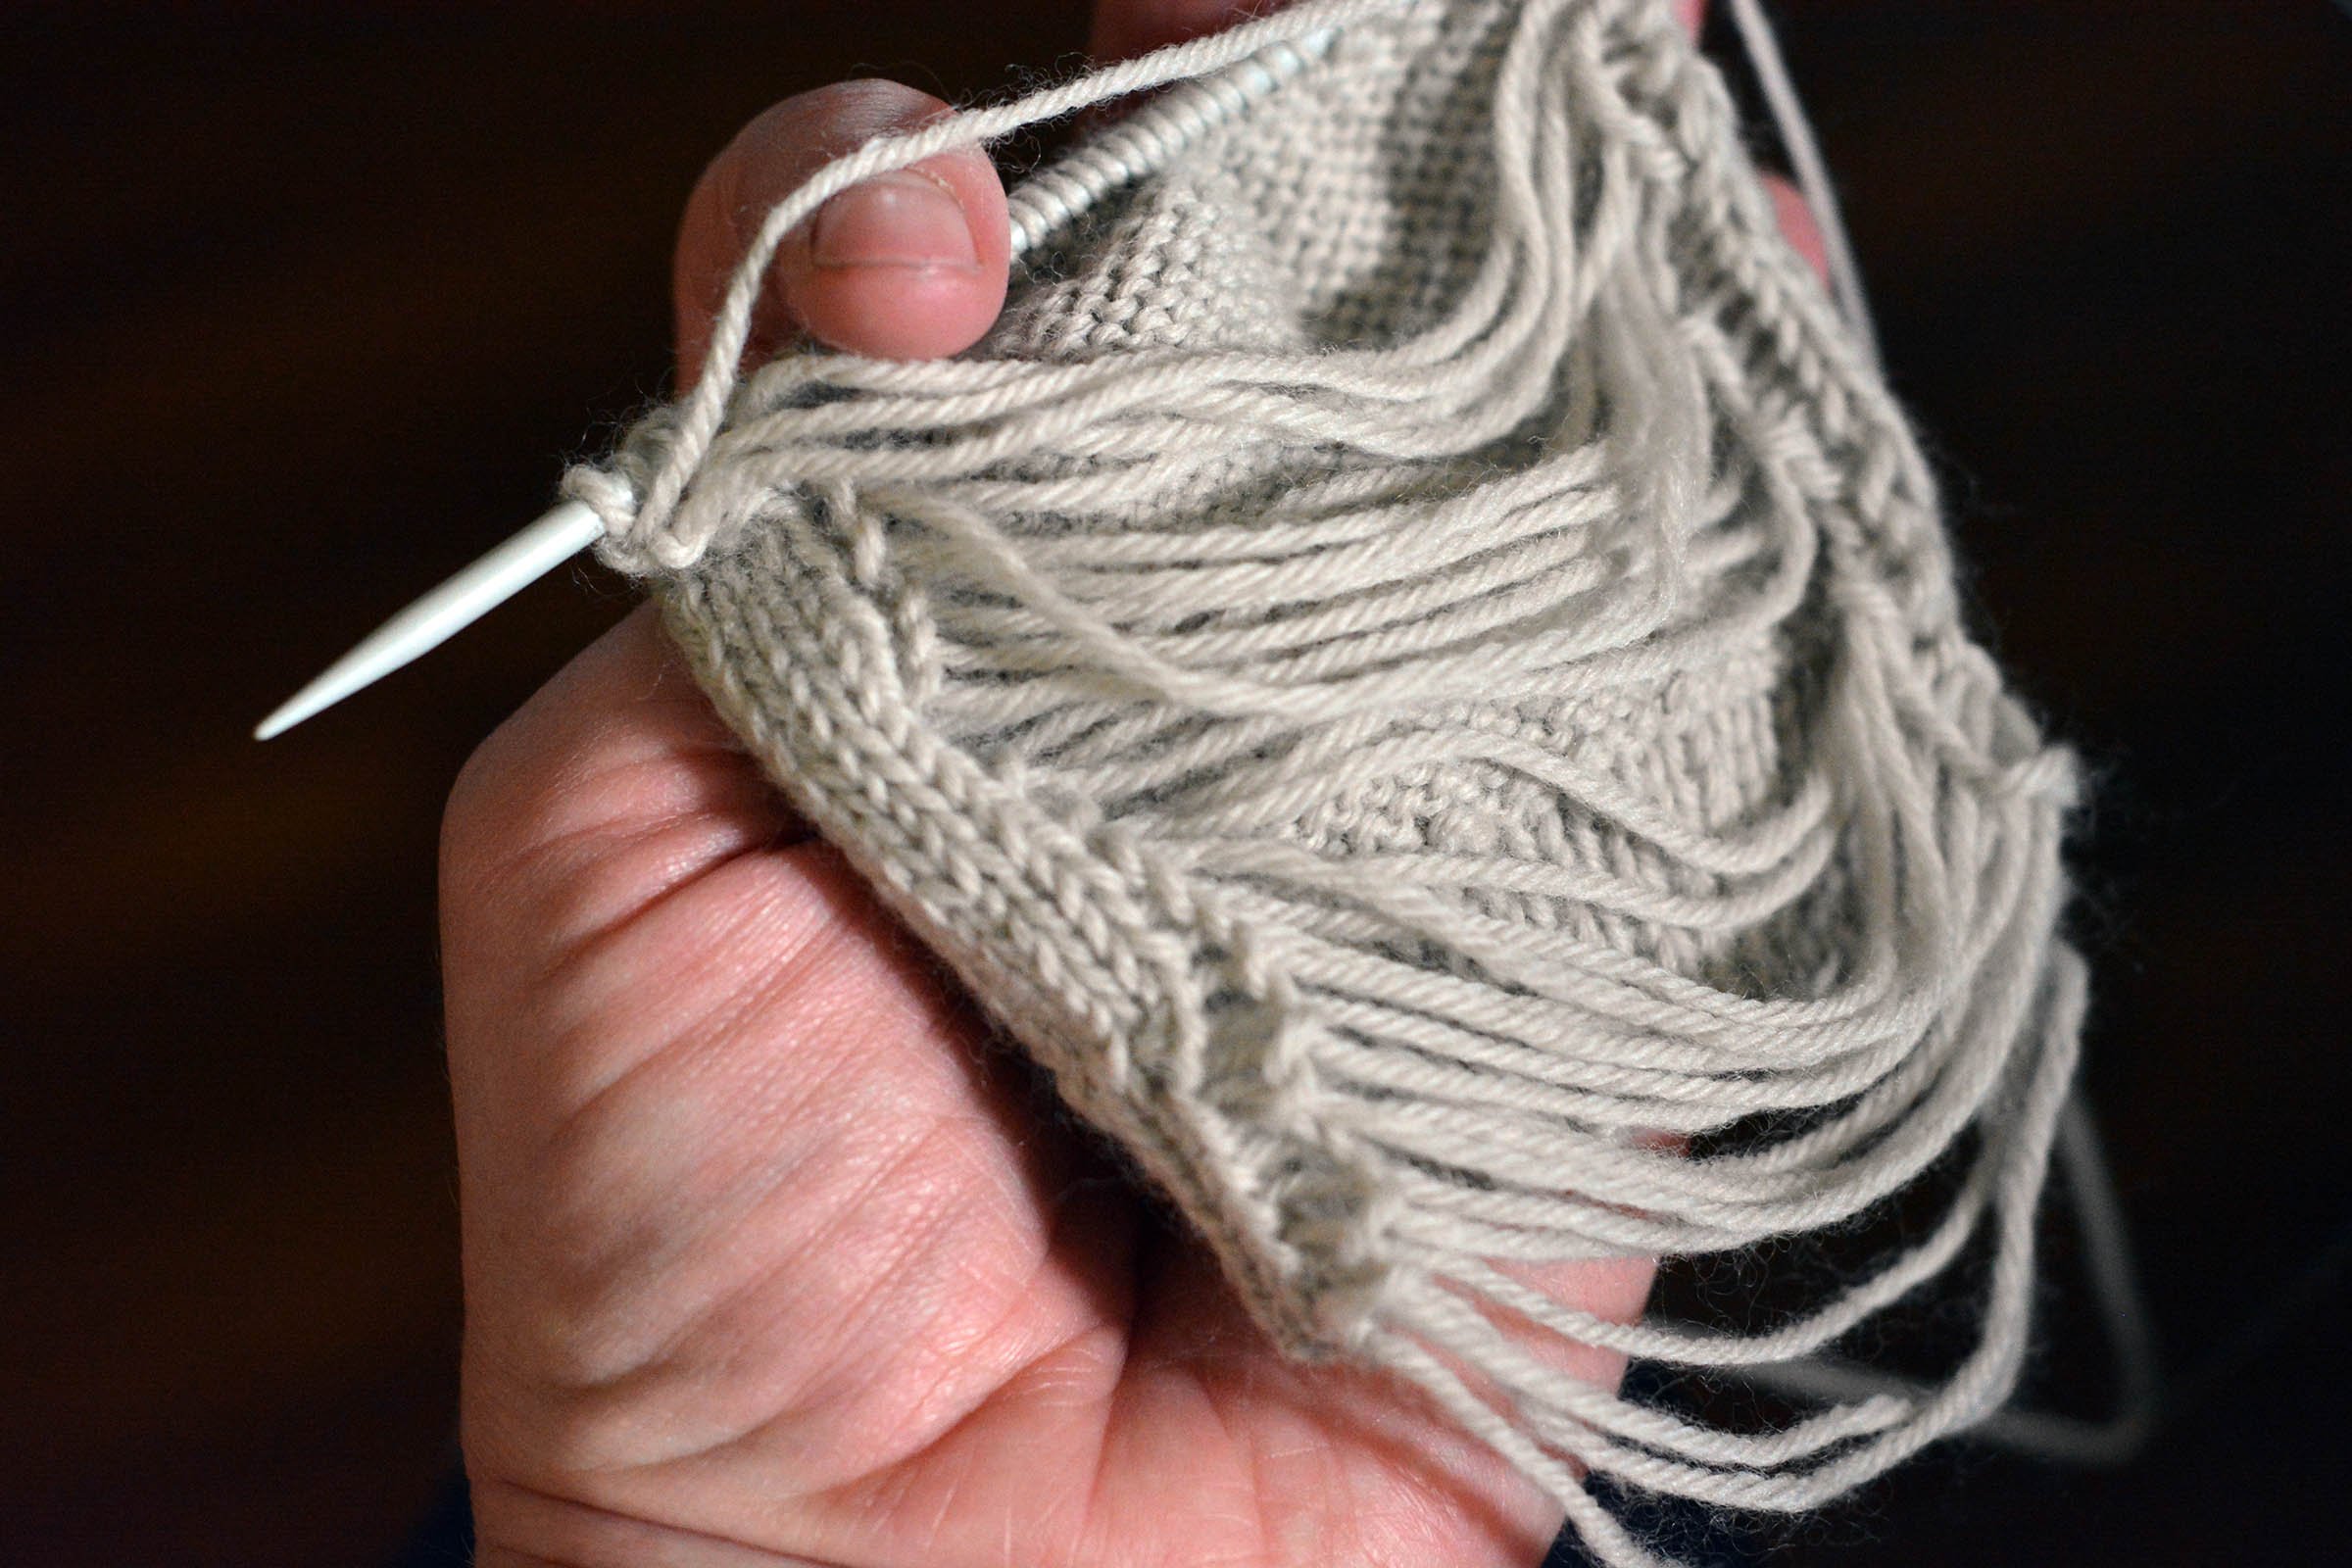
The back side of a gauge swatch made in the round, showing the yarn floats.
To learn to make a swatch that duplicates the tension of knitting in the round but saves yarn and time, check out my tutorial about how to swatch in the round below:
I also recently saw another ingenious idea for swatching in the round, which will save even more yarn and create even better tension, because it prevents the swatch curling toward the back of the piece. (I think it was from designer Patty Lyons on her Instagram account, but I can’t find it now. If someone knows differently, please let me know so I can attribute properly.)
What I did for this swatch in the round is keep an extra three or four times the width of the swatch for each yarn float as I ran it back across, then used that float to work the next round instead of the working yarn. You keep alternating rows between the working yarn and using the yarn float to work the next row.
Kind of blew my mind when I saw it, and it works great. (Though, as you can see, I wasn’t keeping enough slack on my leading edge at first (on the right), which is why that part is more puckered. The slack gets used up as you work the first bit of the row, so make sure to leave more of a loop at the leading edge than you think you’ll need.)
I hope these tips give you a much more satisfying experience while knitting in the round. If you still have questions, feel free to reach out to me, or join my Ravelry community to ask questions and get help from a bevvy of experienced knitters.
And be sure to sign up to receive blog notifications in the sidebar to never miss a helpful post.